xtraCHEF: Upload Invoices and Receipts (Desktop)
Last updated: Jul 7, 2026, 4:12 PM
- Invoice Upload Summary
- Compare Receipts and Invoices
- Upload Documents via Computer
- Create Invoices
- Upload Documents via Email
- Next Steps
Invoice Upload Summary
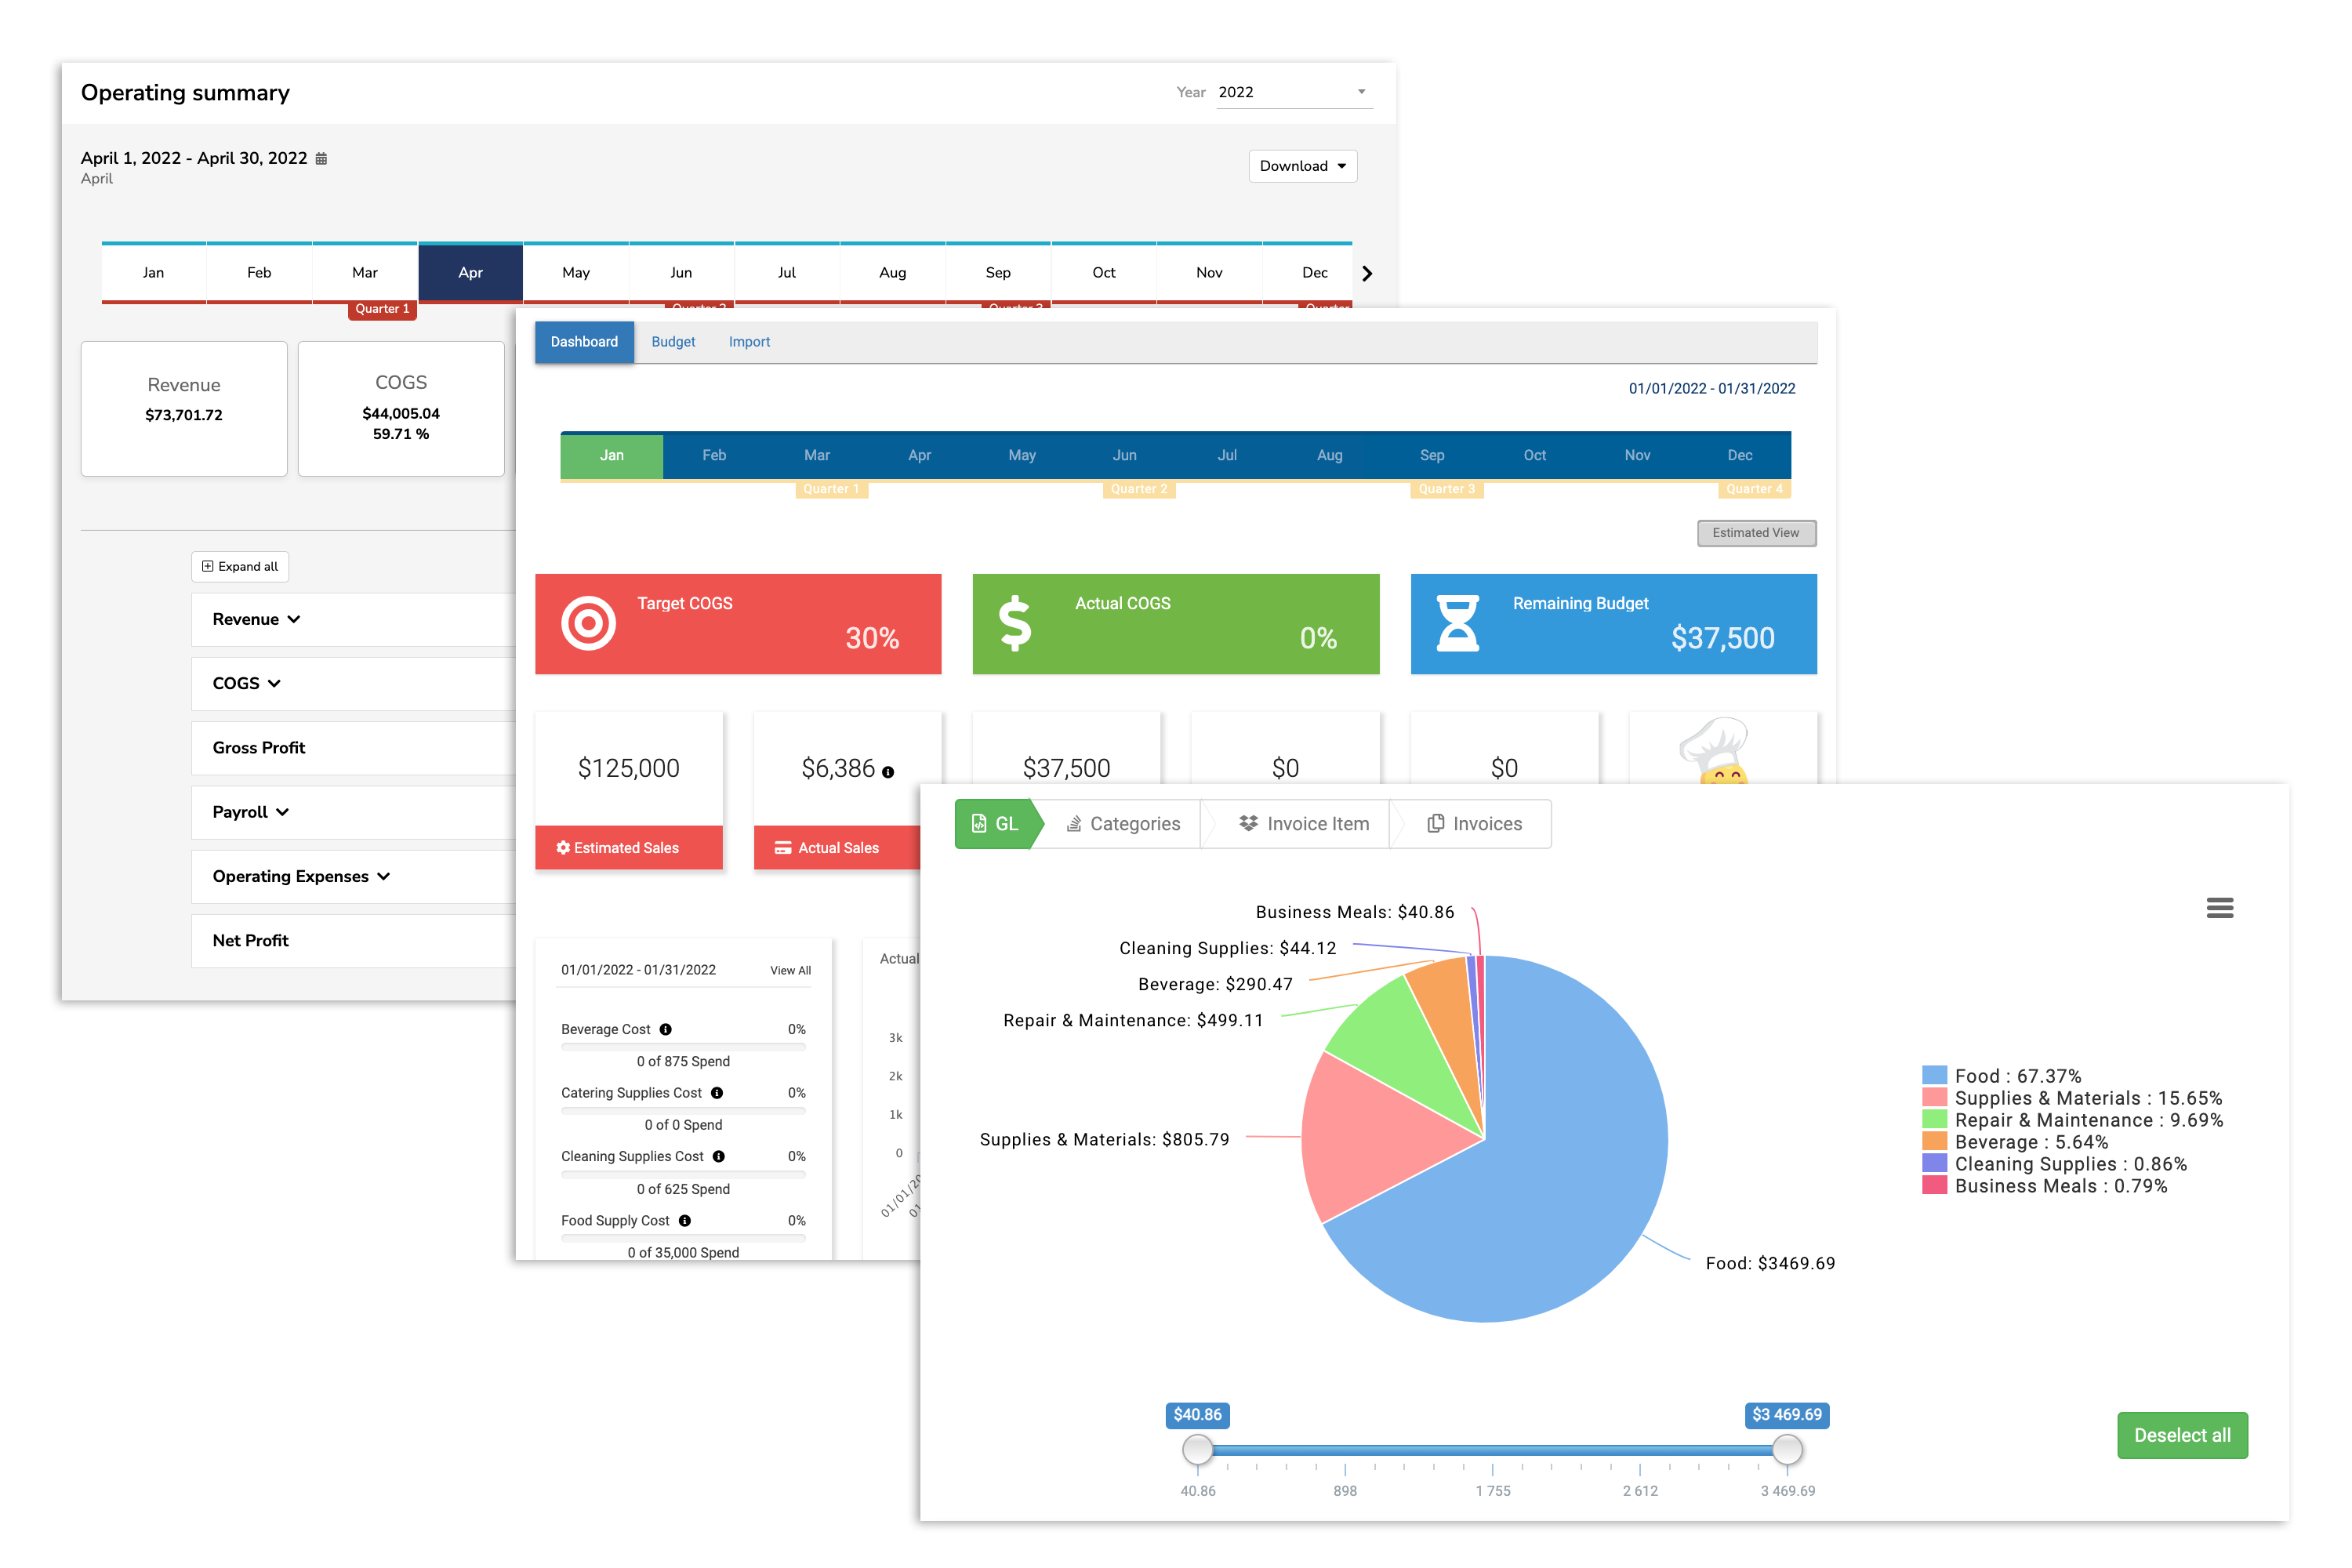
xtraCHEF puts advanced reporting, analytics, and cost-tracking capabilities right at your fingertips - and it all begins with uploading documents. This is because your reconciled invoices and receipts yield the cent insight into not just your spending but also food prime costs (only with xtraCHEF Pro) and inventory values (Pro), and play into advanced metrics such as your Operating Summary (xtraCHEF Essentials & Pro), Budgets (Essentials & Pro) and COGS (Essentials & Pro).
Note: Once uploaded, invoices will, at first, require your attention in order to reconcile. That initial manual effort will create the machine learning (and time savings) to automate reconciliation in the future.
To understand the overall health of your business, xtraCHEF first needs to know where your money is going and how much your goods cost.
AI automation is also a core function of your xtraCHEF subscription that enables reconciled invoices to extract to your accounting system and tech stack, saving you time and reducing room for human error with machine learning.
Compare Receipts and Invoices
Typically, an invoice (which QuickBooks refers to as a bill) has not yet been paid to the vendor/store. A receipt, however, has already been paid.
When we use these terms in xtraCHEF, it can be confusing because when we hear the word "receipt," it commonly represents a document proving payment for items. That is not always the case with vendor receipts. Sometimes the receipt looks exactly like an invoice and the only difference is that one has been paid already and one has not. Receipts usually don't even have the word "receipt" on them.
It's important to track/record invoices and receipts differently to avoid double-paying the vendor and double-posting or recording the expense. Invoices submitted to xtraCHEF and extracted to your accounting software tell the accounting software that it's "open" or "unpaid." Companies will typically run a report of all the unpaid invoices they've recorded for a certain time period and then issue checks to the vendor to pay for those invoices. If you had already paid for that invoice and it's still on that report, you could accidentally pay it again.
When you input a receipt into xtraCHEF, part of that process is also telling the system how that invoice was paid (check or credit card) and that receipt can then be extracted into QuickBooks along with the payment type to record both sides of the transaction (the expense for the items purchased plus the payment made to cover that expense amount). This means your accounting software already knows that it's been paid and it will not appear on your unpaid bills list.
xtraCHEF does not default to sending receipts directly to QuickBooks. Most customers utilize an automated bank/cc feed directly into their QuickBooks Online account(s) and either (a) have "rules" set up in QuickBooks Online that automatically categorize those expenses in their accounting software or (b) have manual workflows/processes where they go through each transaction on the feed and categorize them themselves. If xtraCHEF were to export/post those receipt expenses to QuickBooks Online, there is a risk of double-posting the expense. If customers want to turn on the export from xtraCHEF to QuickBooks Online, make sure there are no rules set up in QuickBooks and no reconciliation process in place that would risk double-posting. It is very easy to accidentally double-post expenses this way, which is why the default for this export is disabled. If this feature is enabled, customers need to manually reconcile their bank/cc feed and manually match every transaction from the bank/cc feed in QuickBooks to its corresponding receipt expense that we post.
Upload Documents via Computer
This 6-minute video covers ways you can upload invoices into your account, including uploading files via your desktop version of xtraCHEF.
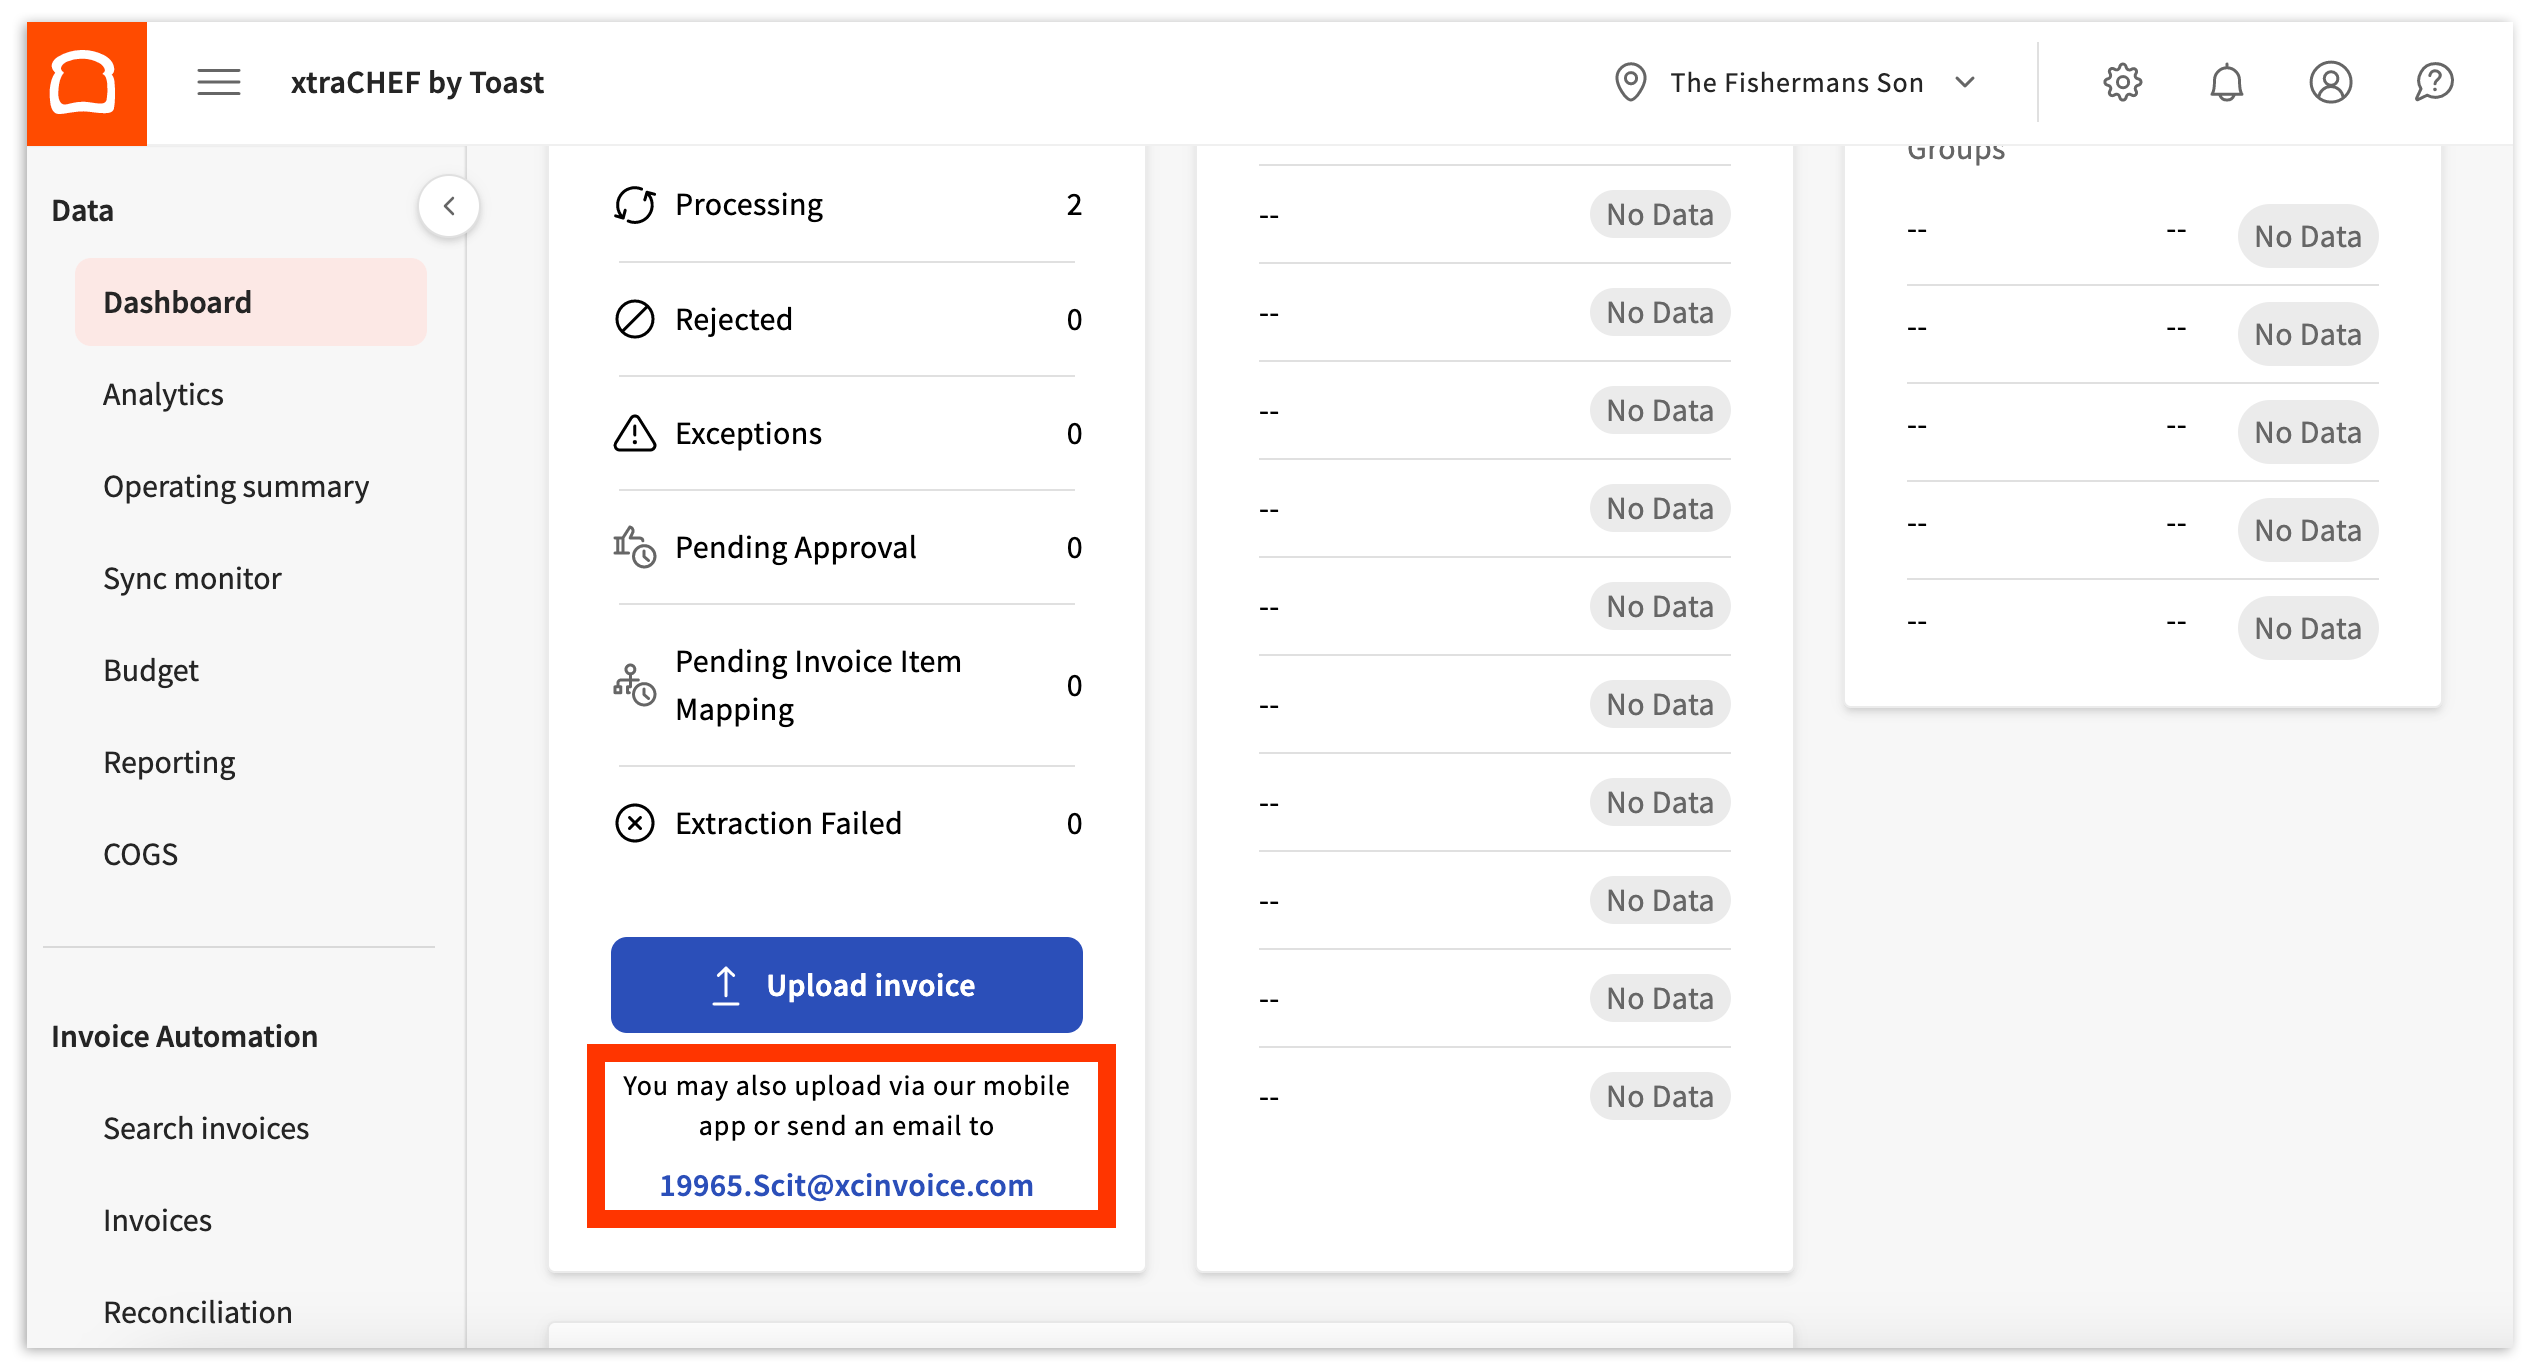
The most common way to add your invoices, receipts, and other files to xtraCHEF is through the Upload document button on the main xtraCHEF dashboard. Your Dashboard is the default landing page upon logging into xtraCHEF. However, it can also be accessed from any other page using your navigation bar.
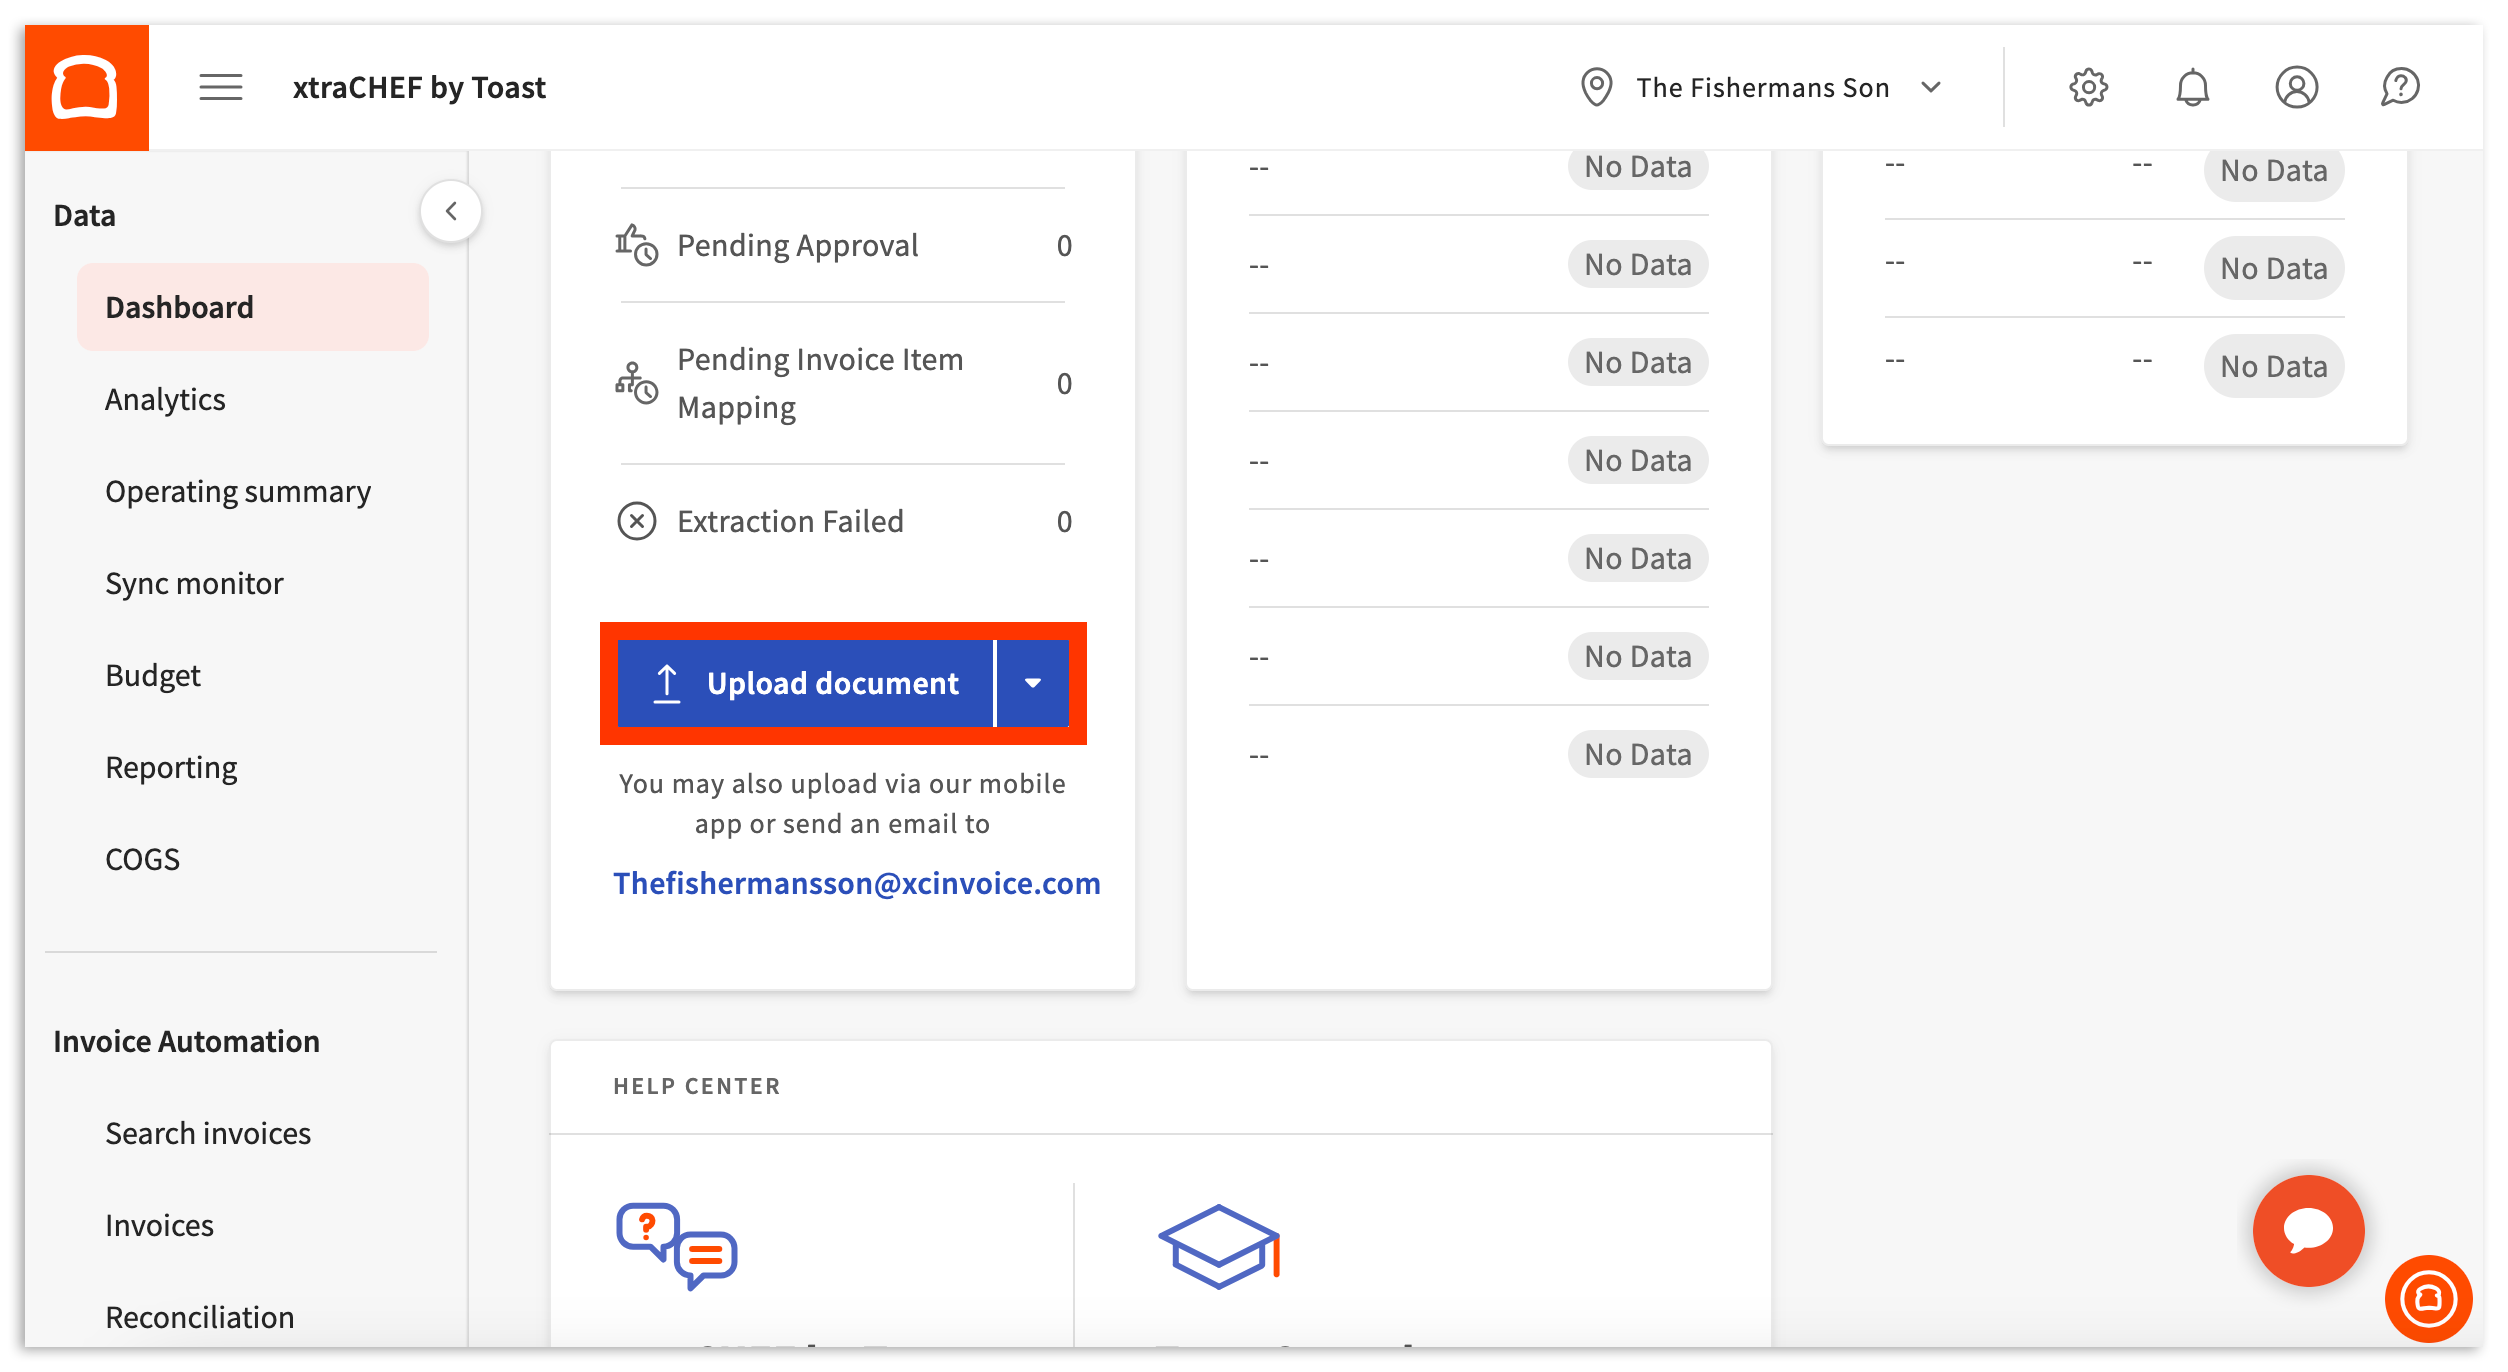
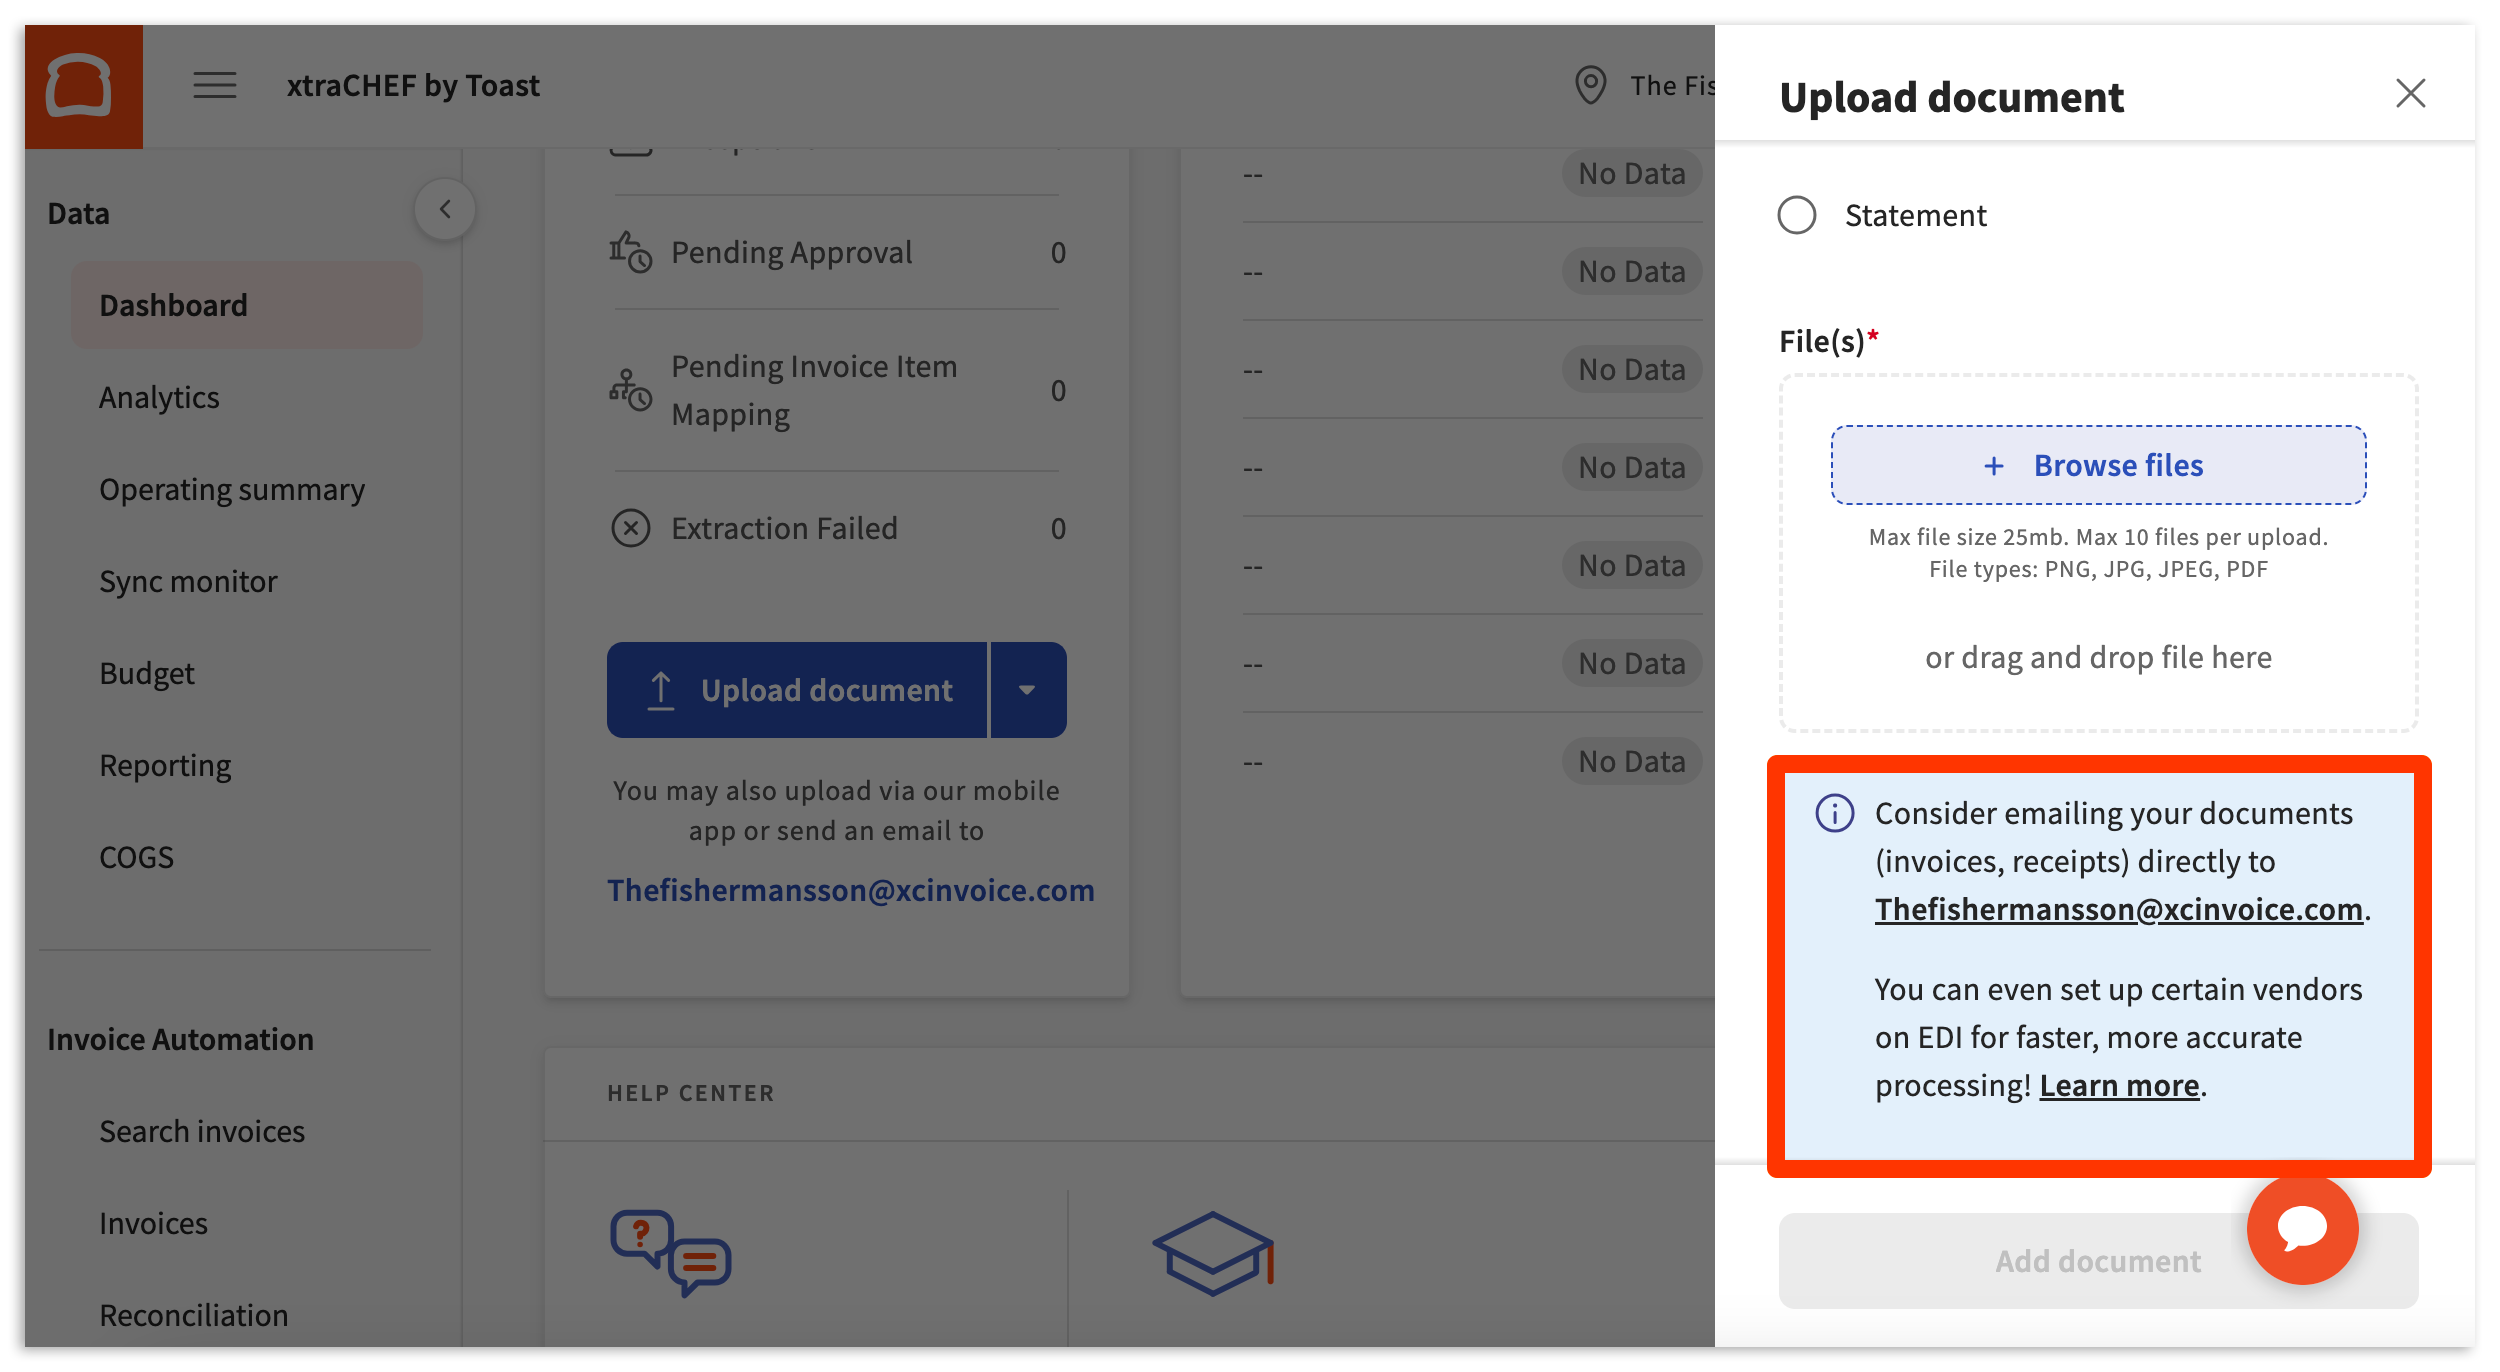
Selecting this button will open a sidebar where you'll find different options for adding your files to xtraCHEF.
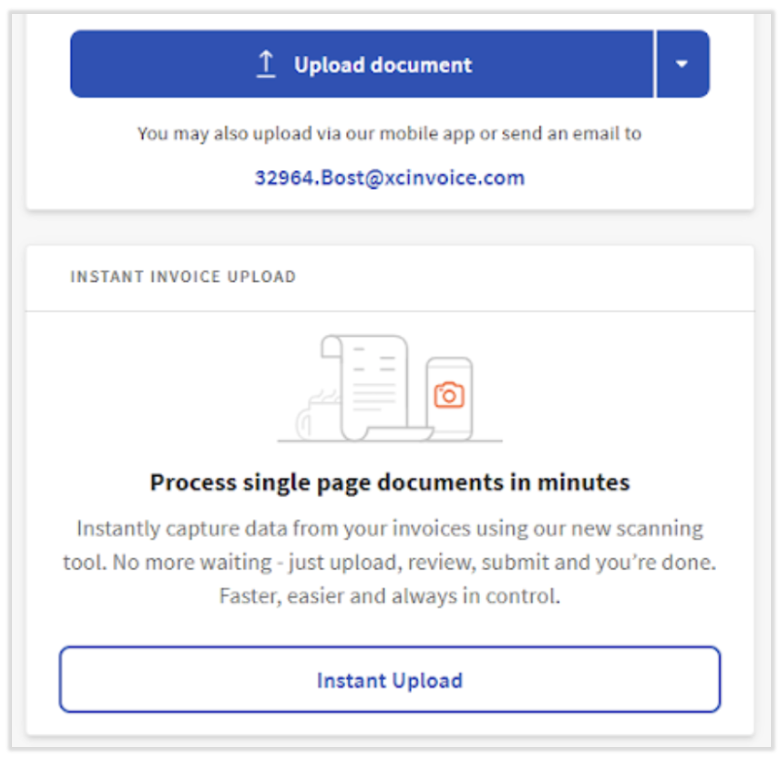
Instant Invoice Upload
This feature allows users to upload single-page invoices which can be processed instantly. The delay seen when using other upload functions is not present with this feature. You'll still be able to review the upload and make corrections if needed. When this feature is used, xtraCHEF will automatically suggest a purchase category for each line item.
Instant upload might be your default and only upload option or you might have the ability to choose between this option and the regular upload. If you see a button named Instant Upload, select this to begin. Otherwise, select the original Upload document button. Note: The instant upload feature is not available by default, so contact support@xtrachef.com if you'd like it enabled.
Instant invoice upload will point out any areas that require attention, including if a new vendor needs to be created. Revisit the fields outlined in red and make corrections as needed.

Upload Documents by Type
To begin your upload, select your Location.
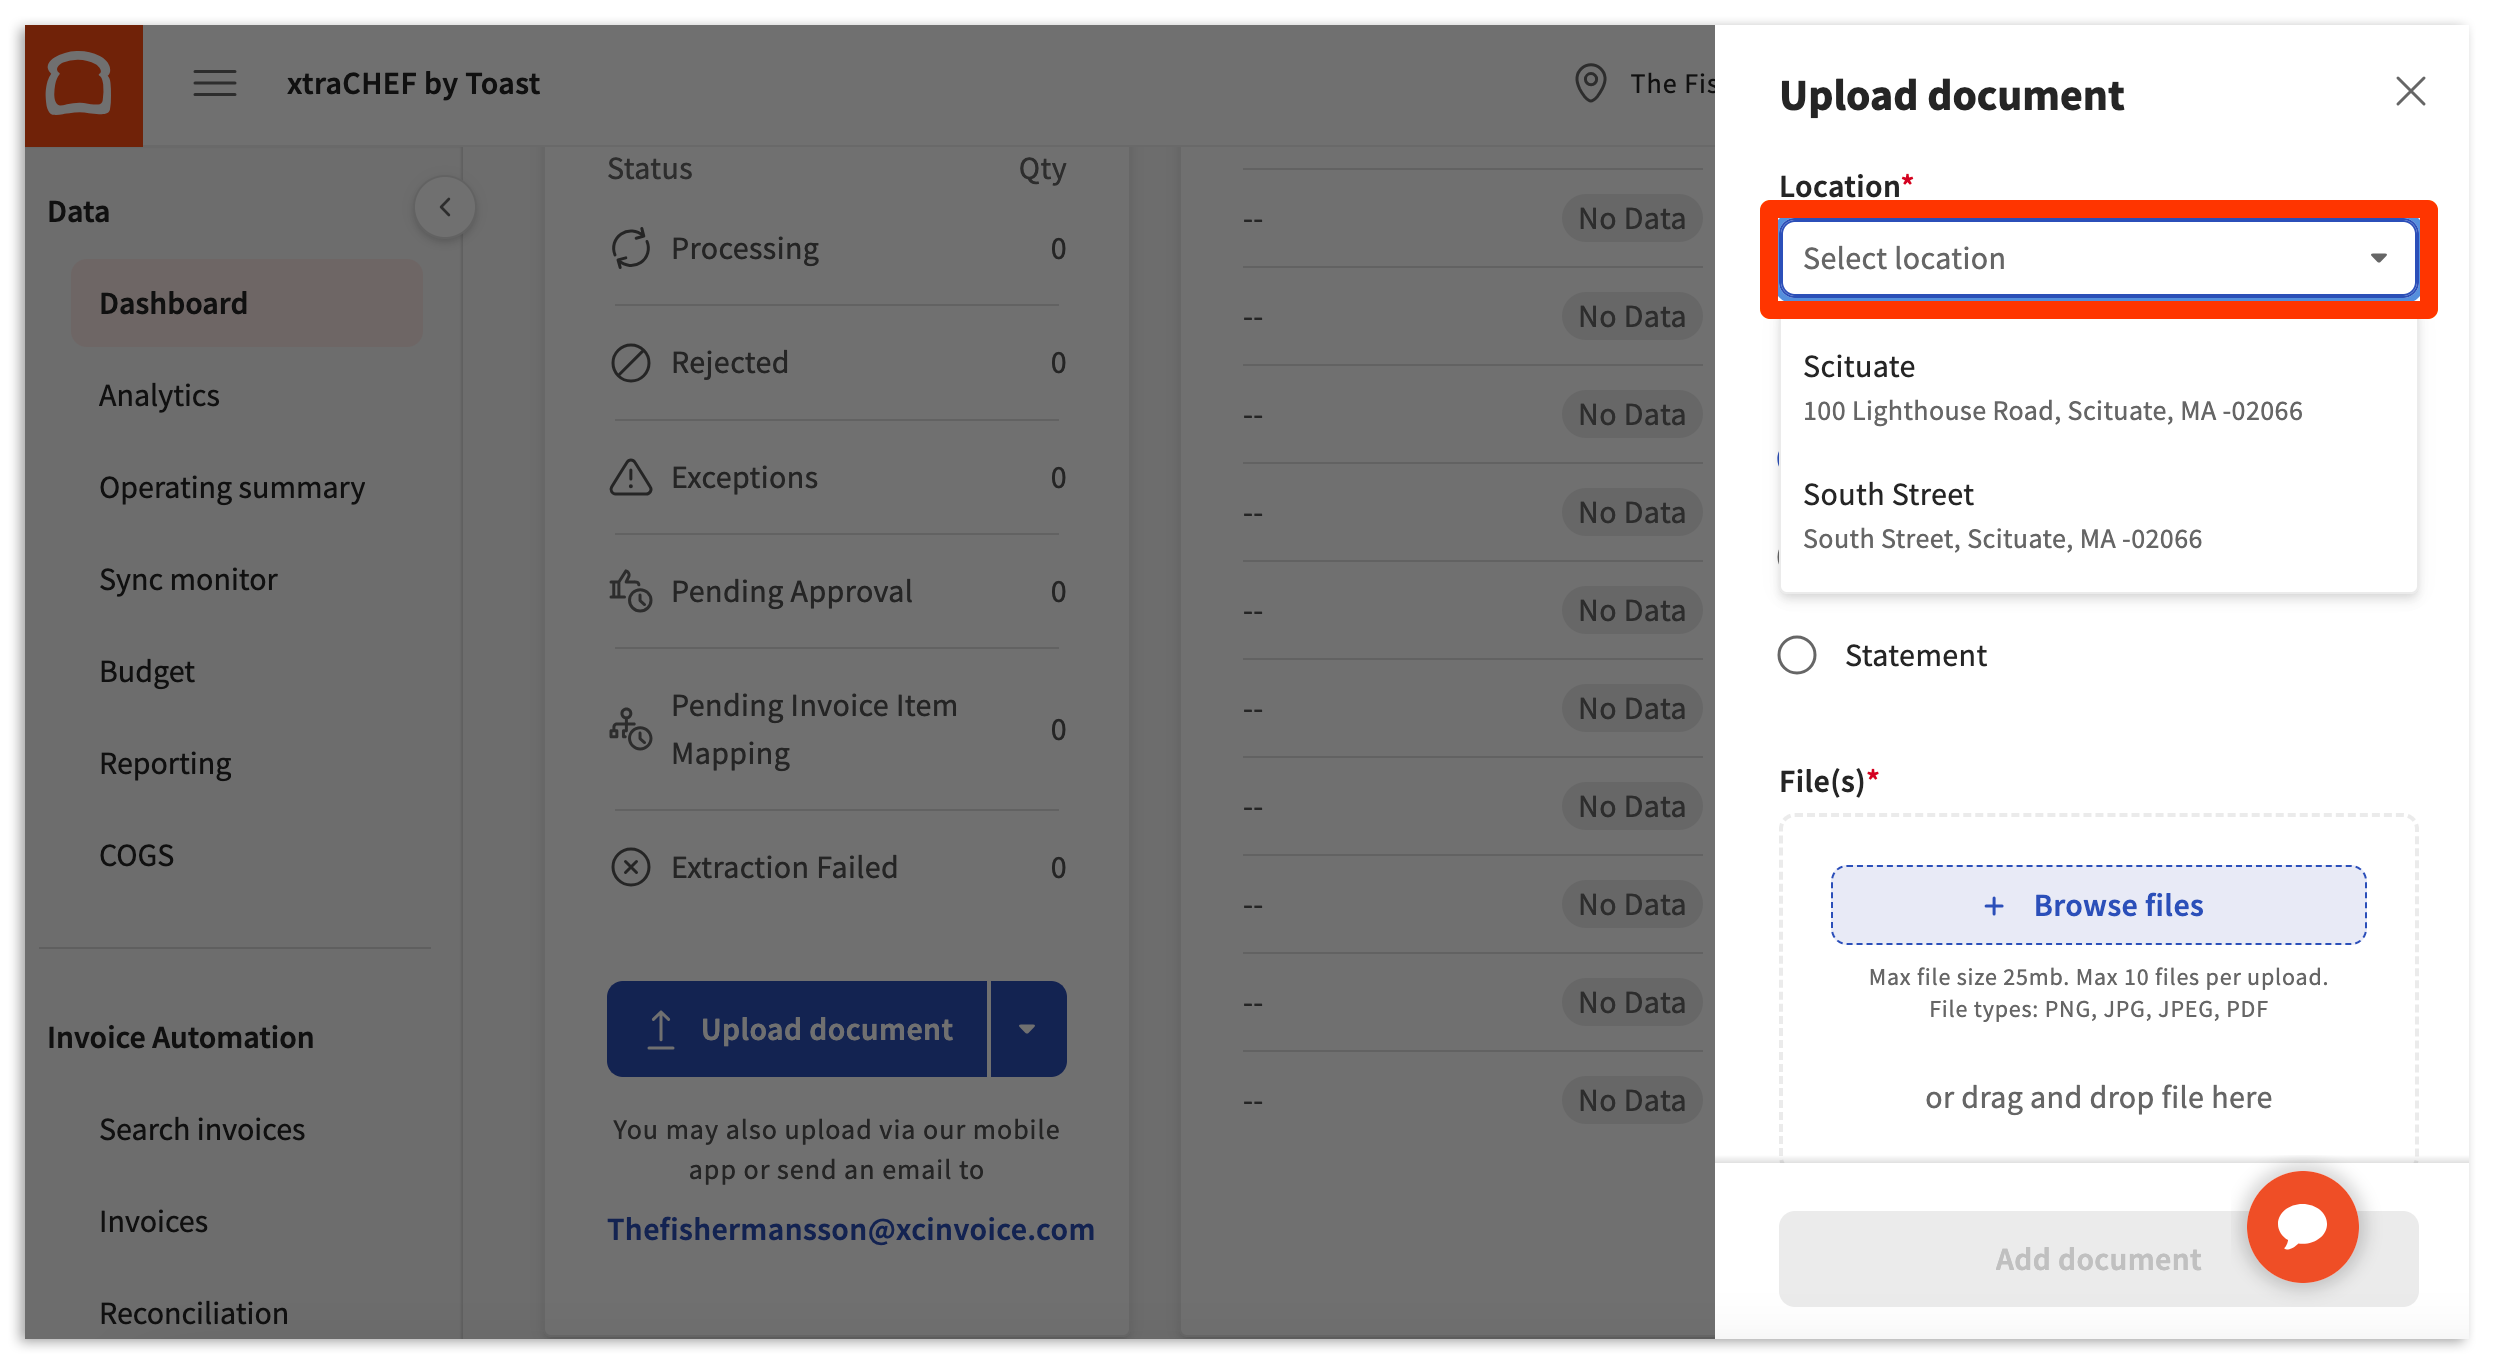
Next, select either Invoice, Receipt, or Statement (more on these below).
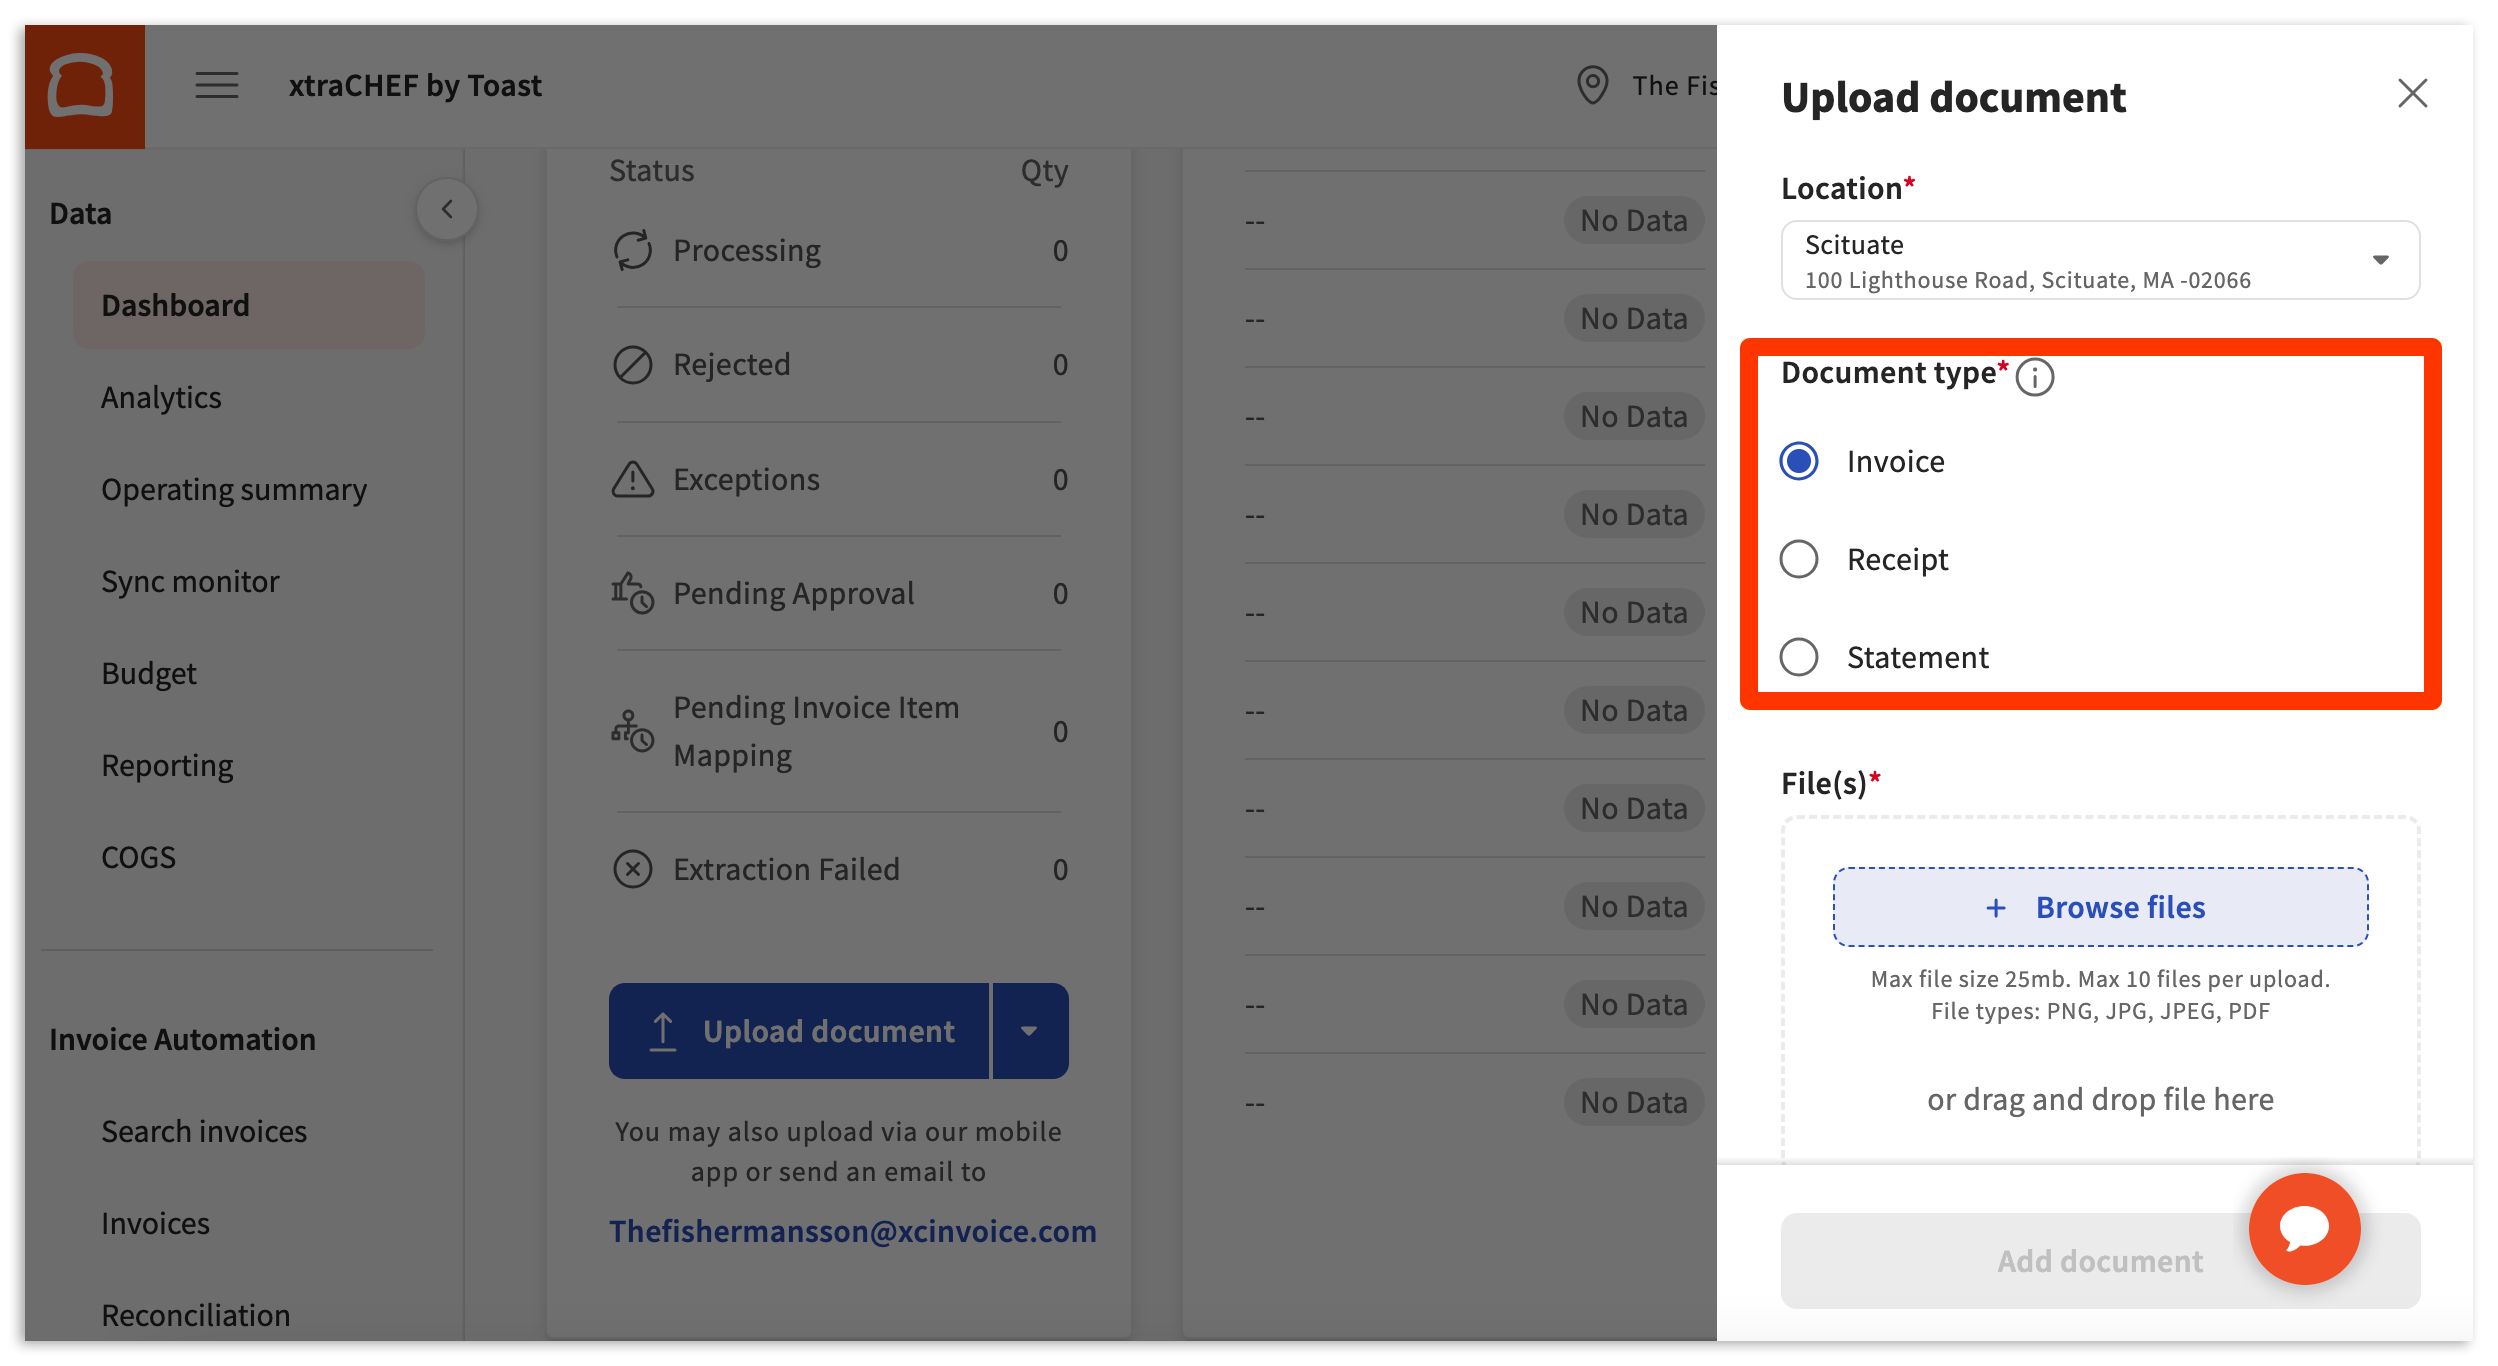
As a rule of thumb, an Invoice is a 'bill' to be paid. Documents uploaded with this document type will be extracted to your accounting software (if applicable and integrated) once reconciled. In most cases, you will be selecting Invoice.
A Receipt, on the other hand, is a 'bill' that has already been paid. By default, this document type will not extract to your accounting software (if applicable and integrated) once reconciled. Note: Receipt extract for accounting can be enabled if you utilize QuickBooks Online. For more on this and set up, consider reading our article titled xtraCHEF: Receipt Extract for QuickBooks Online.
Statement may also appear as an option under document type, but only if Vendor Statement Reconciliation is enabled in your account. This option does not appear by default.
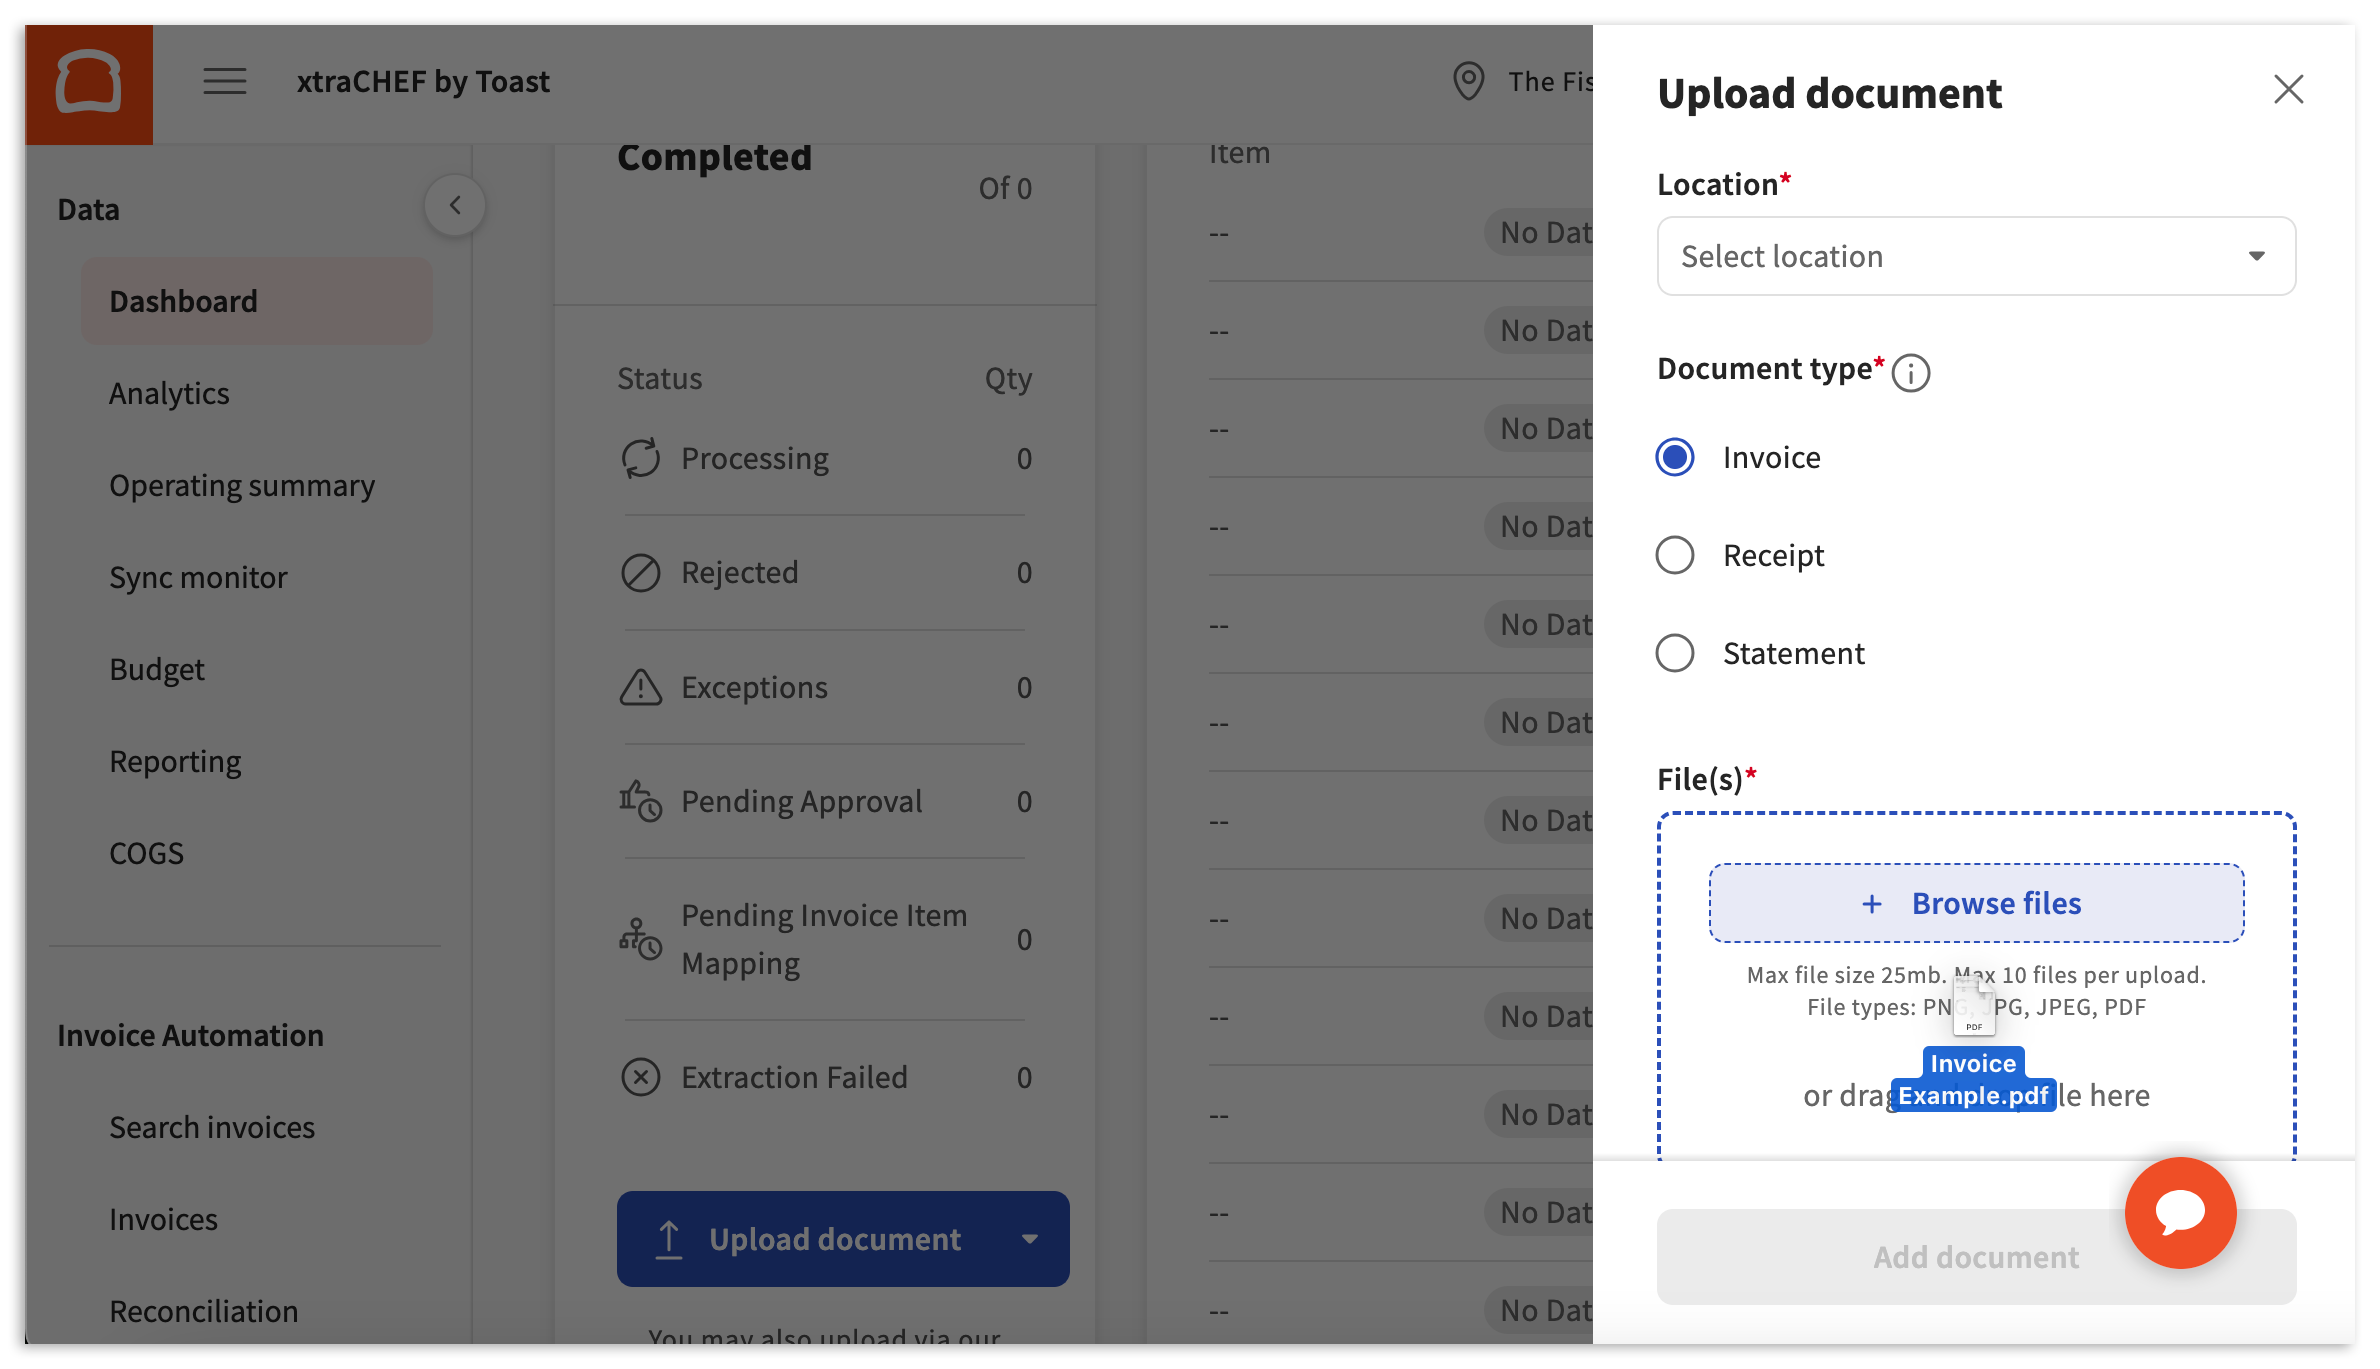
After selecting your document type, you can proceed by uploading your document file. xtraCHEF will accept document formats such as .jpg, .jpeg, .png, and .pdf. To upload your document, drag and drop your file into the blue submission space. You can also manually select your file for upload using the + Browse Files button.
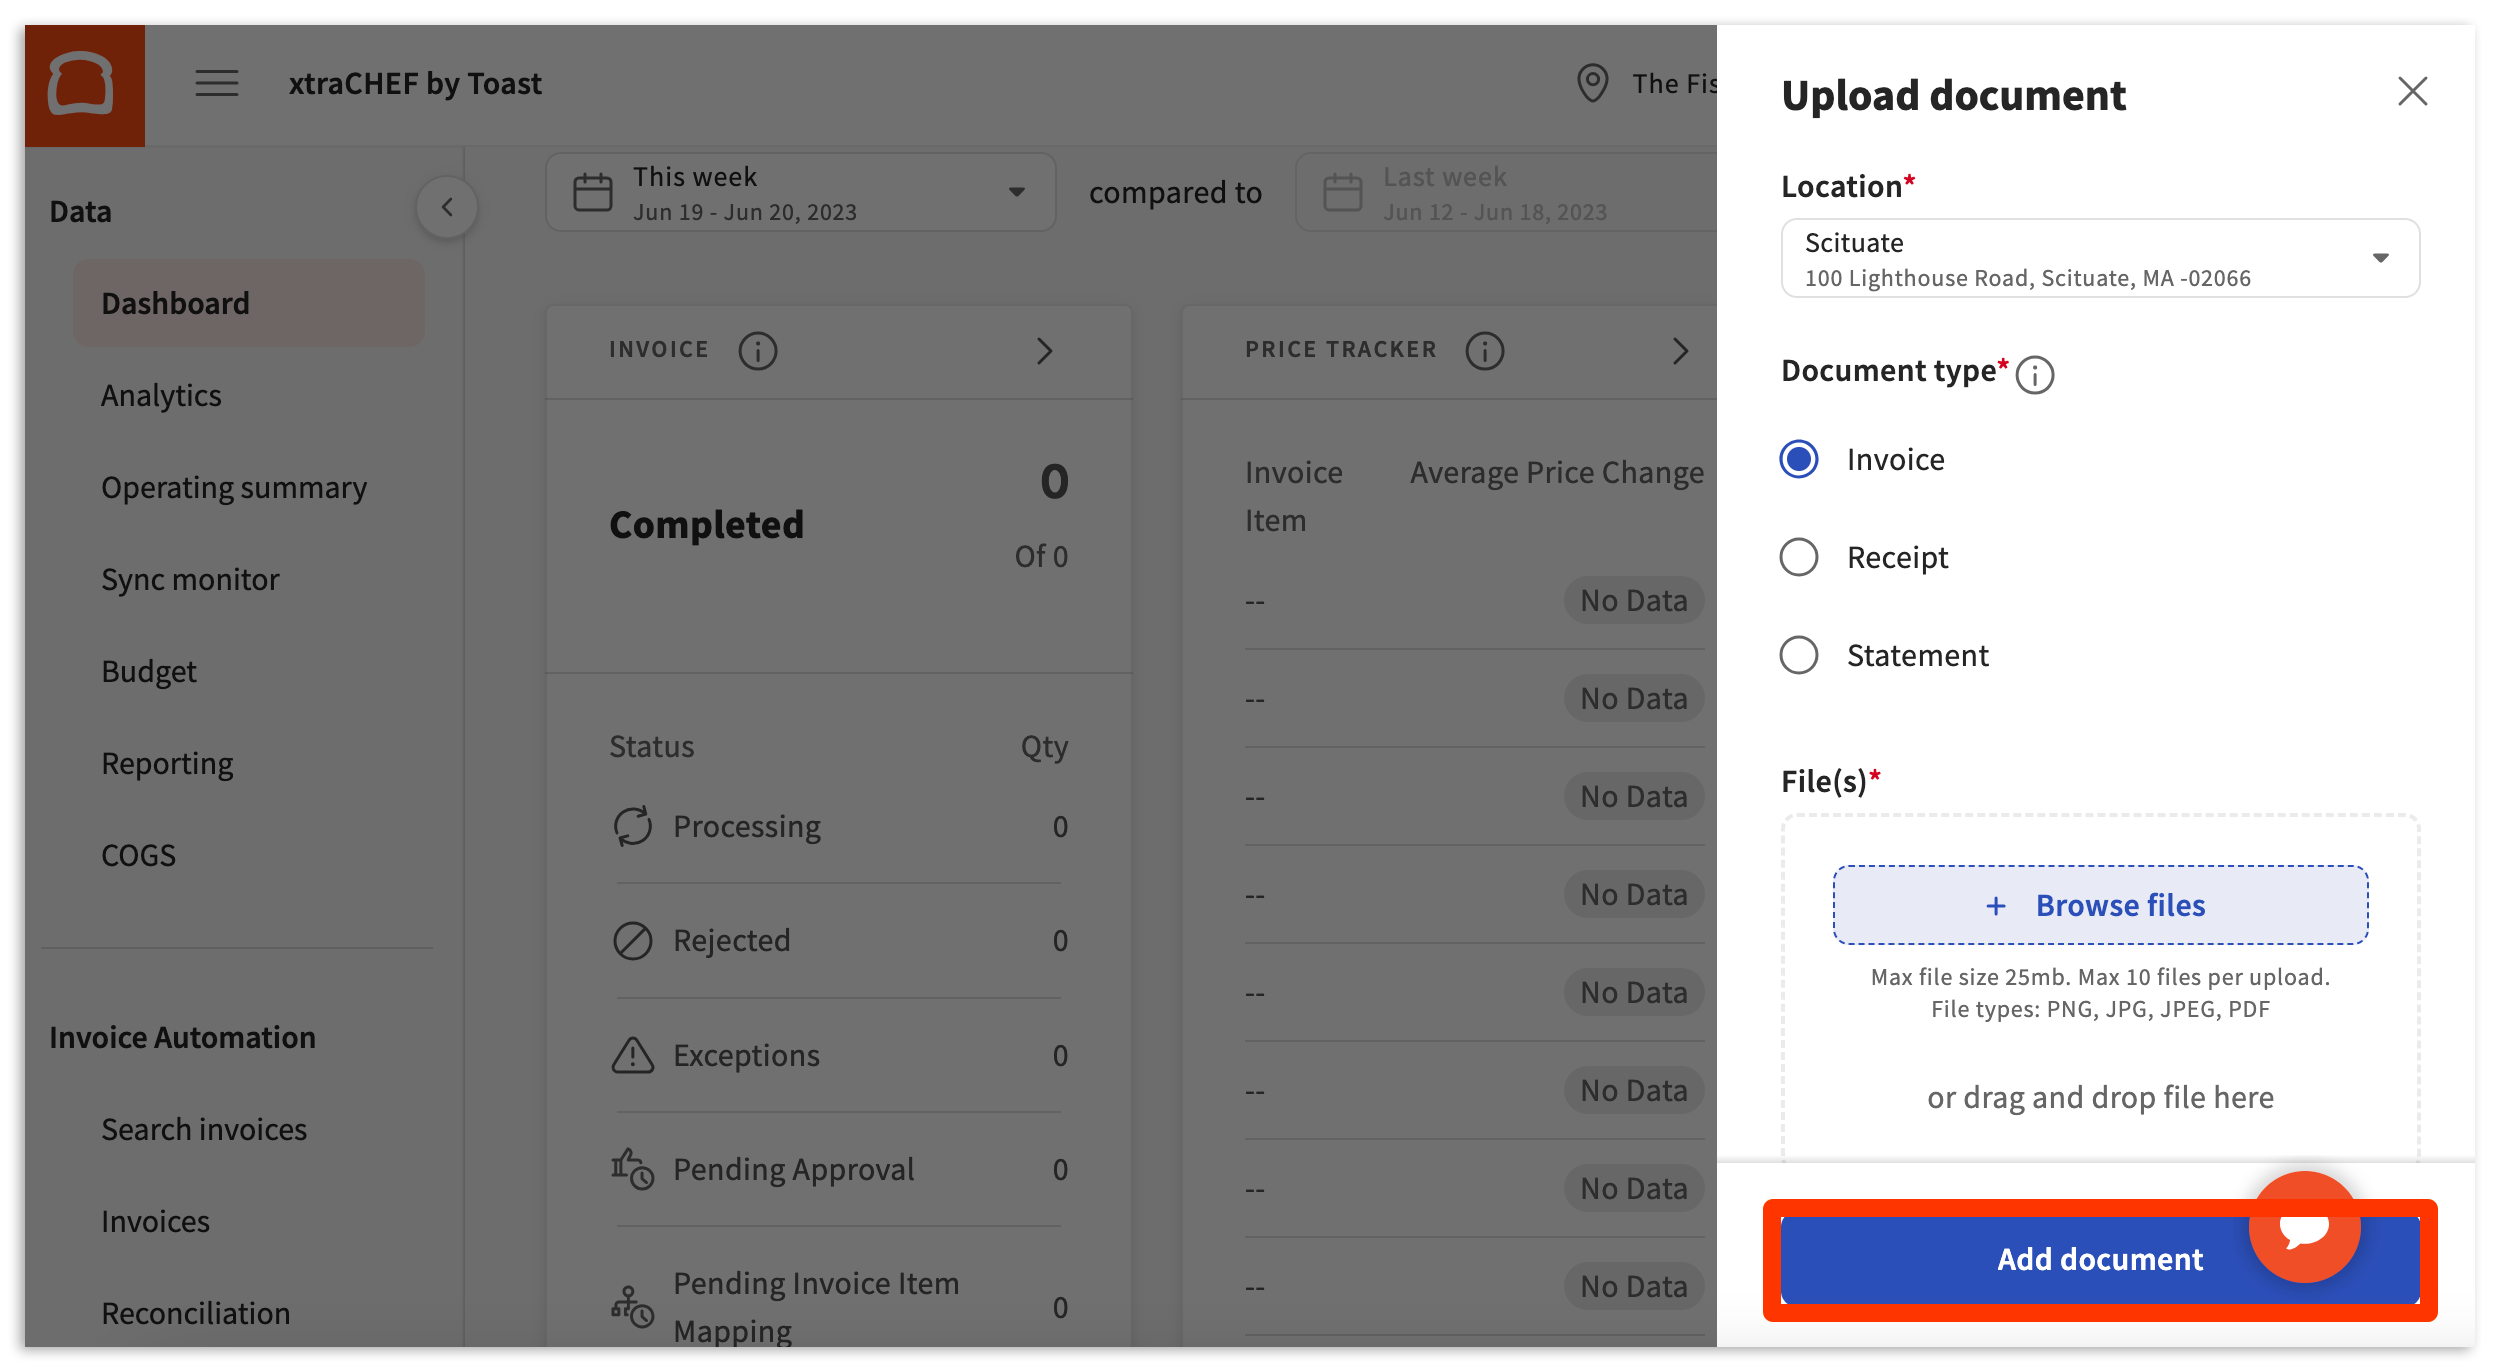
Once your files are uploaded, select Submit to send them to xtraCHEF for processing.
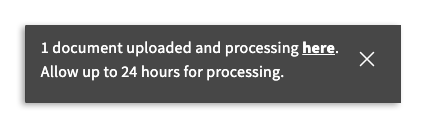
If your upload is successful, you'll get a pop-up notifying you that the file has been uploaded.
Upload Best Practices
To help ensure xtraCHEF successfully processes all uploaded documents, we recommend the following best practices:
- Capture the entire invoice page. When scanning or photographing a document, do not crop out information such as vendor name, invoice ID, payable total amounts, line items, e.t.c.
- Ensure legibility. If the information on your upload is illegible, xtraCHEF will not be able to read and record its data properly. You can help ensure legibility by photographing invoices in a well lit space and against a neutral background.
Create Documents
We know restaurant life is hectic, and paper is often an innocent victim of spills, smudges, and other indignities. If your invoice or receipt is torn, stained, or illegible, don't worry - you can still add it to xtraCHEF.
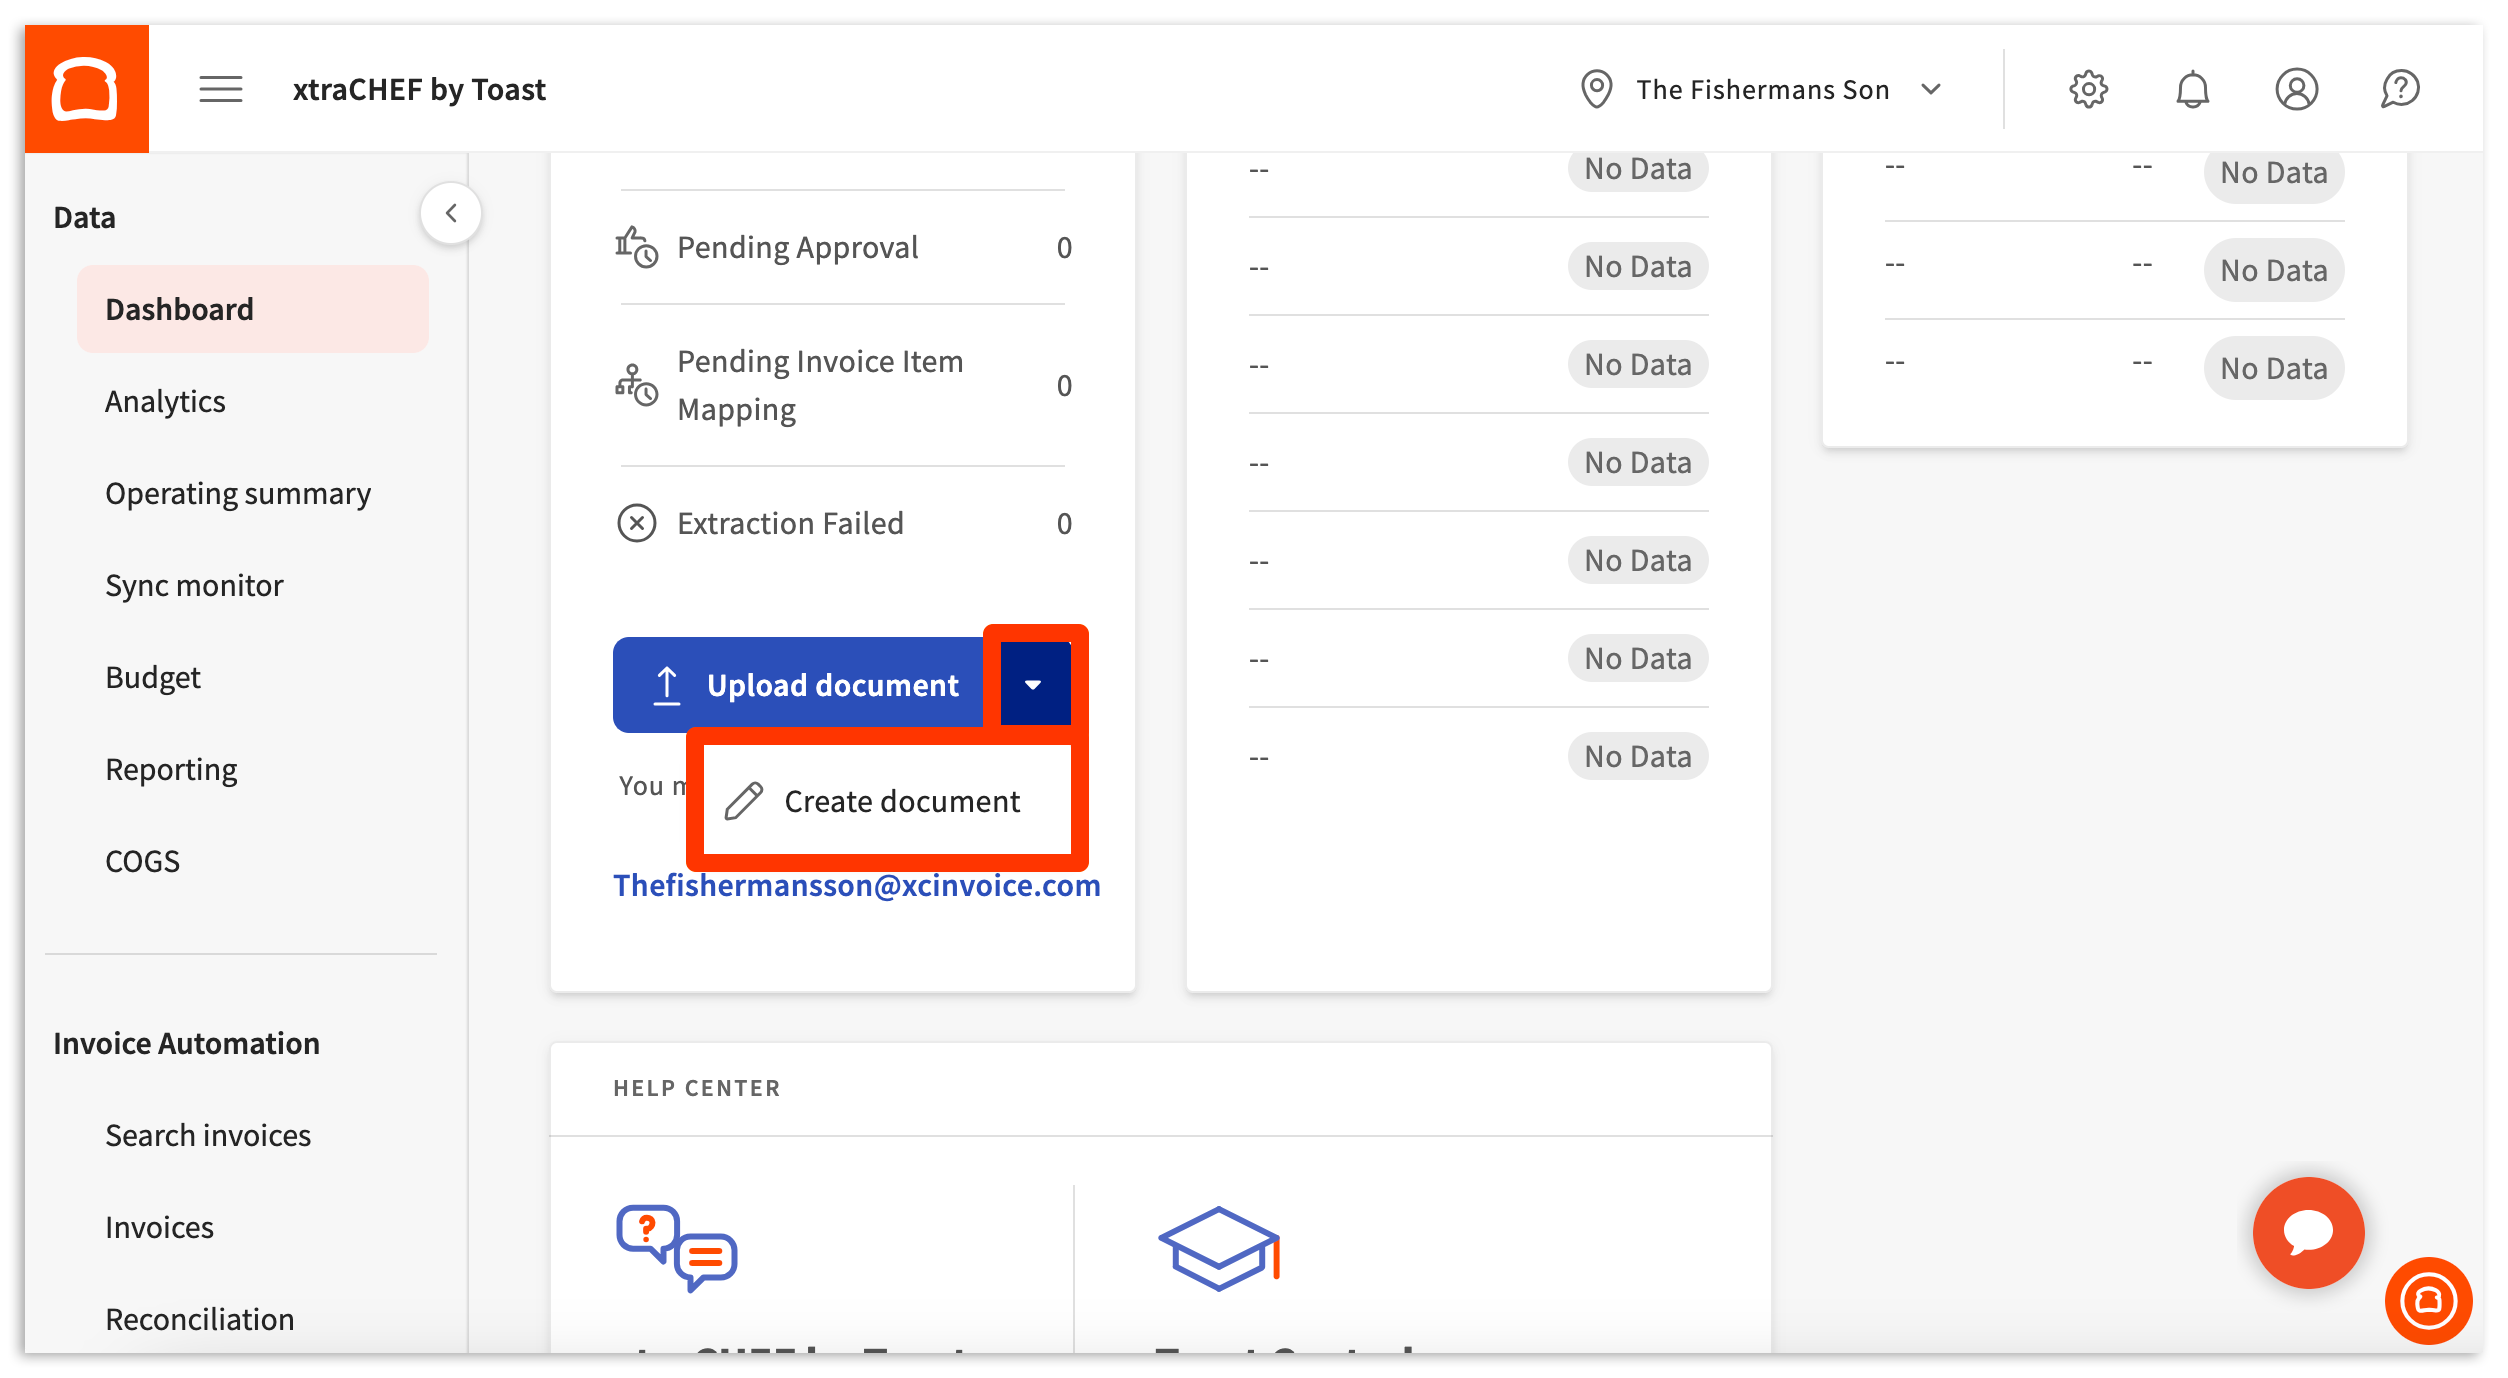
To manually upload your invoice/receipt details, select the button pictured below, located next to Upload document. Then, select Create document.
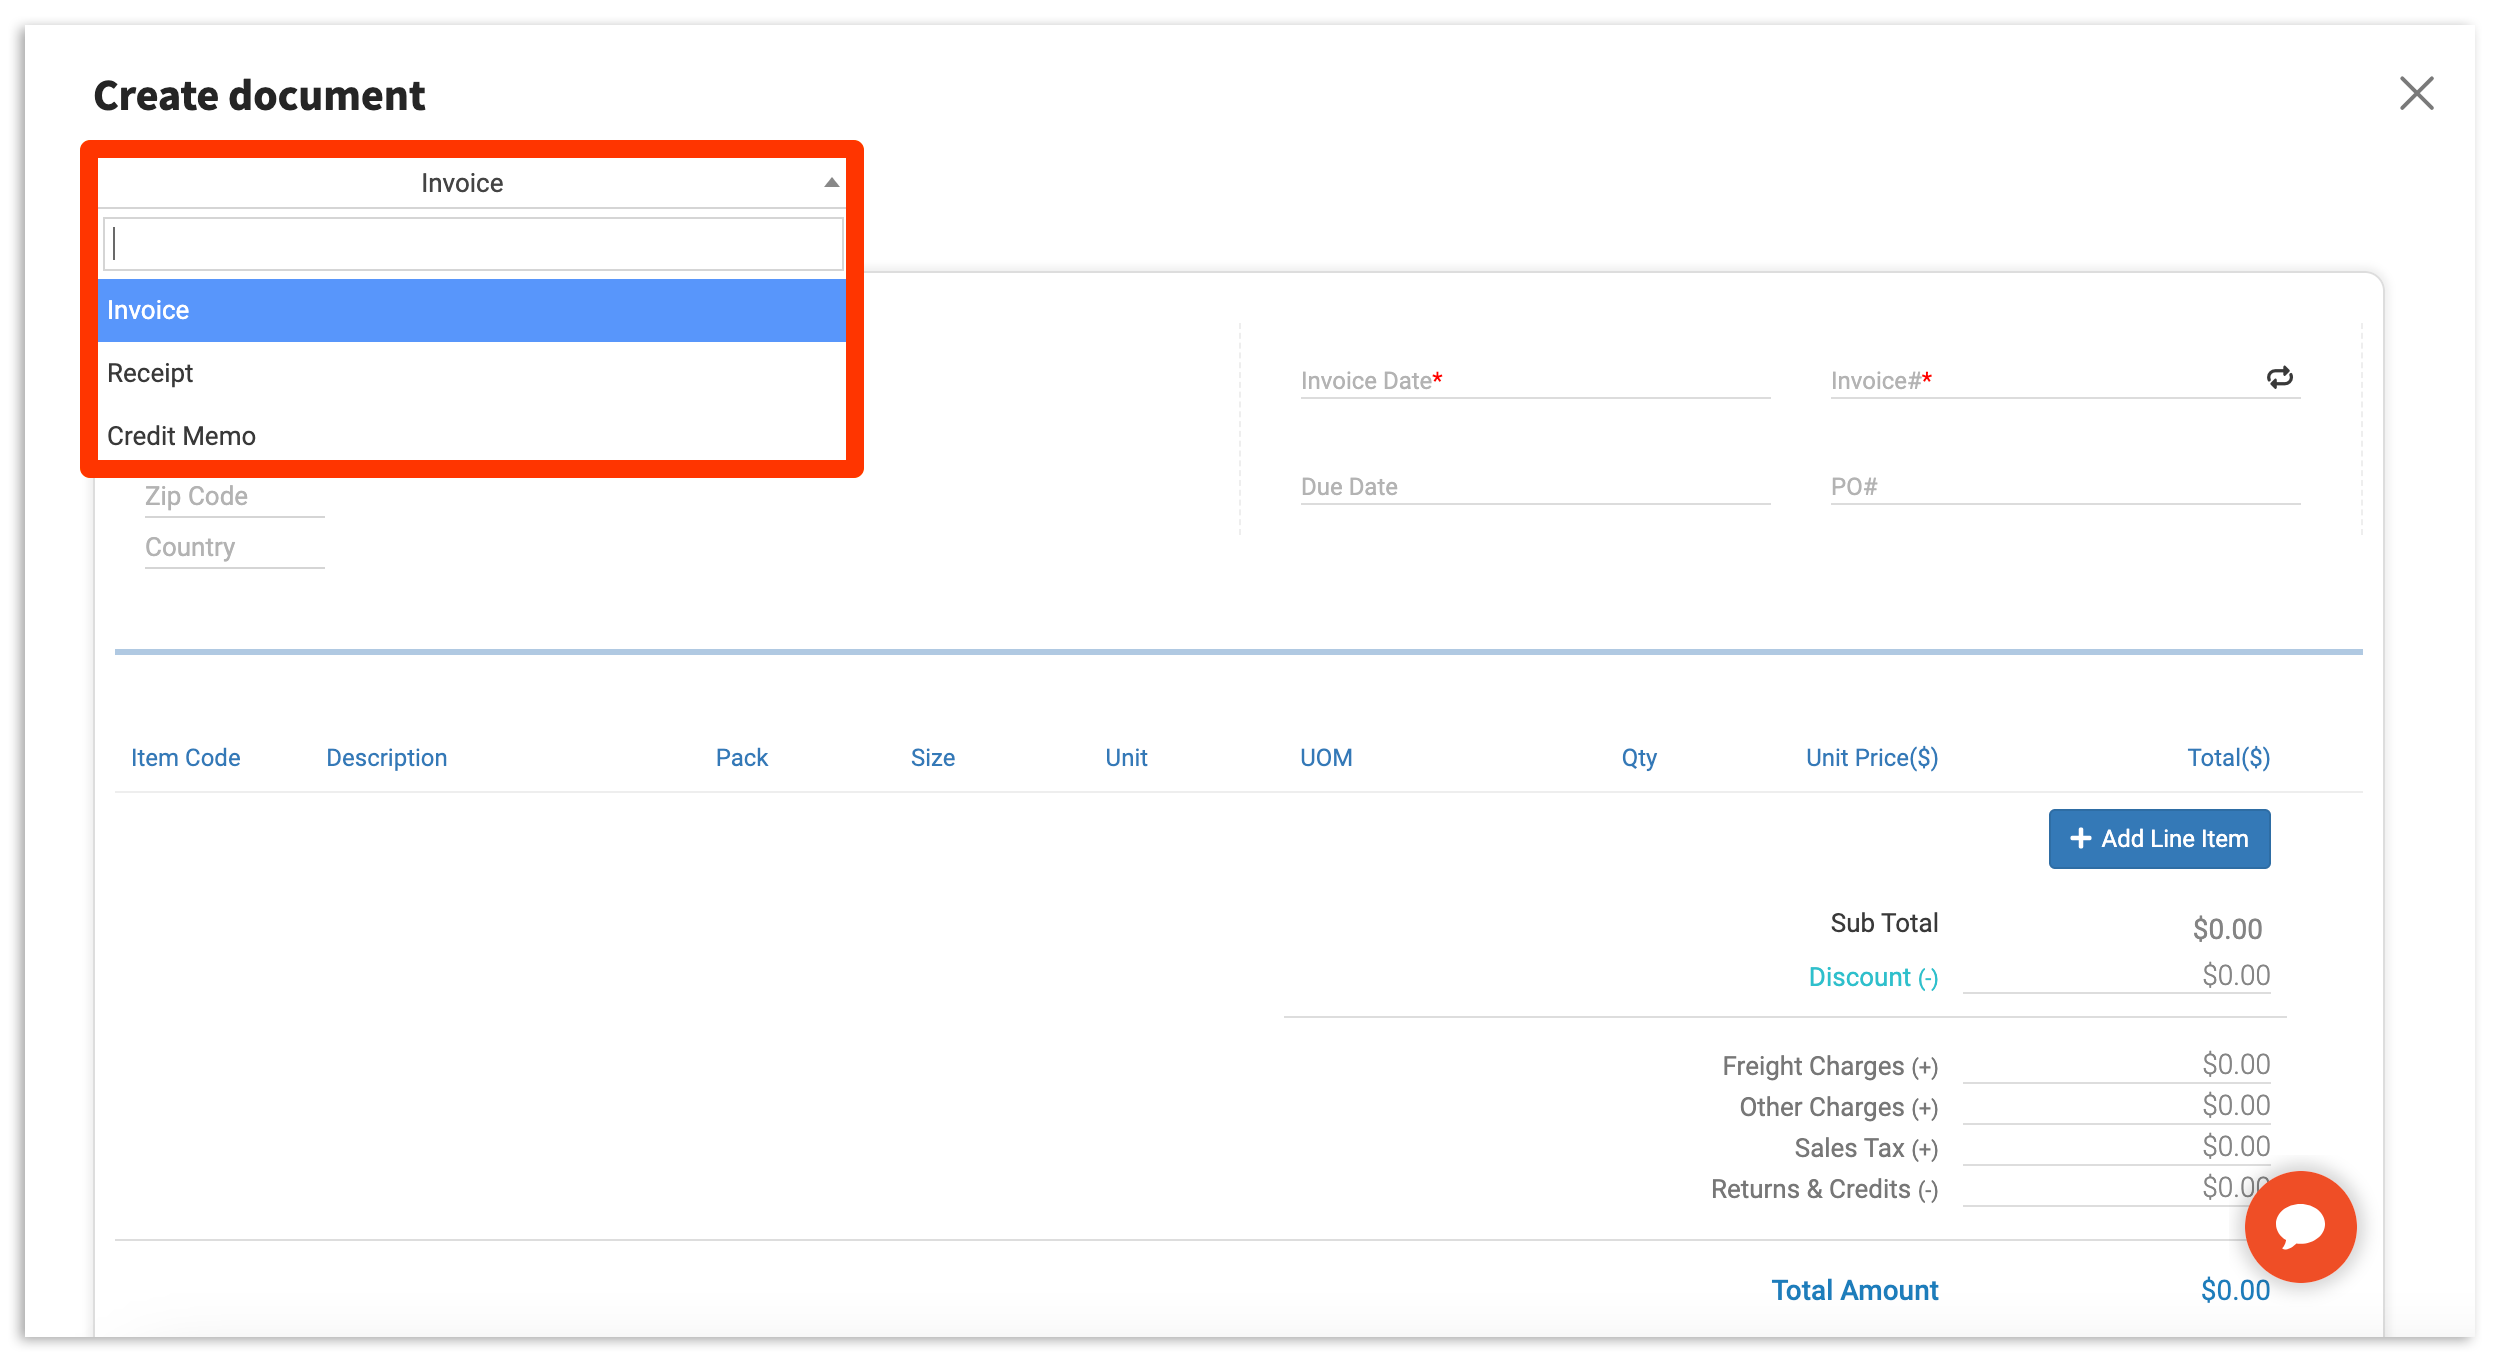
Begin by selecting your Document type (Invoice, Receipt, or Credit Memo) using the drop-down pictured below.
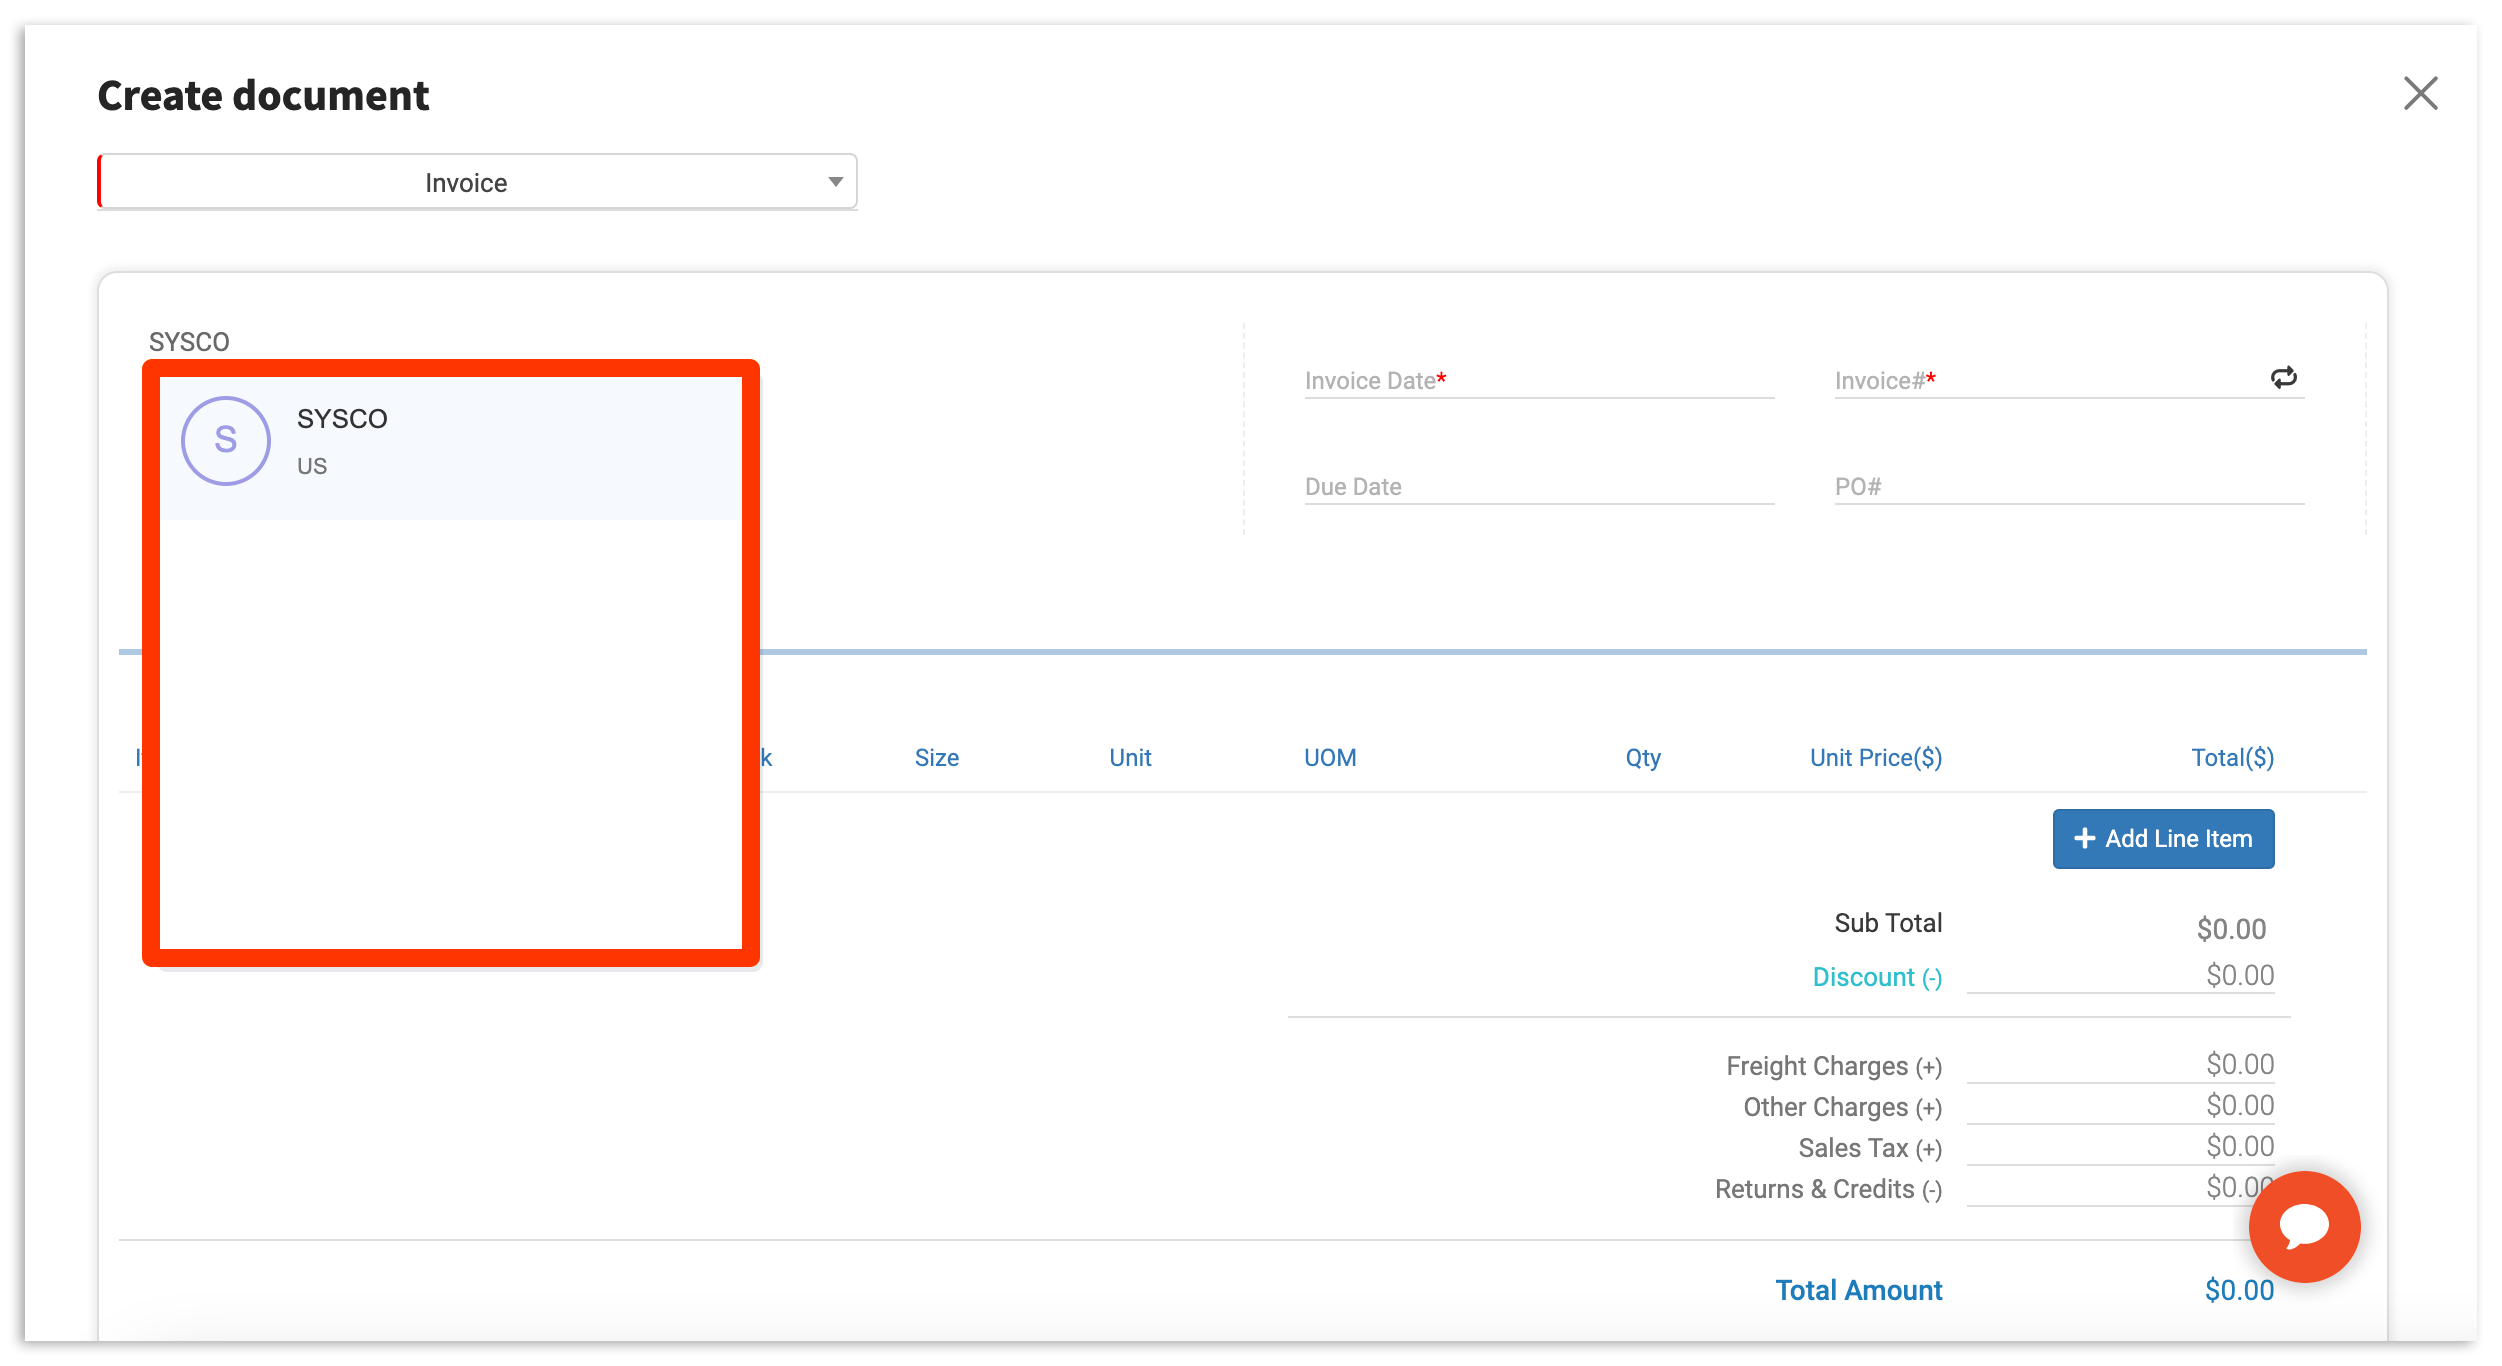
To proceed, begin entering document details. To do this, select your Vendor. Typing in this field will populate recognized vendor records.
Note: If no record appears, or if this is a new vendor, continue to enter this information Manually. xtraCHEF will record the new vendor information in your Vendor tab for future instances.
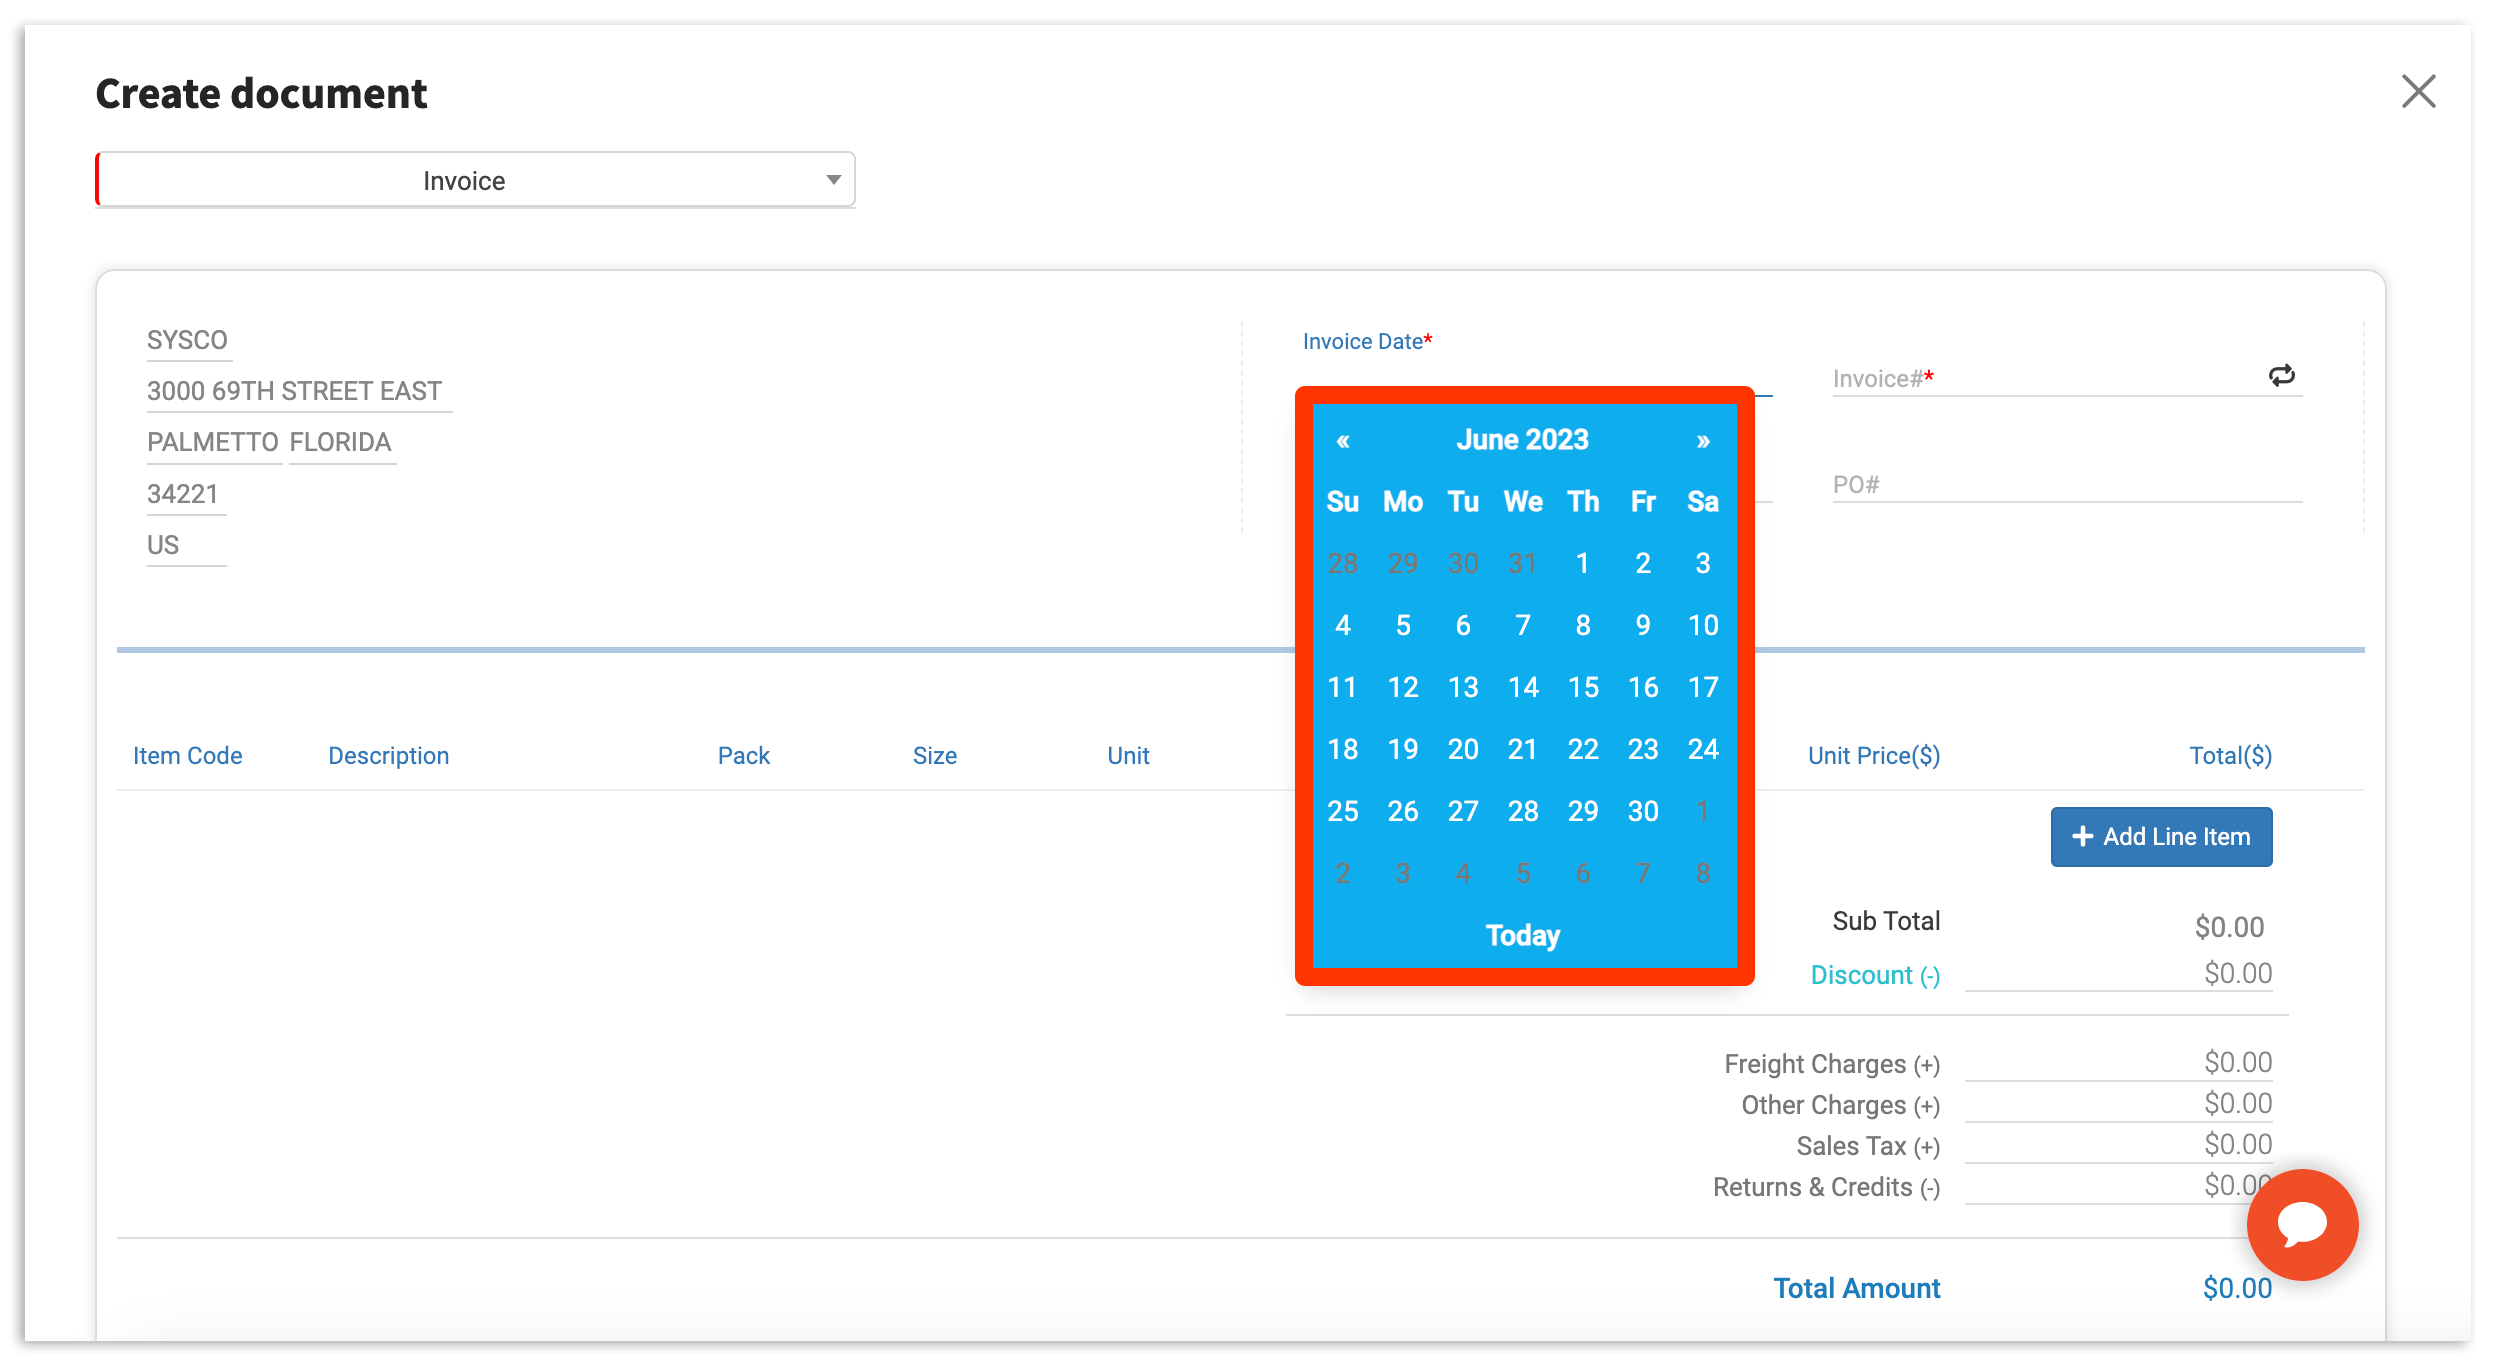
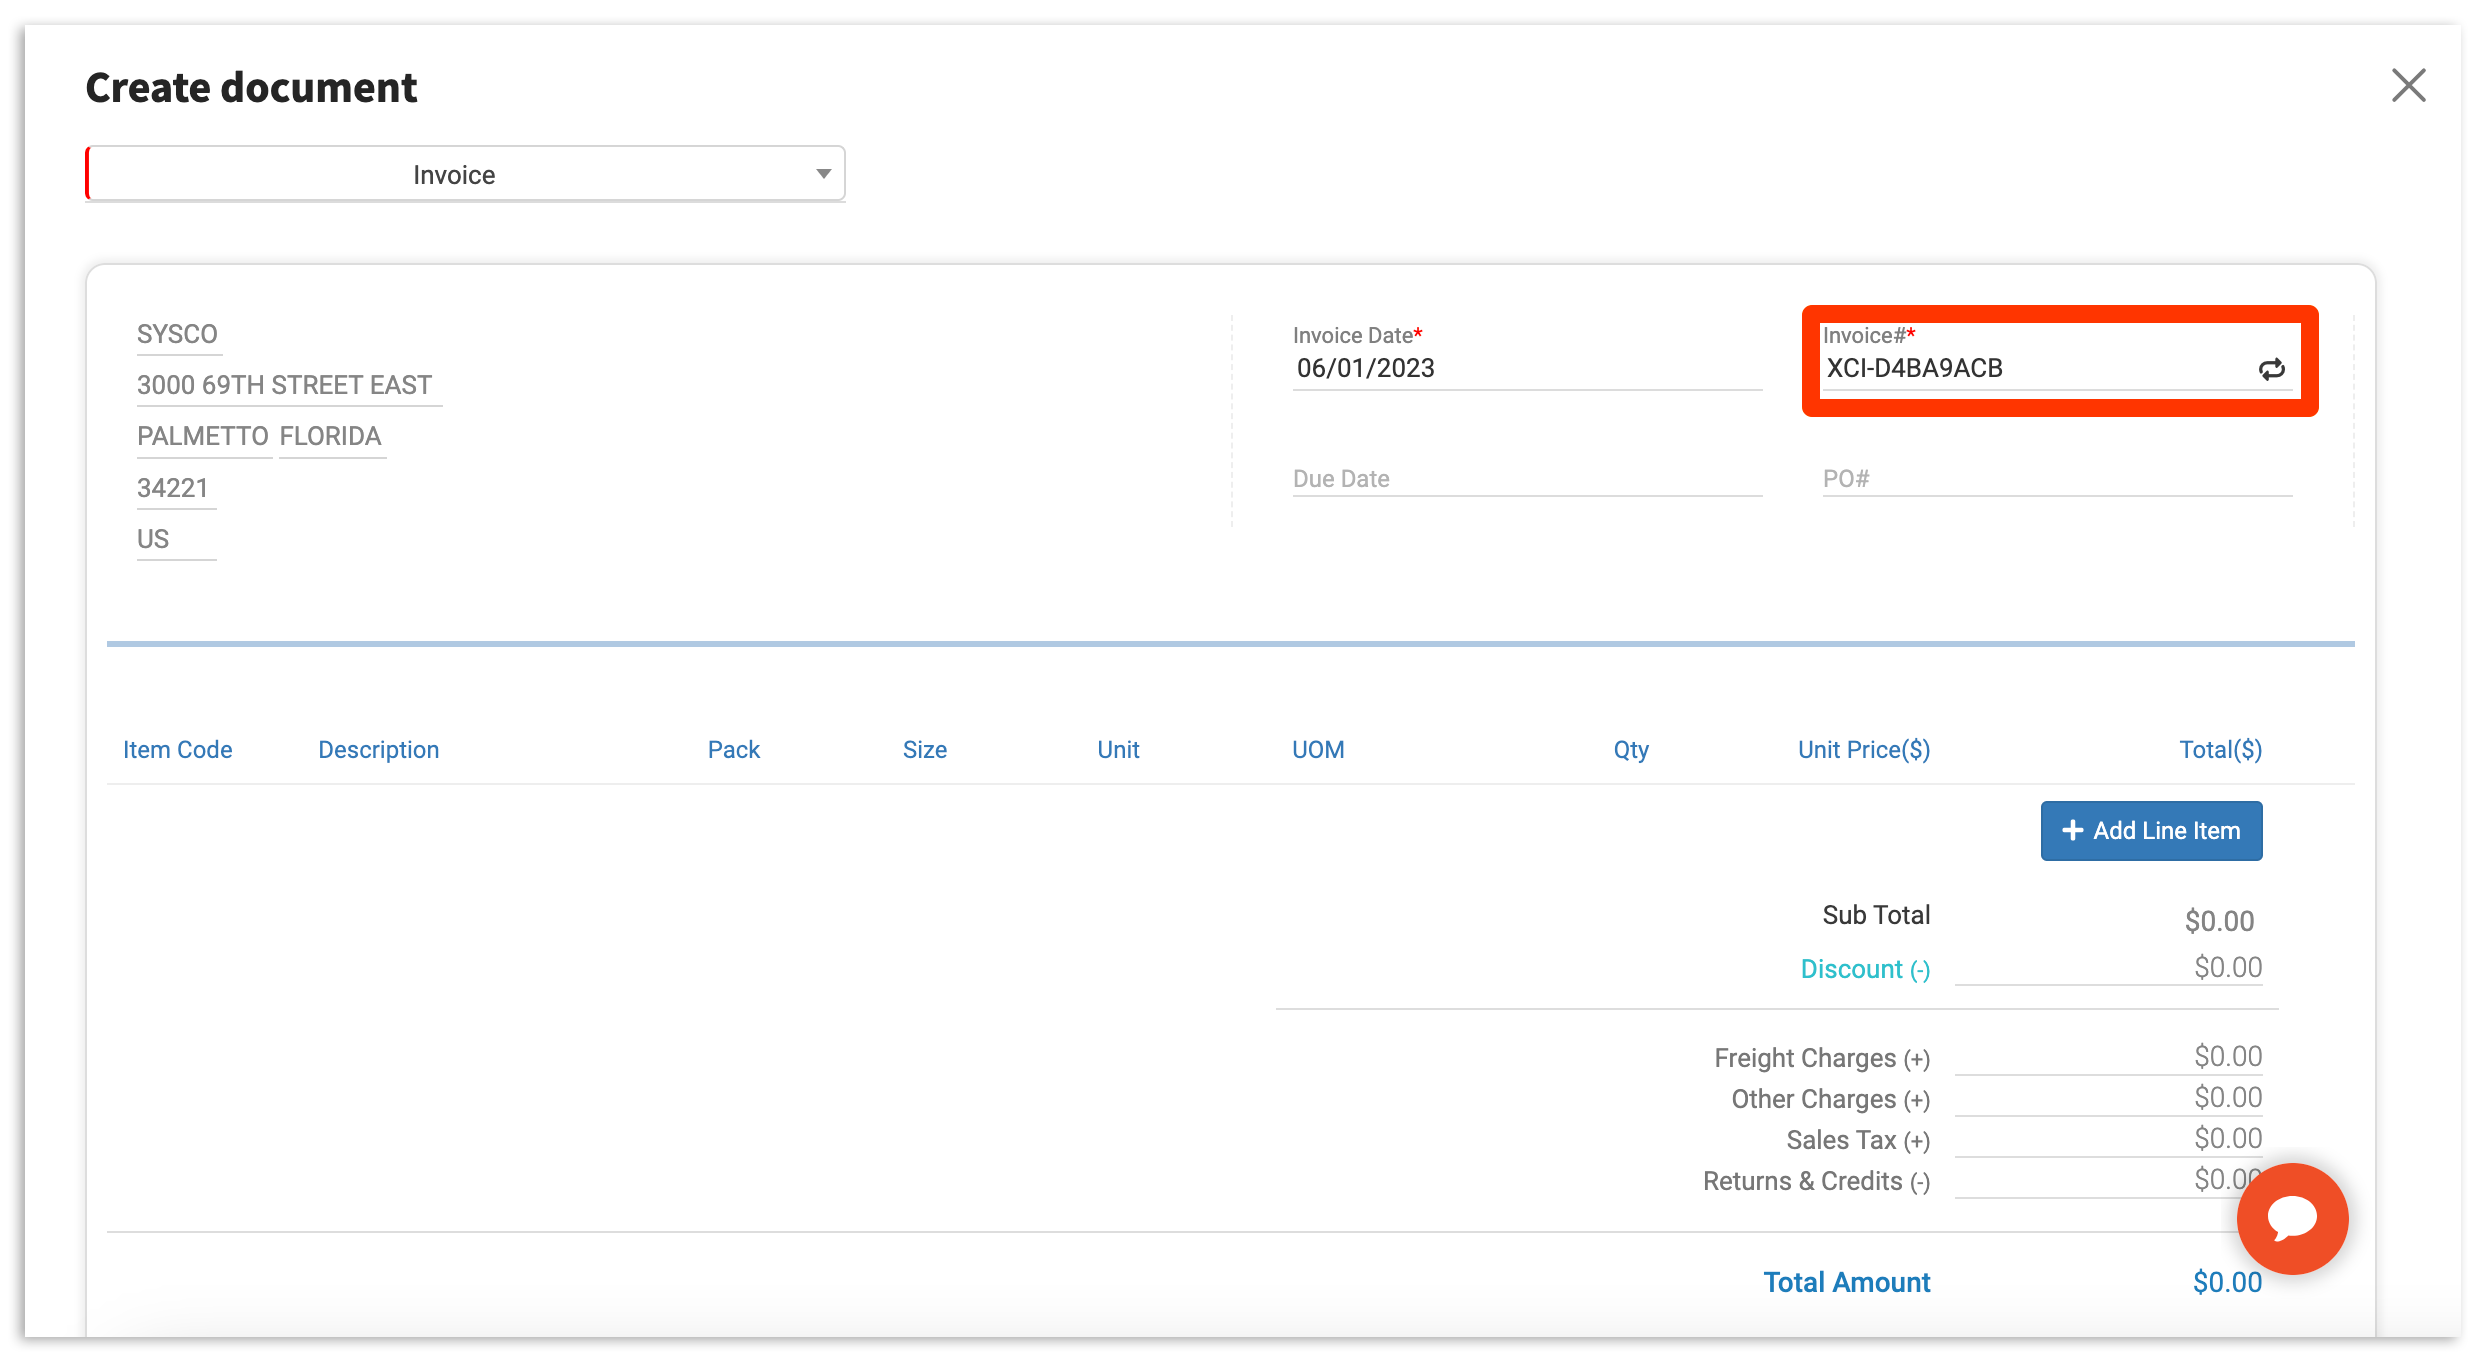
Next, select the Invoice Date field. You can type in a date manually or select if from the calendar tool.
Then, enter your Invoice #. This can be done by typing characters or numbers into the required Invoice # field. If you do not remember your Invoice #, you can randomize one by selecting the 'randomize' icon.
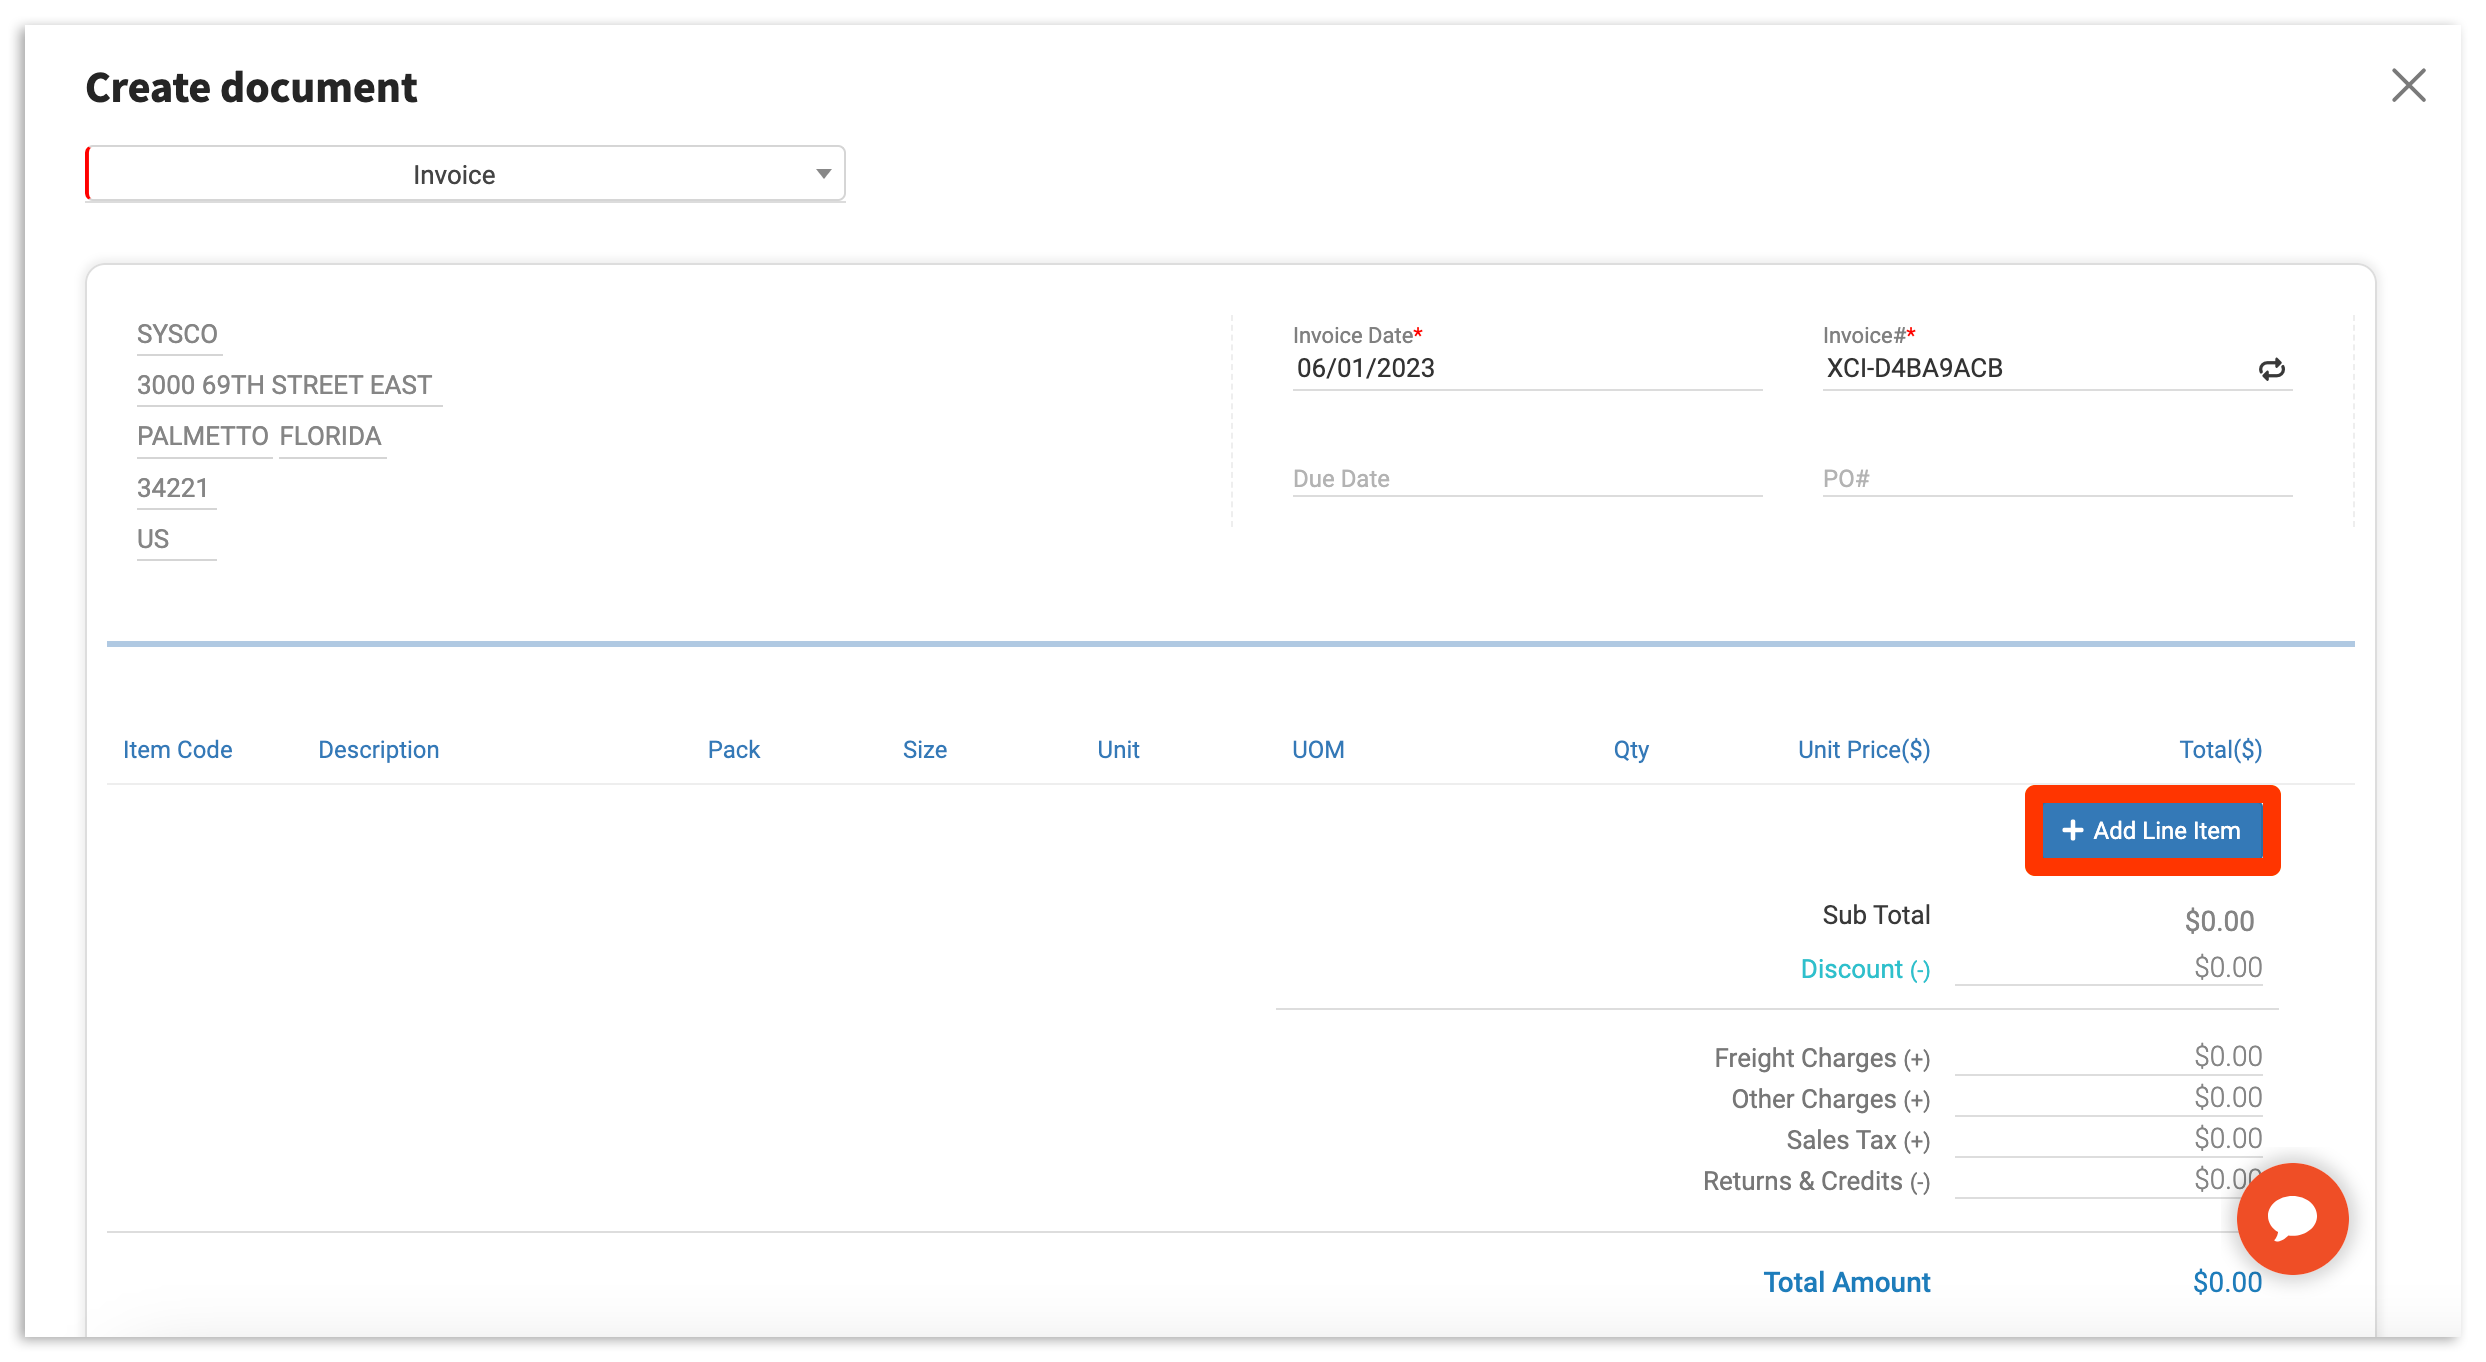
With this information filled in, you can begin adding the individual line items that make up your document. To do this, select + Add Line Item.
Then, add vital line item information such as Item Code, Description, Quantity, Unit Price, and more.
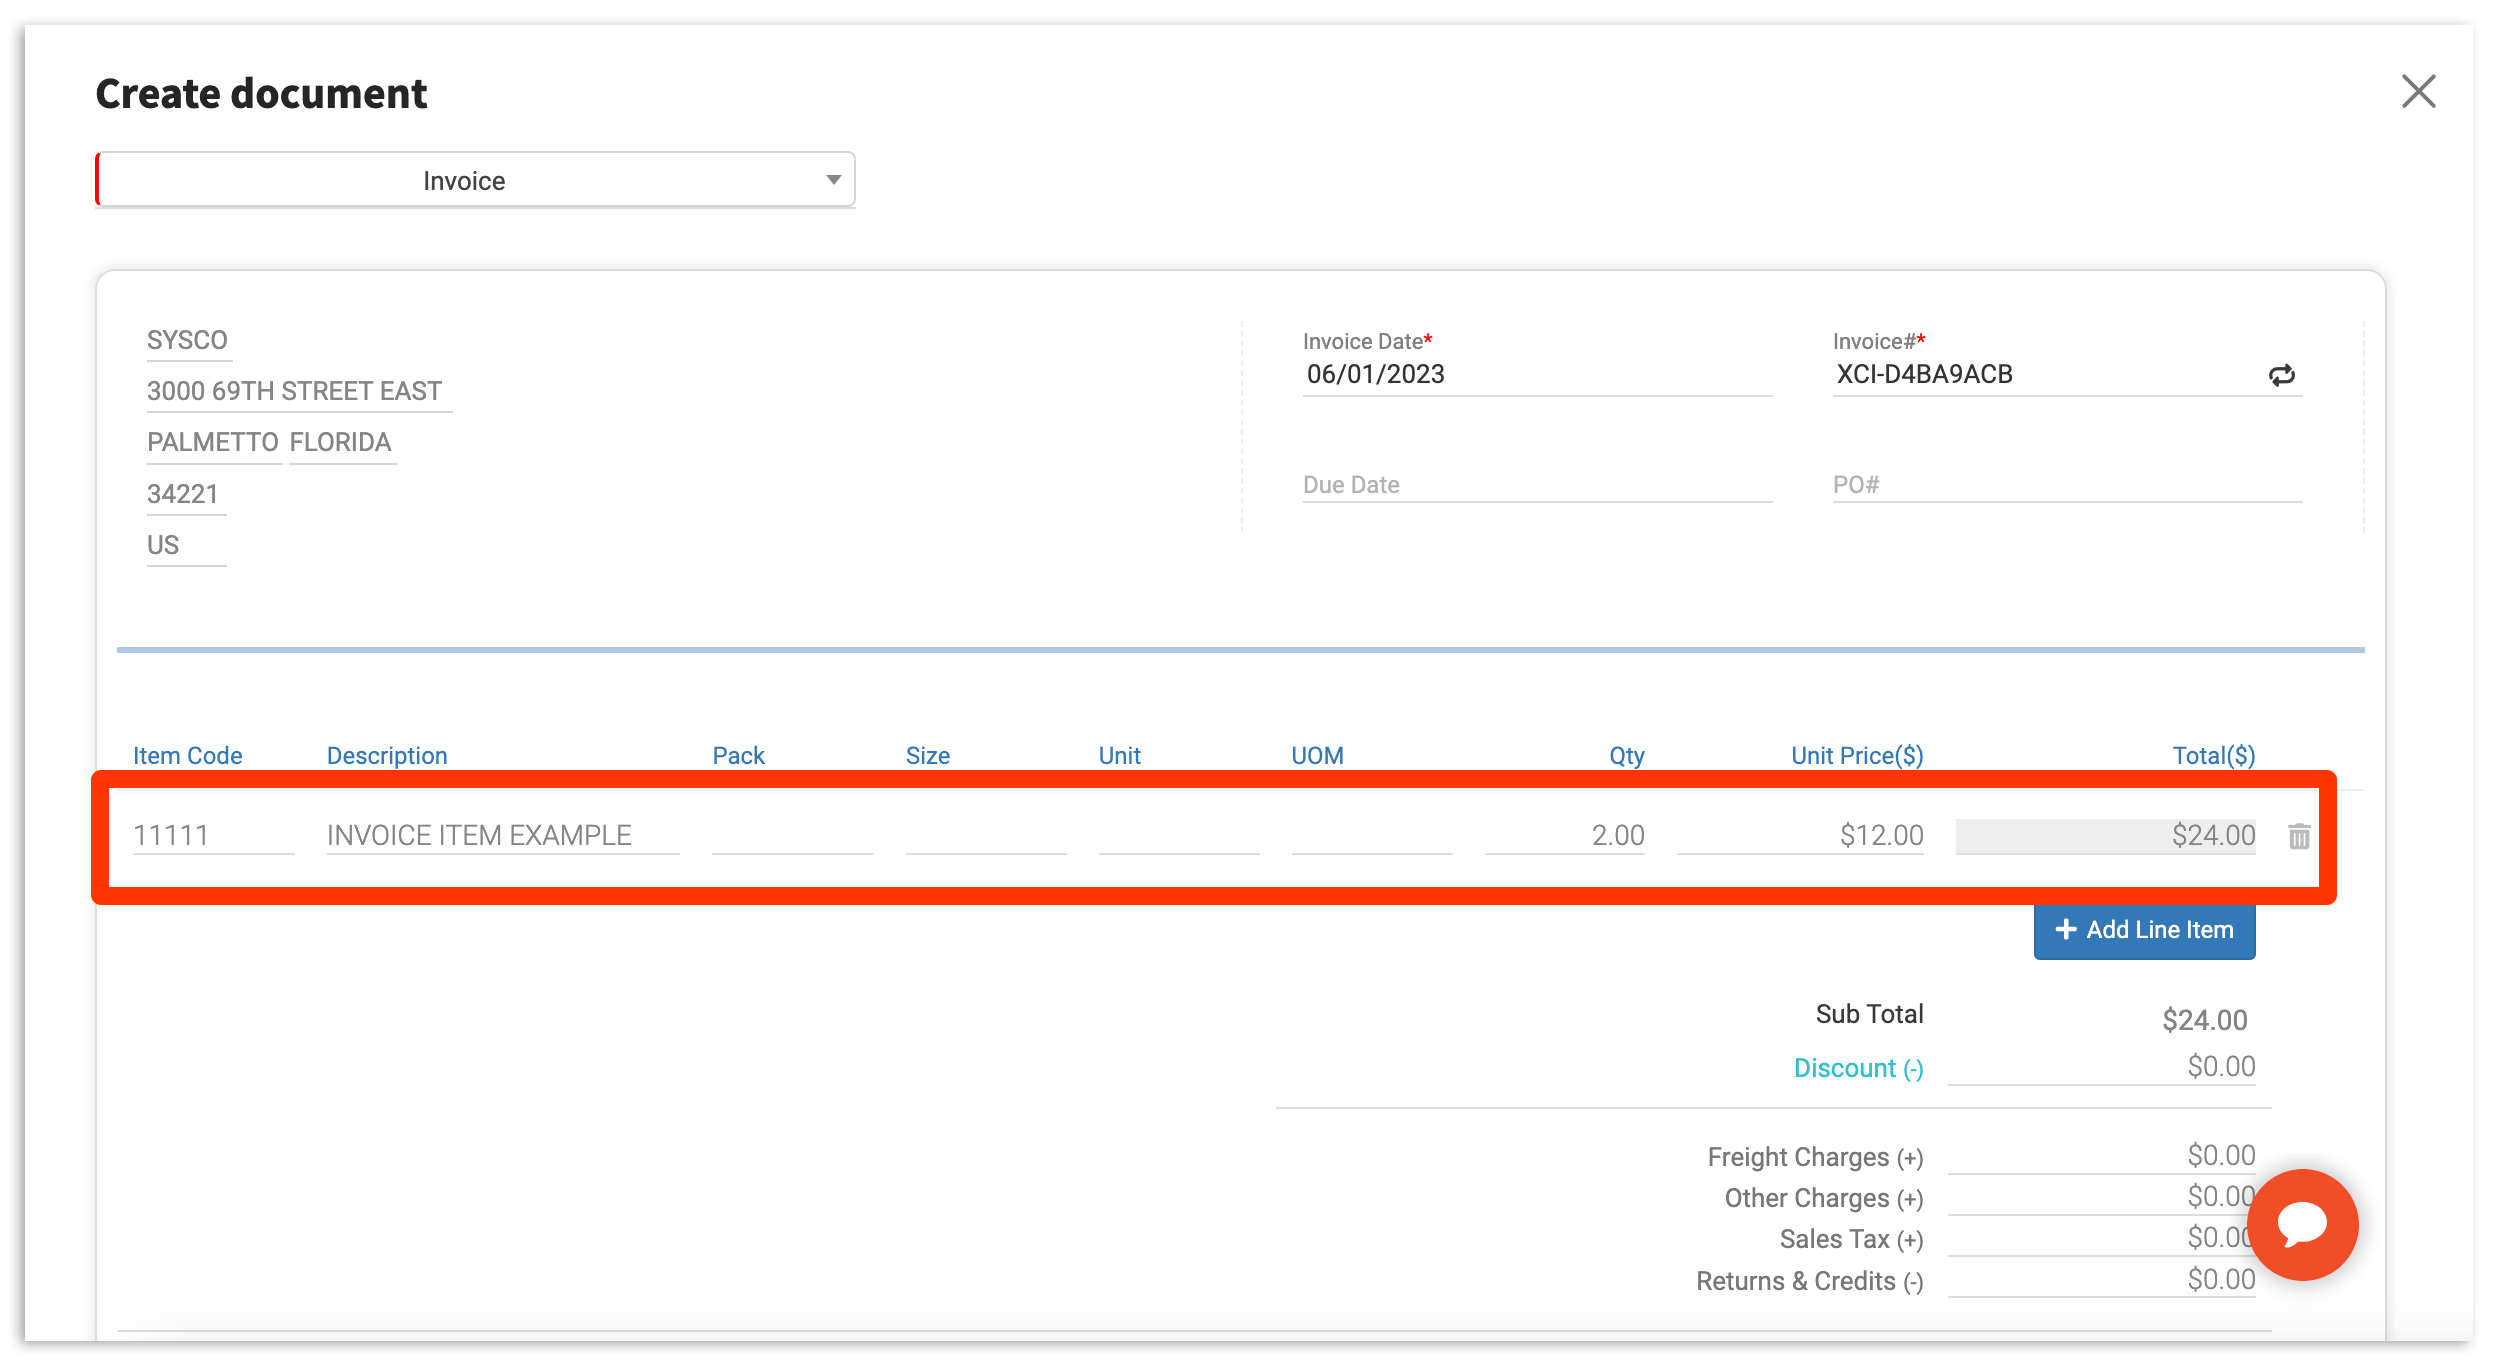
Note: You can continue to add as many line items as needed by reselecting +Add Line Item.
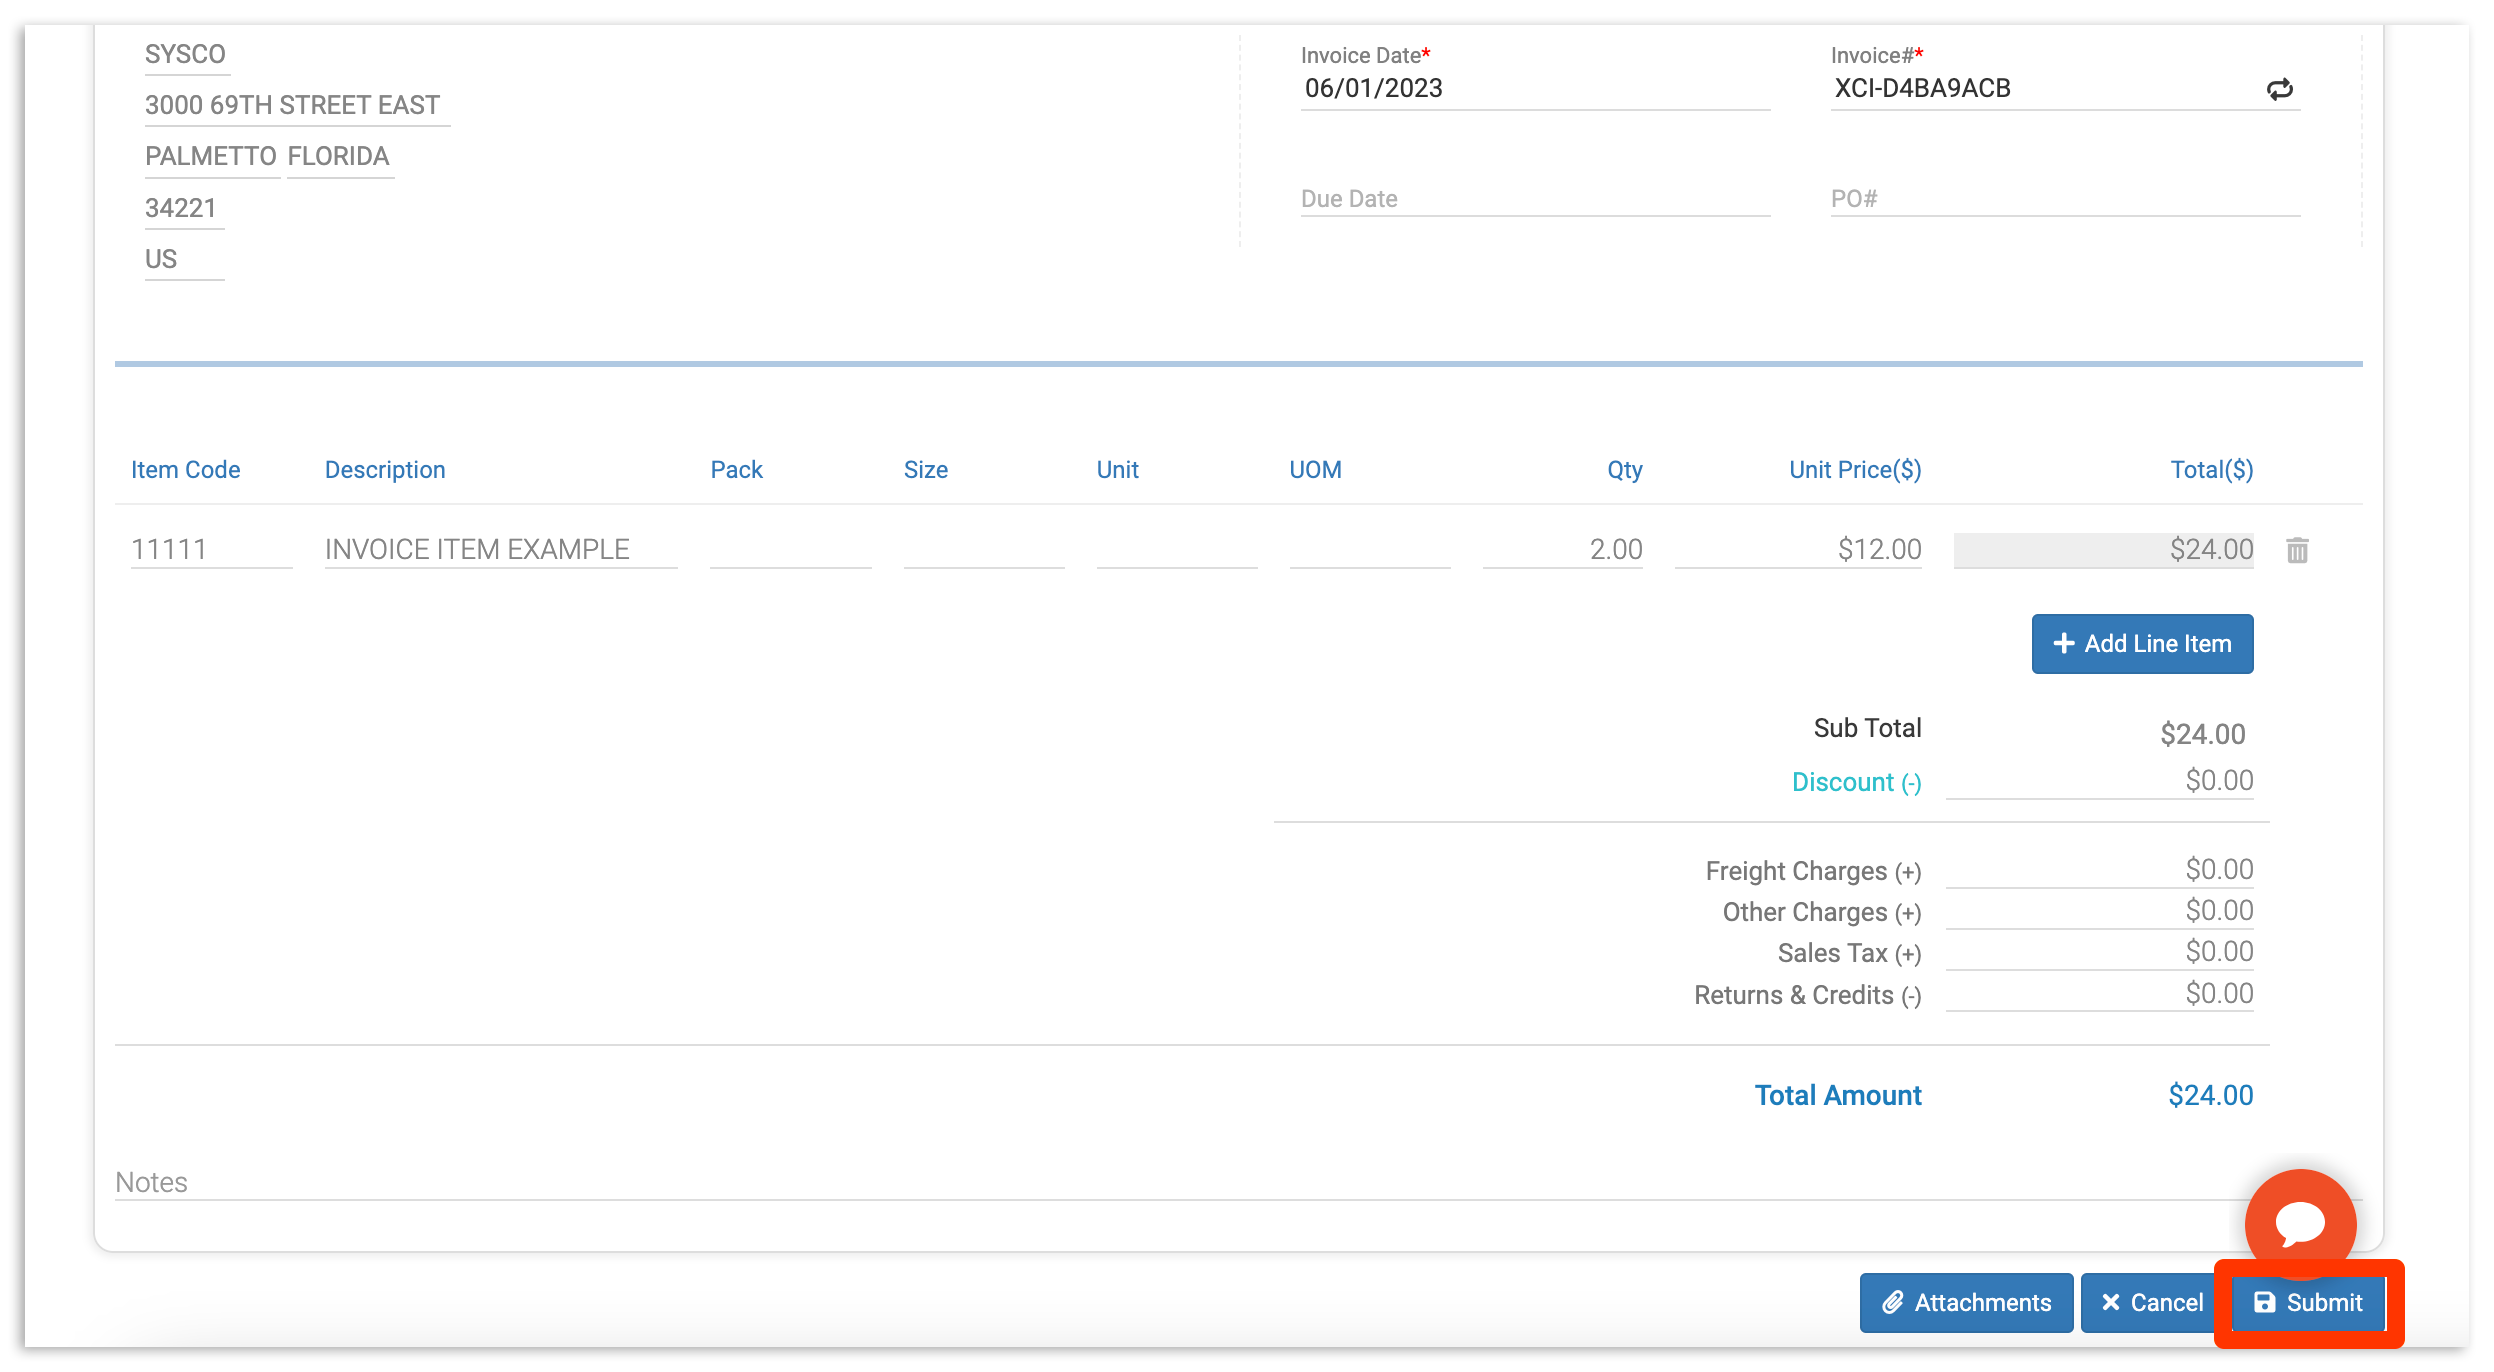
Finally, select Submit to send the information to xtraCHEF. If the upload is successful, you'll also have the option to download a PDF of the data you entered for your records.
Upload Documents via Email
If you're on the go or can't log in to xtraCHEF, you can always upload invoices in a PDF format via email! In xtraCHEF, each location has a unique email address assigned to it. Any invoices emailed to that xtraCHEF address (in a PDF format) will be automatically uploaded to your account.
Note: xtraCHEF will only accept invoices from users in your account. To learn more about adding your staff or vendors as users, consider reading our Manage User Profiles article.
You can quickly find your location's email address in two places:
- On your Dashboard
- And on your Upload documents page
Customize Your Email Address
These email addresses are configured for you by default. However, you are able to further customize addresses at the location level. To do this, select the gear icon in the top right corner of your account. Then, select Locations.

This will take you to the Locations page, where you can view all the locations associated with your account. Each location will have a default email address connected to it. To change an address, select a Location and Edit Location Details.

This will populate your Edit Location details page. To continue configuring your xtraCHEF email address, select the Email invoices to field and change the text before @xcinvoice.com. Here, you can also configure your Reply option and add an email address to be included in invoice received receipts.
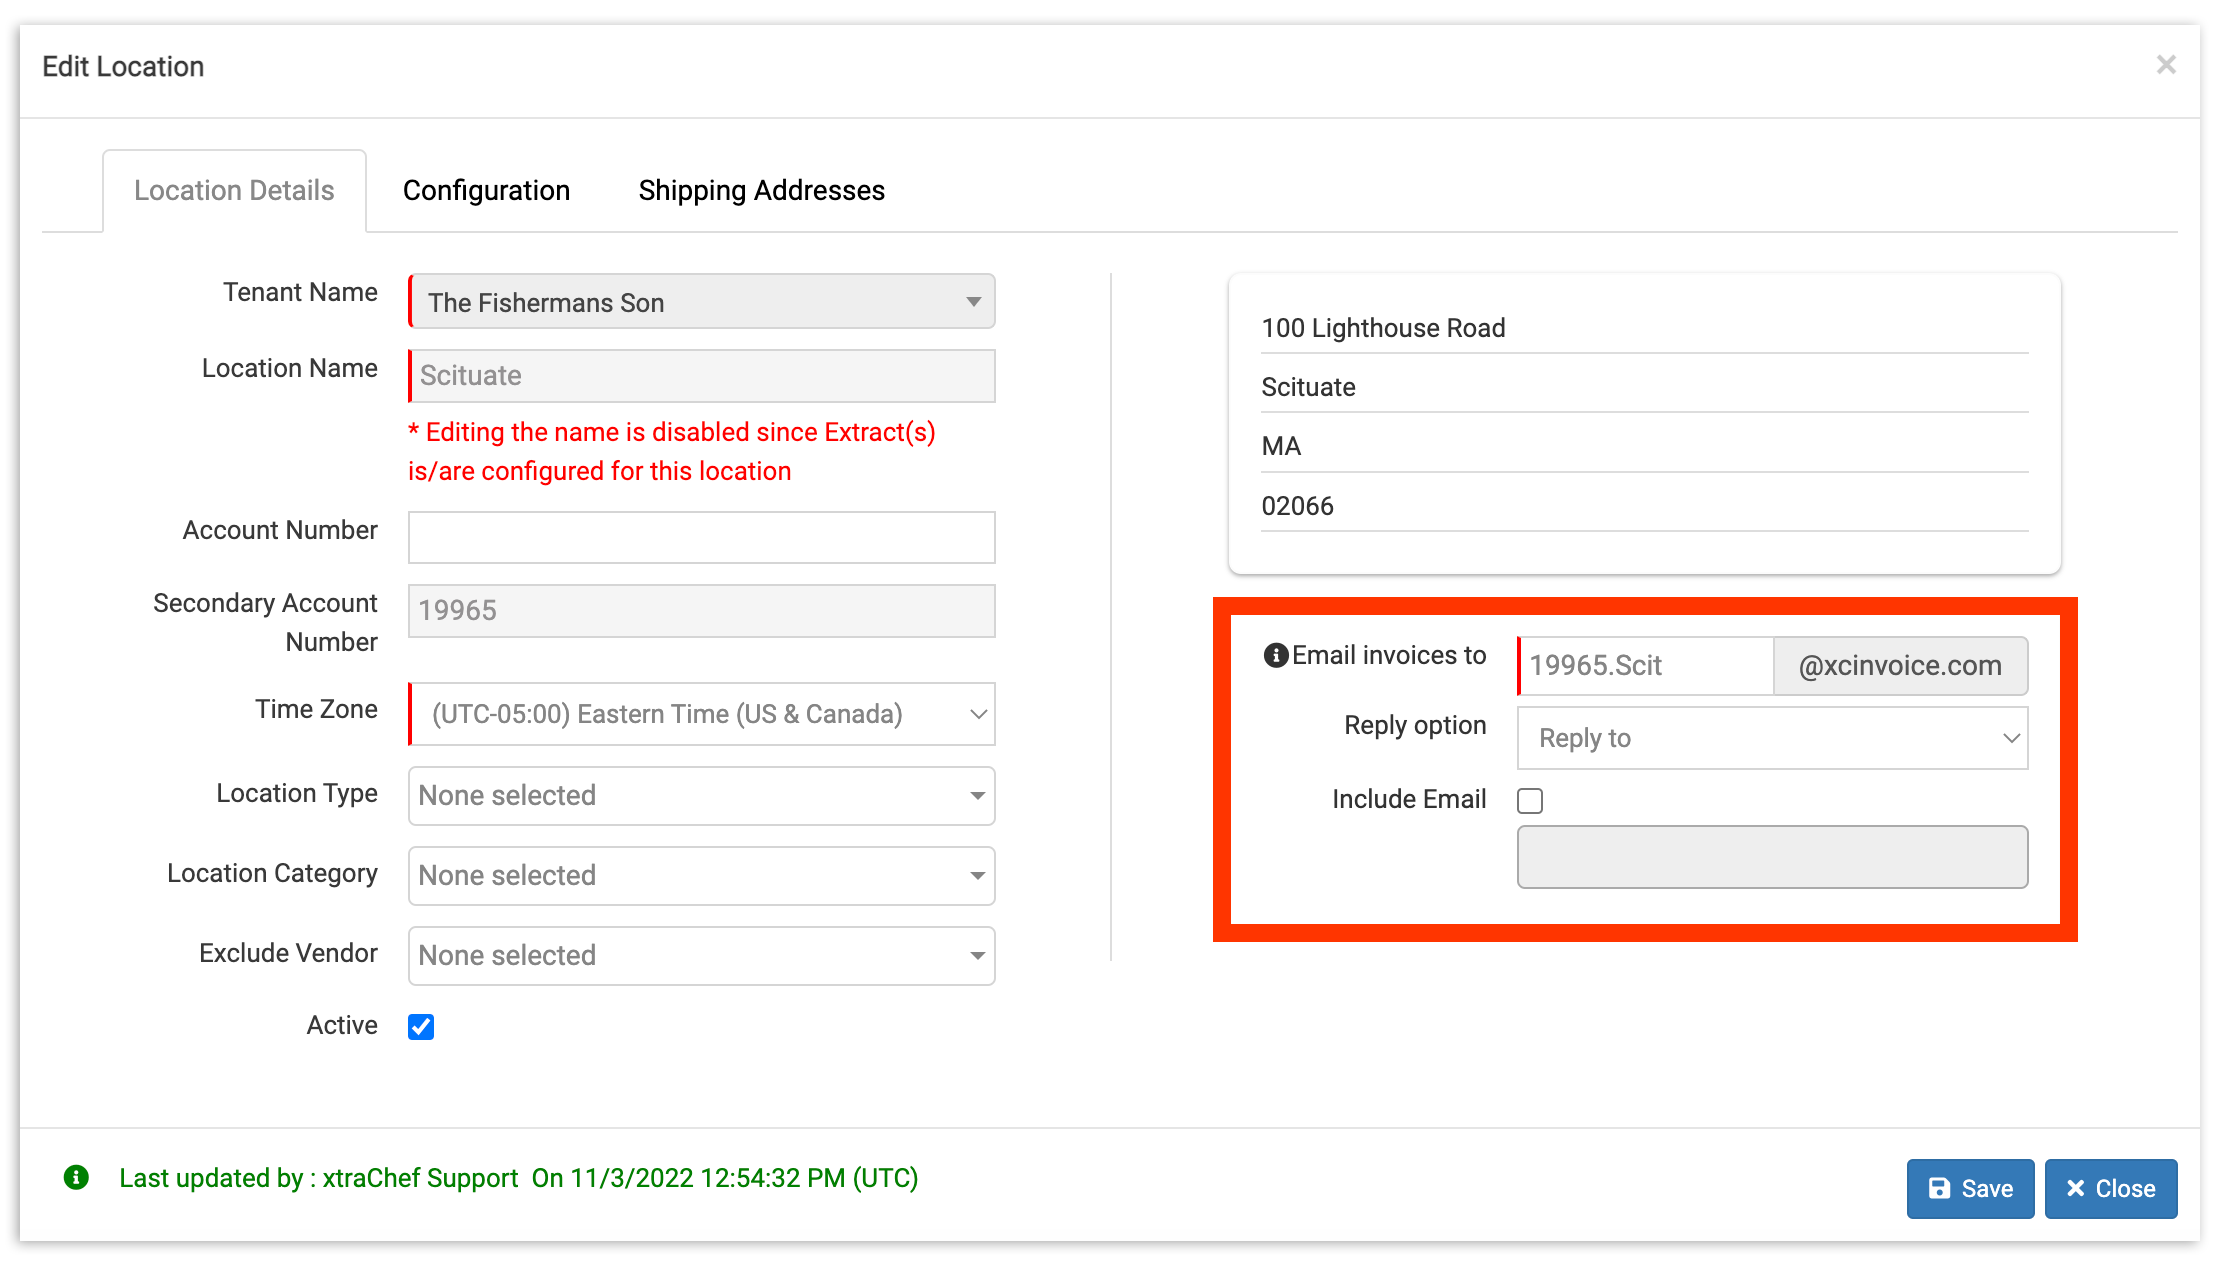
When you are ready, select Save. This will lock in your changes. Your changes will not be remembered by xtraCHEF if Save is not selected.
Note: After changing your xtraCHEF email address, it's important to update your invoice upload workflow. This can be done by notifying any staff or vendors tasked with submitting documents by email on your behalf. Your new email address must be observed going forward in order to successfully receive future invoices.
Next Steps
Once invoices are uploaded, they begin the reconciliation process. At first, this process will require action on your behalf to review and handle the following:
- Rejections: Invoices can be rejected if an uploading photo or scan is missing too much data (due to cropping or missing pages) or if image quality is illegible. For more on rejections, visit our article xtraCHEF: Invoice Rejections.
- Action Needed: Invoices missing partial information such as vendor codes, invoice numbers, dates, and more will be stopped. These invoices can always be pushed forward by supplying the missing and required information. For more on exceptions, visit our article xtraCHEF: Action Needed Invoices.
- Mapping invoice items: Over time, xtraCHEF learns to code your individual invoice line items to General Ledger (GL) Codes and Categories for accounting and reporting purposes. It does this through machine learning. However, when you’re just getting started, your accounts AI is a clean slate.
As you manually ‘code’ your invoice line items to a corresponding GL Code or Category, xtraCHEF will remember your designations and repeat them on your behalf moving forward. For more on mapping invoice items, visit our article xtraCHEF: How to Map Invoice Items.
Continuing to usher your invoices through that reconciliation process, xtraCHEF will begin to unlock insight in the form of Analytics, Reporting, Budgets, Operating Summaries, and so much more.