xtraCHEF:开始使用租户配置设置
上次更新时间:2026年4月8日 10:05
租户配置概述
您的账户或租户可以在多个不同层面上进行自定义。如果您是xtraCHEF的新用户,基本账户设置可能是一个很好的起点。账户设置可以通过选择xtraCHEF右上角的齿轮图标,然后选择账户设置来找到。
返回顶部
基本详情
账户设置页面将自动打开在基本详情选项卡上。
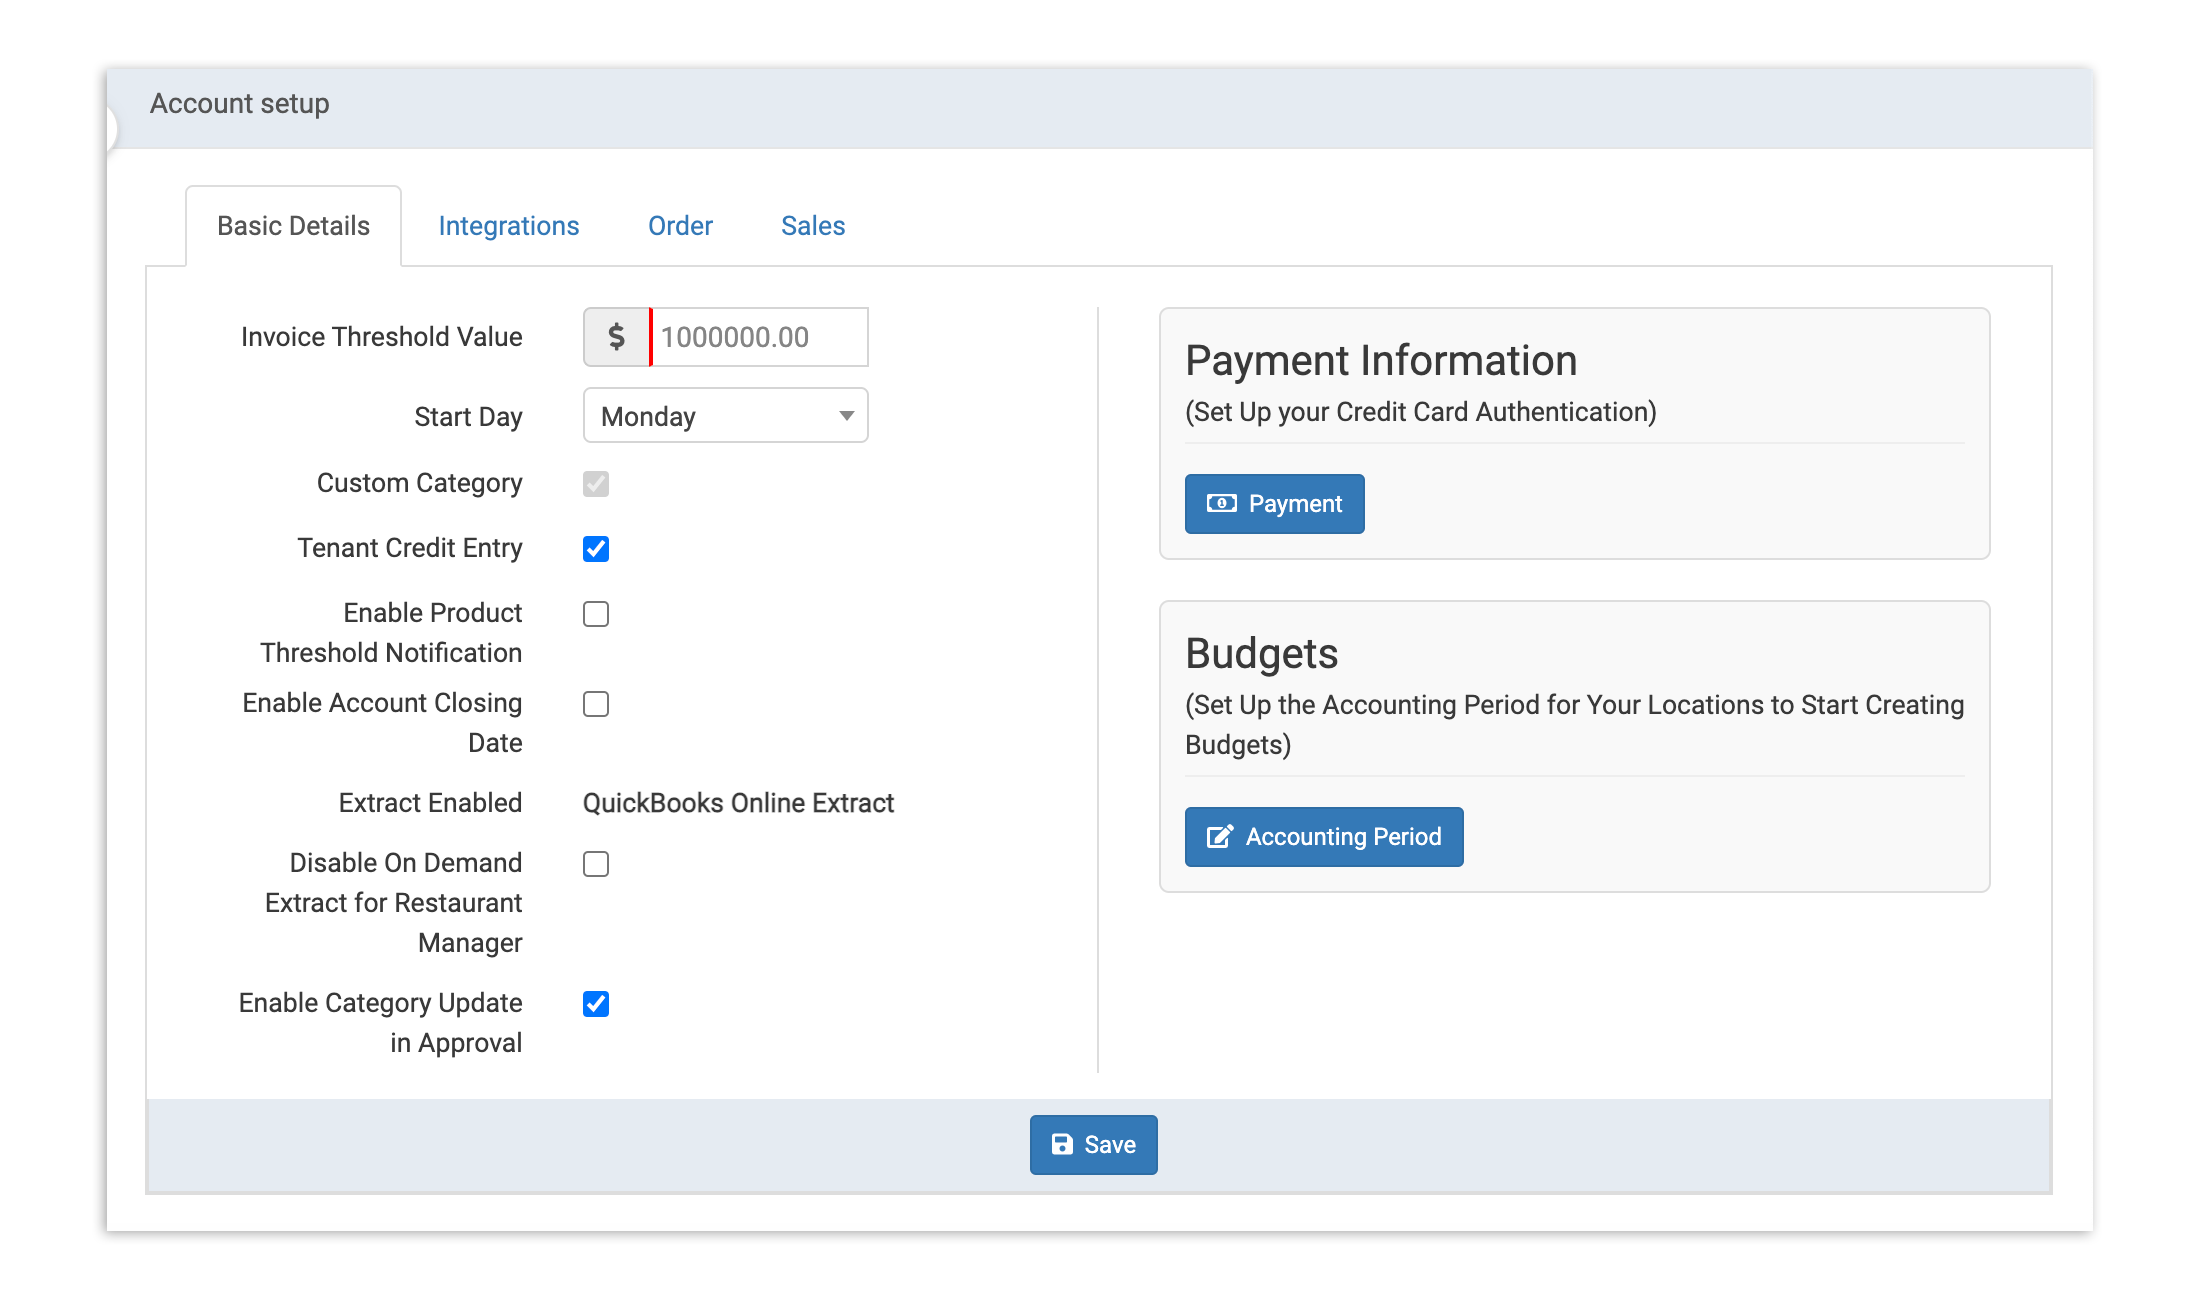
下面,我们将介绍基本详情选项卡上每个选项的含义,以及如何使用它们来定制您的xtraCHEF体验。
| 基本详情 | 定义 |
| 发票阈值 | 如果用户上传的发票超过您输入的值,该发票需要手动审核才能获得批准。 |
| 开始日 | 您组织的周是从周日到周日、周一到周一,还是完全不同的?在这里选择您的周开始日,它将应用于整个xtraCHEF。 |
| 自定义类别 | 自定义类别默认启用。如果您不希望租户管理员能够创建自定义类别,请联系 support@xtrachef.com。 |
| 租户信用条目 | 勾选此框以允许用户在上传发票时输入信用。 |
| 启用产品阈值通知 | 勾选此框以在有人上传超过您阈值值的发票时收到通知。 |
| 启用账户关闭日期 | 如果启用,在此日期之后上传的任何发票都需要手动审核才能批准。 |
| 提取已启用 | 您拥有的任何第三方集成将在此列出。要添加新的集成,请发送电子邮件至 support@xtrachef.com。 |
| 为餐厅经理禁用按需提取 | 勾选此框以仅允许在批准的间隔(每周、每月、每天等)进行提取,除非由租户管理员发起。 |
| 在批准时启用类别更新 | 勾选此框以允许租户管理员在批准页面上编辑行项目类别。 |
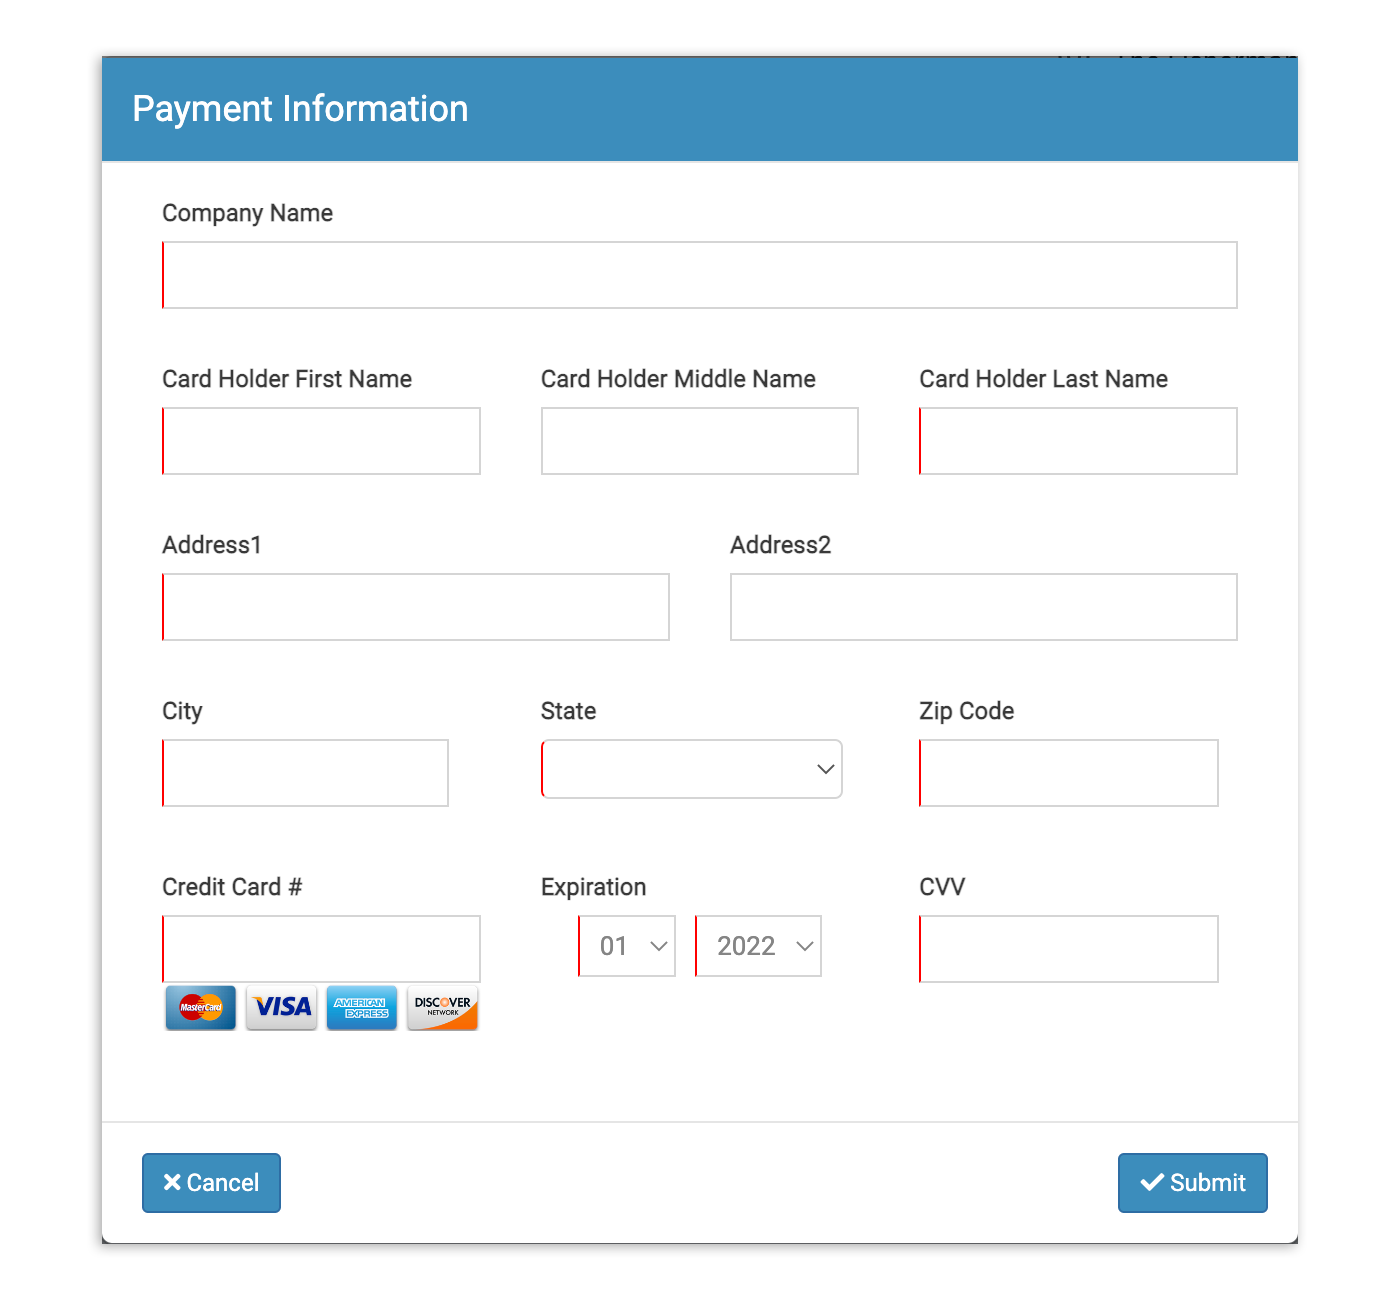
付款信息
基本详情选项卡还包括自定义您的付款信息的选项。选择 付款 按钮以输入公司(或个人)信用卡信息。这可以用于更新与您的 xtraCHEF 订阅相关的付款信息。选择 提交 以保存您的工作。
预算
选择会计期间按钮以重定向到会计期间页面。如果您已经设置了现有的会计期间,您将在此处看到您的期间列表。如果您尚未设置会计期间,请选择+ 添加新期间。

这将弹出一个窗口,您可以在其中输入新会计期间的所有相关详细信息。完成后选择+ 添加。

集成
注意:只有在您将xtraCHEF账户与至少一个第三方库存或会计系统集成后,您才会看到集成标签。要添加新的集成,请发送电子邮件至support@xtrachef.com。
选择集成标签以配置和启用兼容的集成。
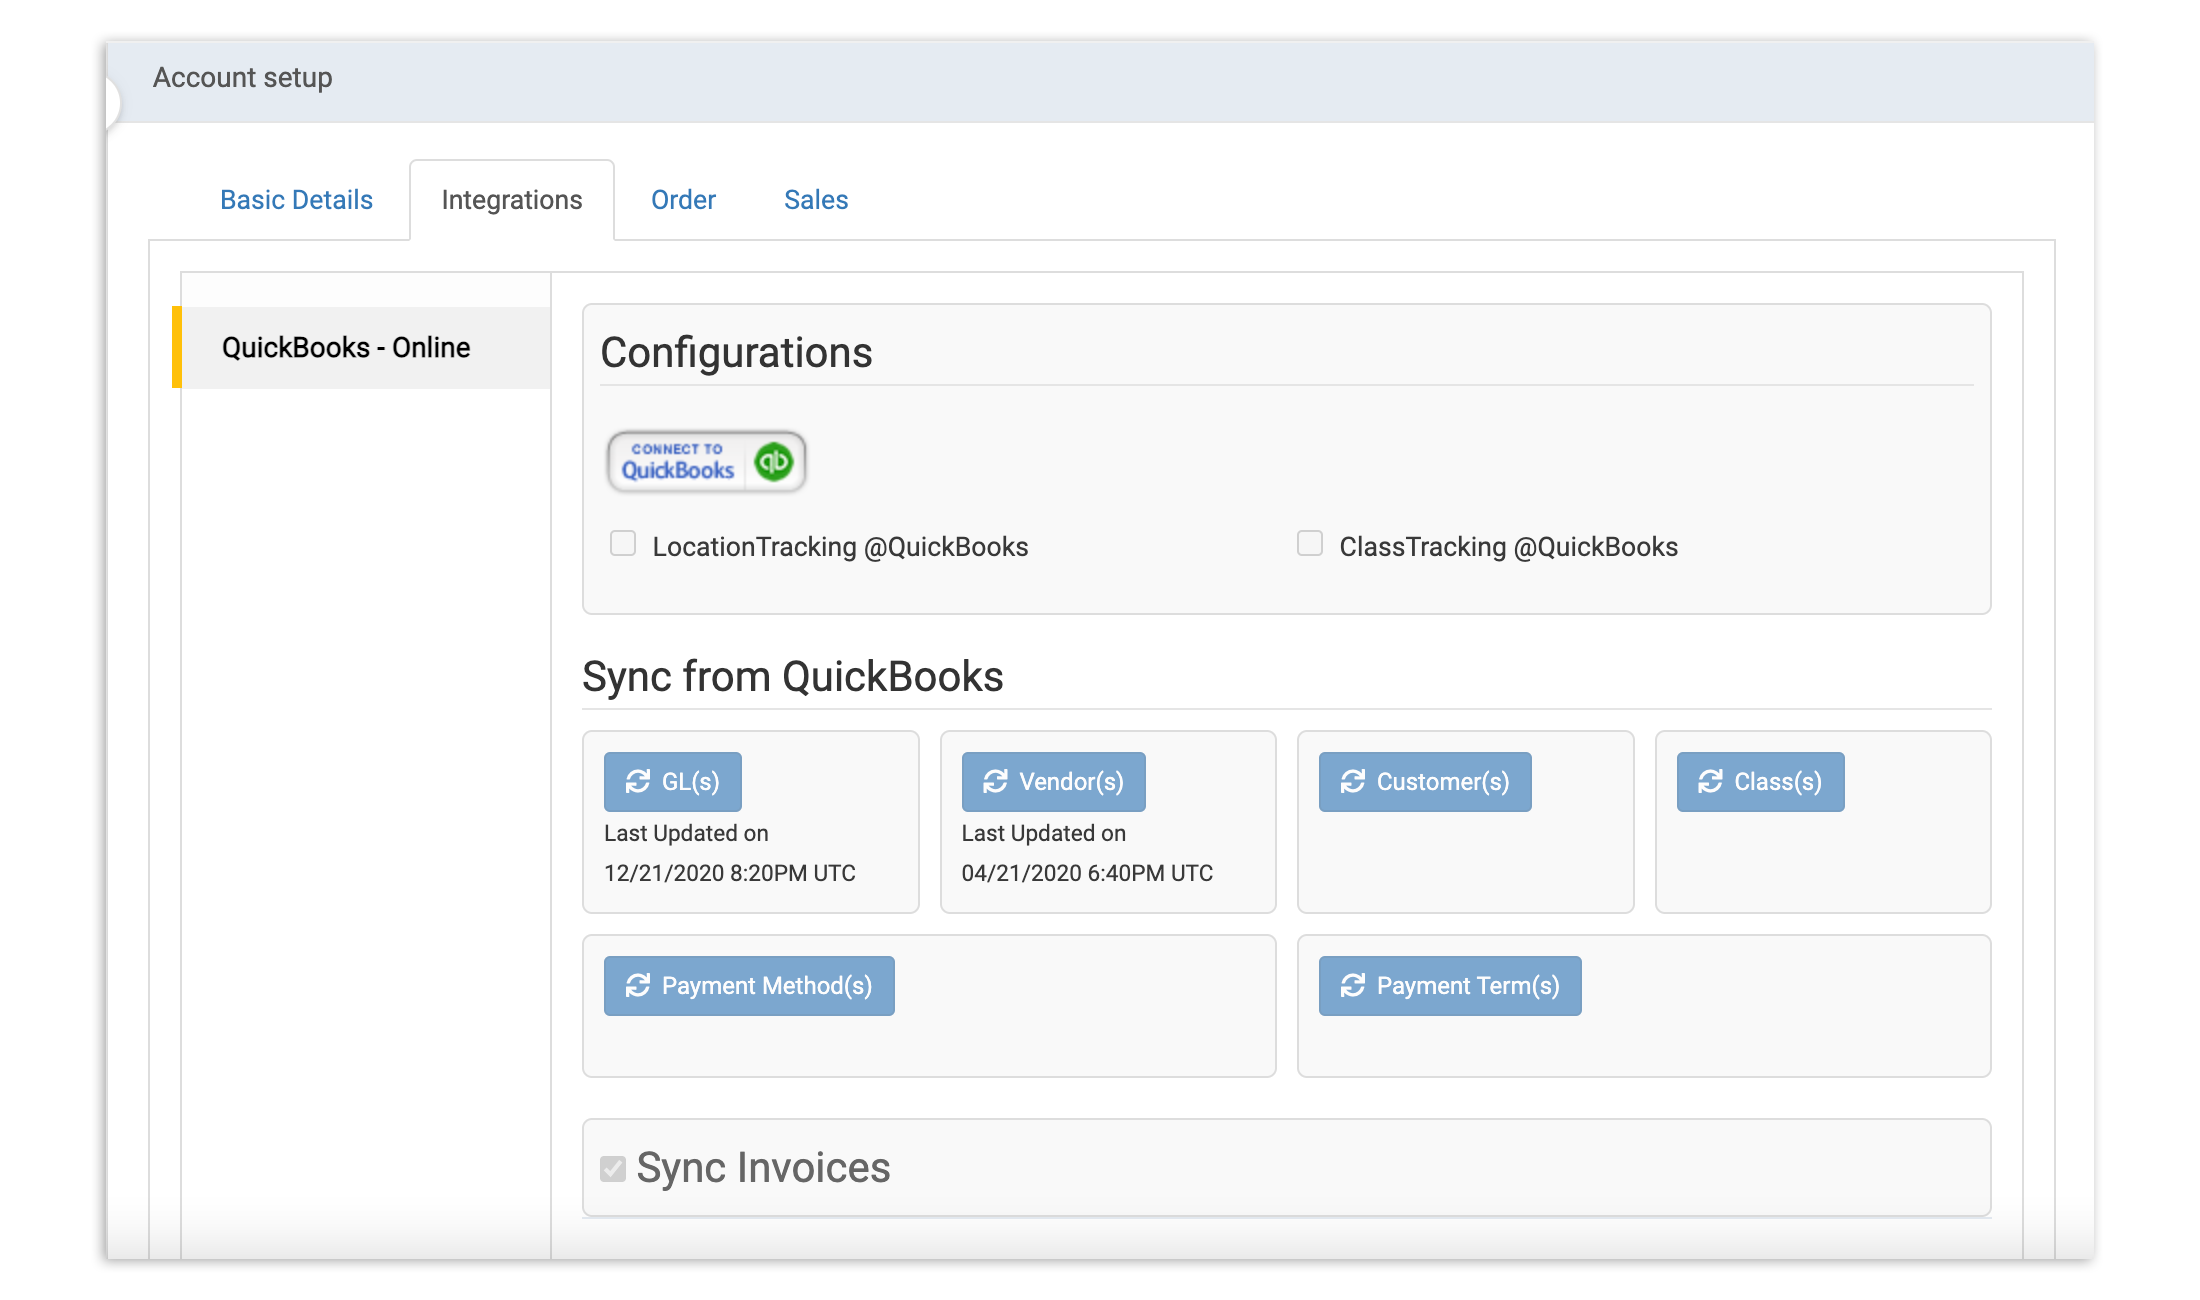
此页面将根据您的账户配置接受的集成选项进行填充。有关与您的会计设置相关的集成资源,请考虑阅读我们在支持中心的文章,内容包括QuickBooks在线集成、QuickBooks桌面集成、Sage Intacct集成等。
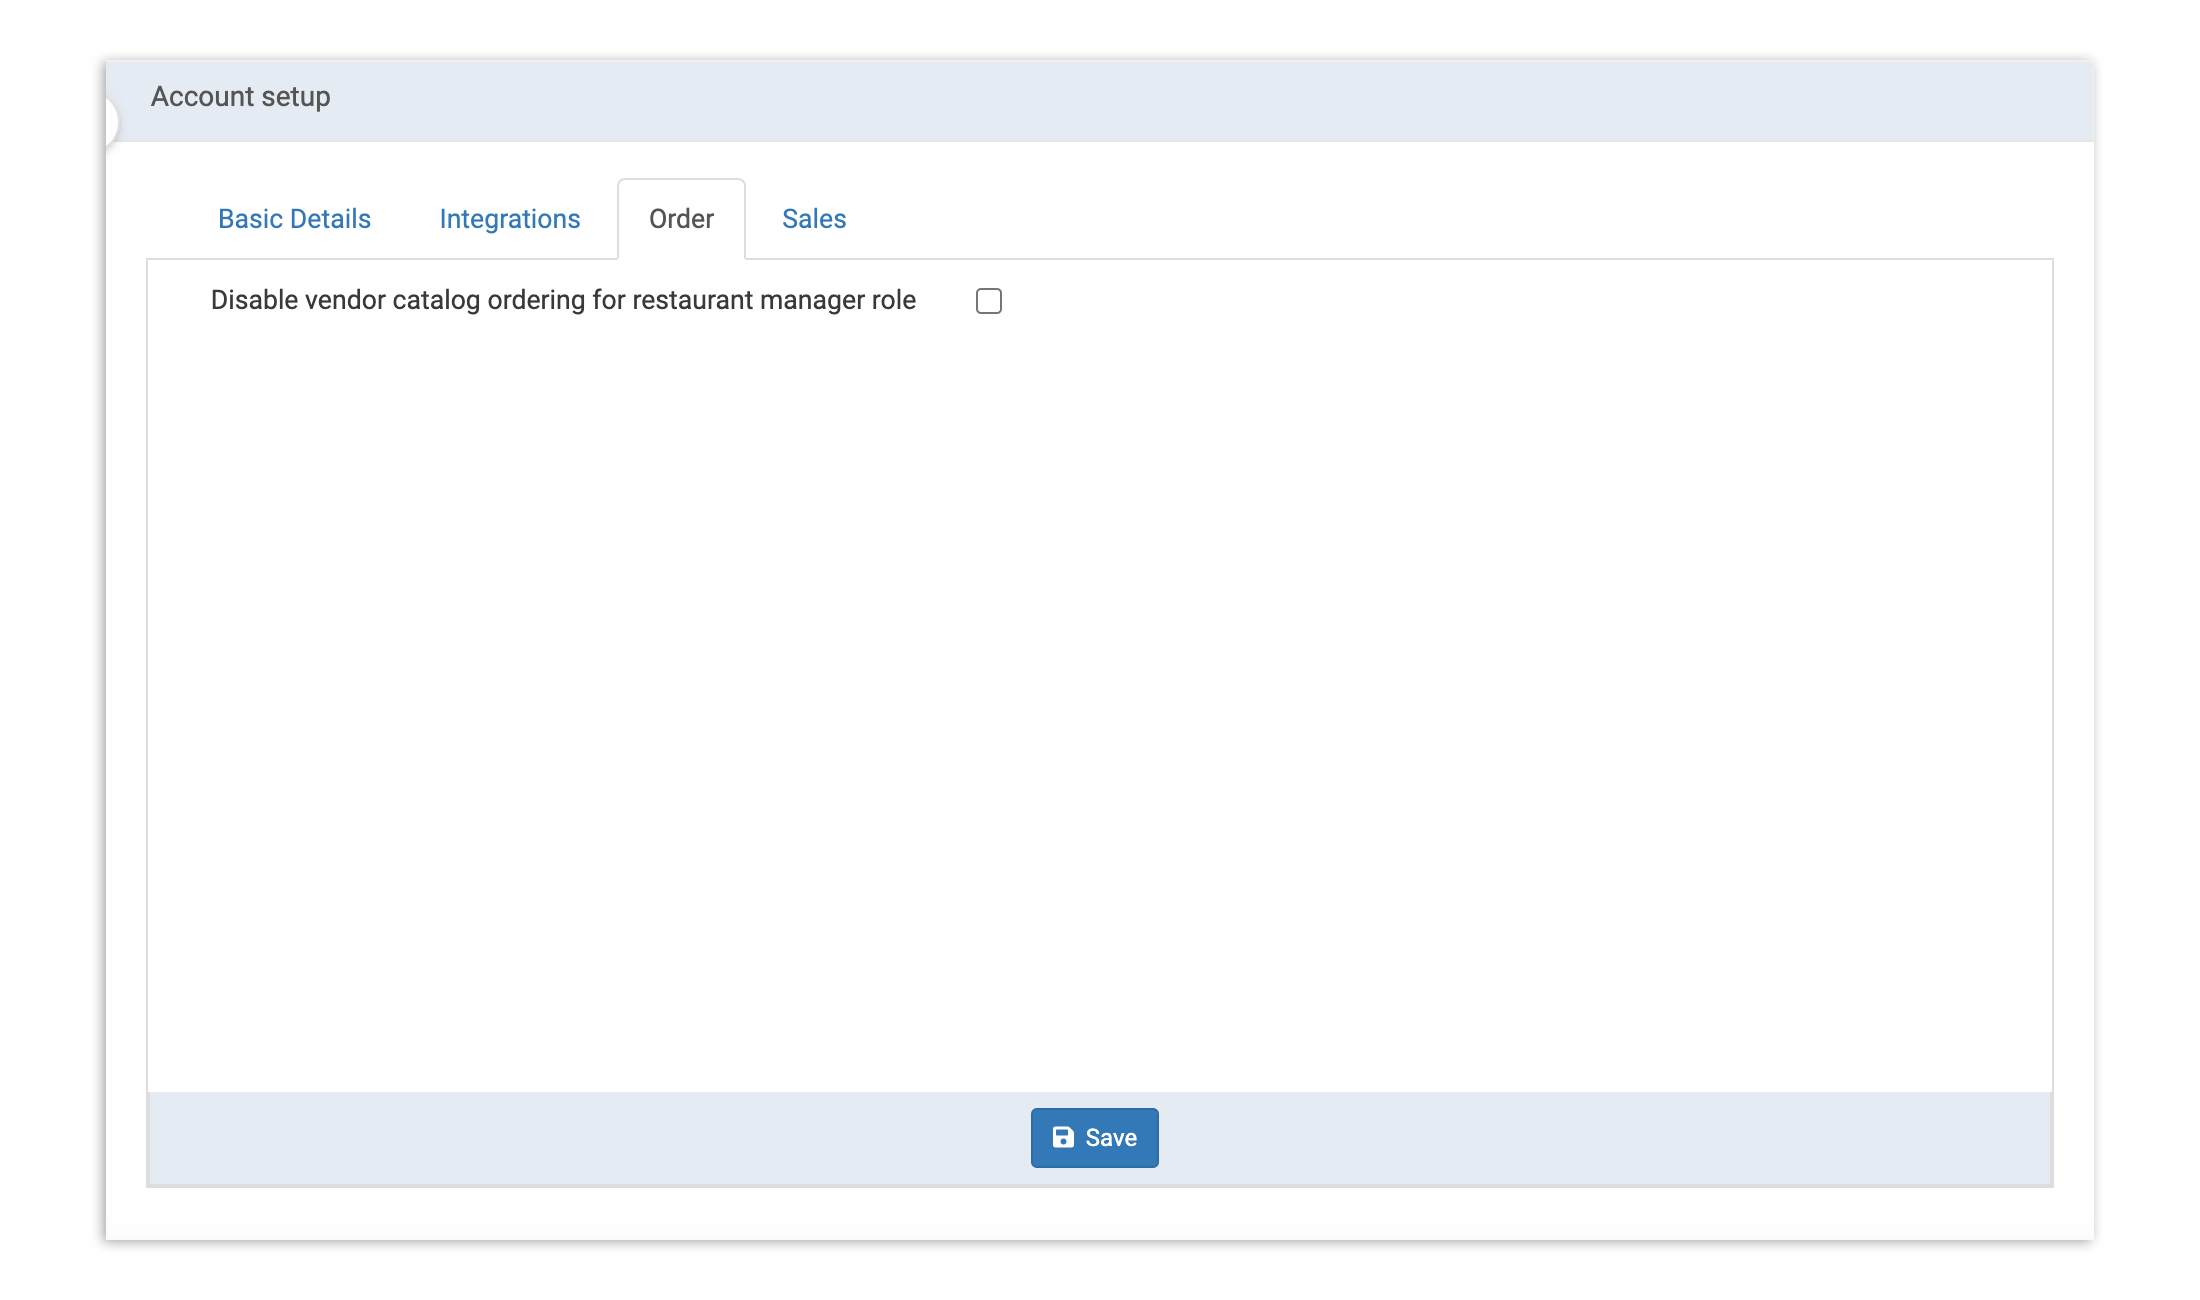
订单
订单标签可用于启用或阻止具有餐厅经理级别访问权限的用户向xtraCHEF中的供应商下订单。要做到这一点,请选择禁用餐厅经理角色的供应商目录订购。 然后选择保存。
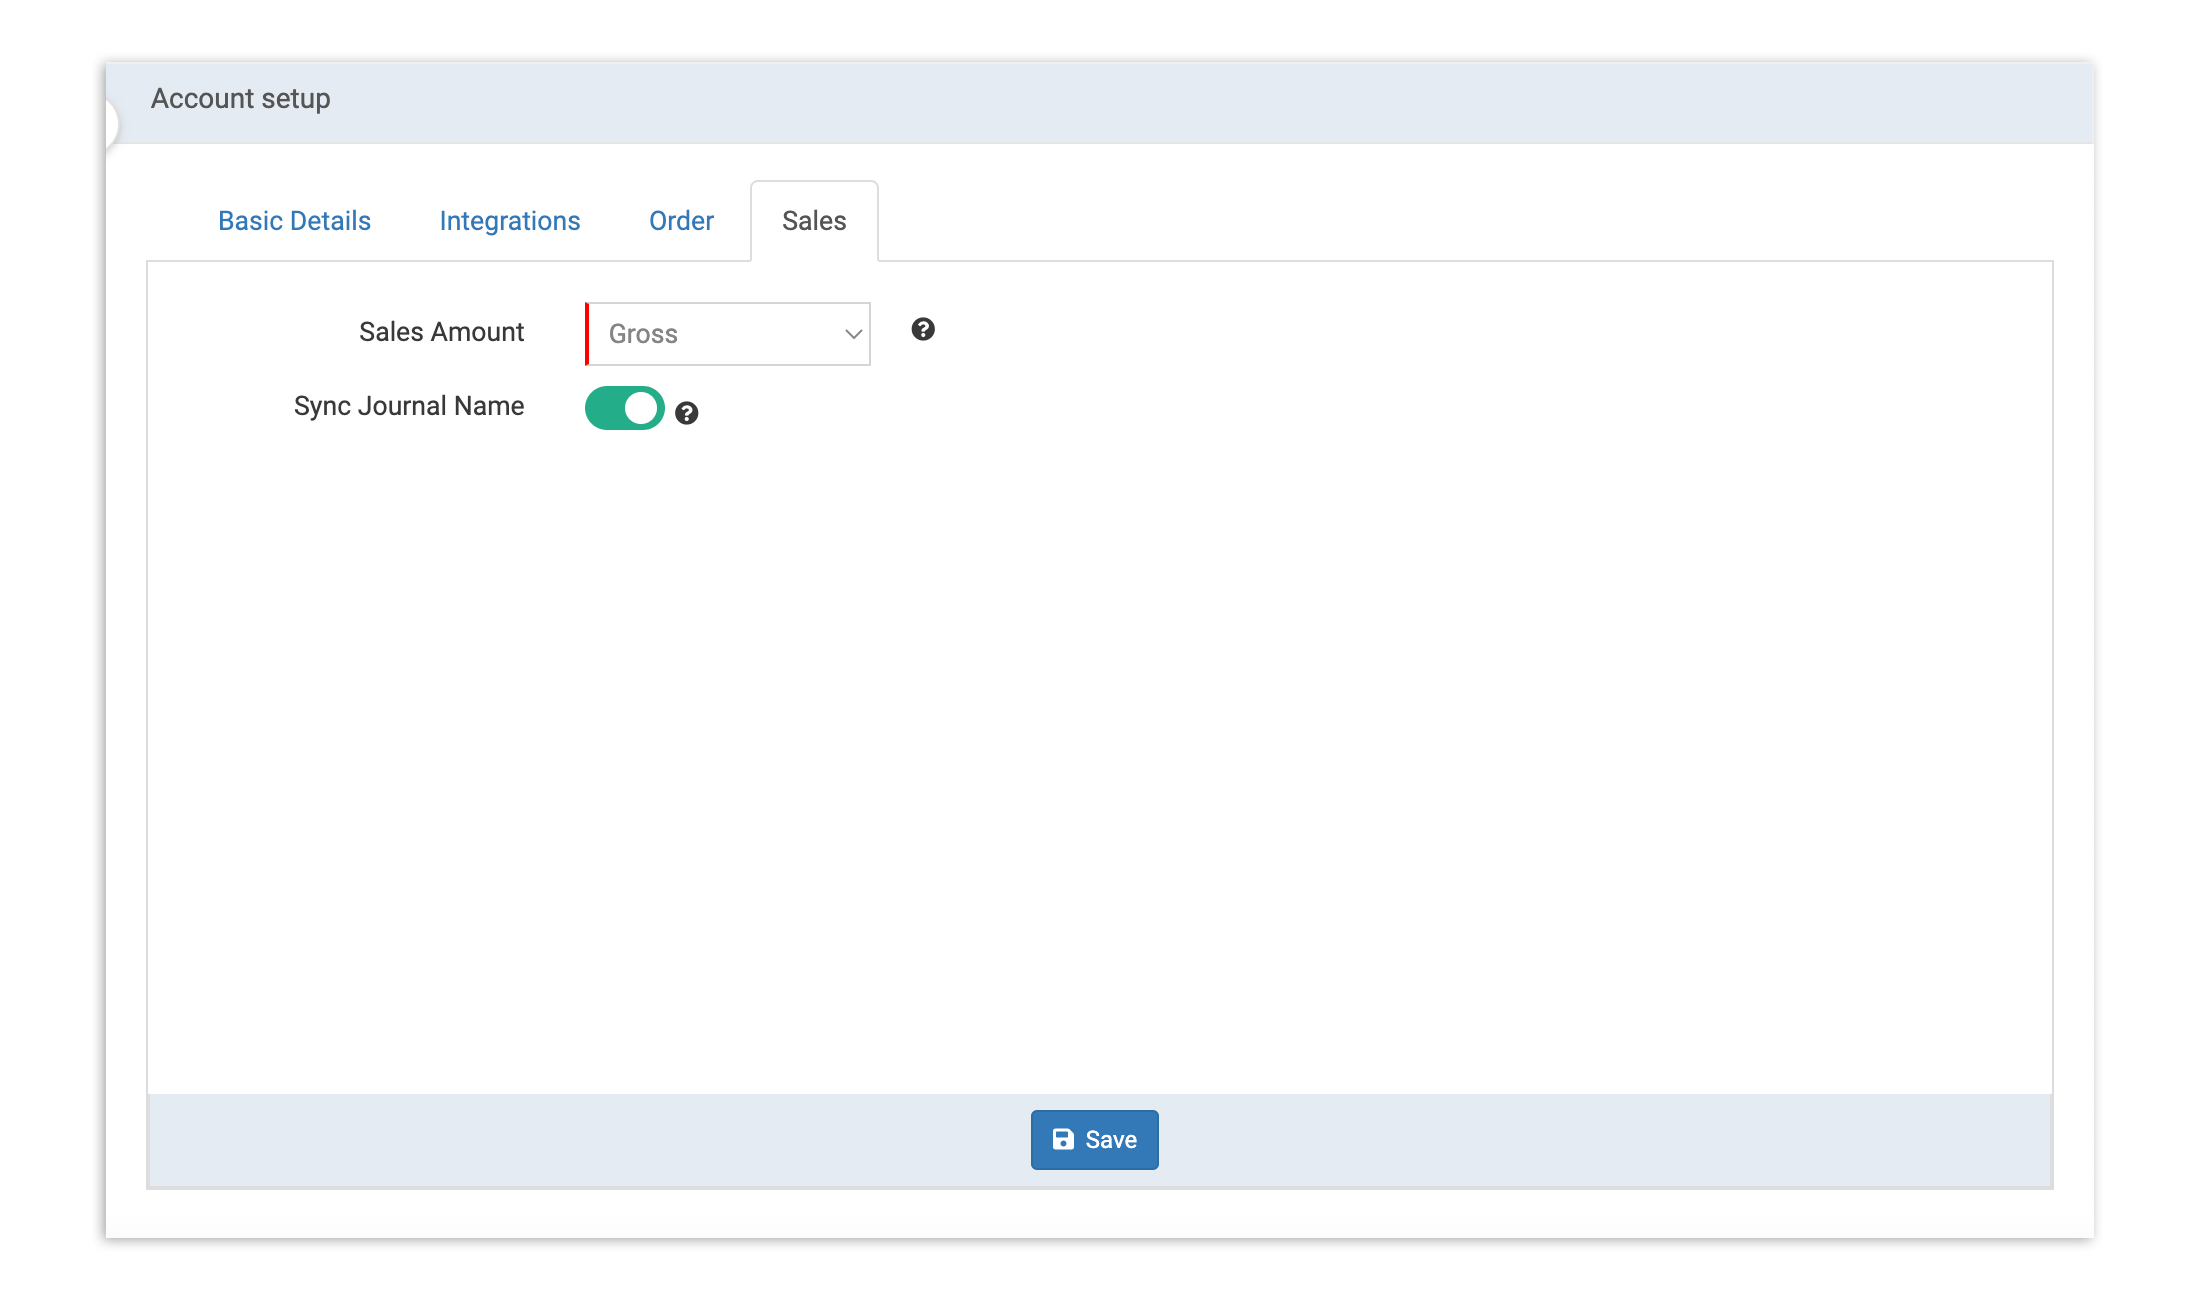
销售
注意: 只有当您的 xtraCHEF 账户与 Toast POS 同步时,销售 标签中的信息才会显示。要将您的 Toast POS 与 xtraCHEF 连接,请发送电子邮件至 support@xtrachef.com。
使用销售标签自定义您希望如何显示销售情况,以及是否希望将您的会计系统的日记条目与 Toast 中显示的名称和日期进行同步。