Toast Flex 3 Installation Guide
Last updated: Feb 27, 2026, 1:33 PM
- Flex 3 Terminal Installation Guide Video
- Site Readiness
- Set Up the Terminal
- Flex 3 Terminal Wedge Setup
- Set Up the Mount
- Additional Resources
Toast Flex 3 Terminal Installation Guide Video
Installation video guide for the Toast Flex 3 Terminal.
Toast Flex 3 Terminal Site Readiness
Before you get started, confirm that you have all the hardware for installation based on your purchase and configuration. Identify where you want your Toast Flex 3 terminal to be located. Ensure a power outlet and ideally a wall Ethernet port are nearby (measuring the distance to wall outlets prior to installation can save time). Check that you have all configuration devices before beginning Terminal setup.
Note: Kiosk, Kitchen Display, and other configs might include different devices and accessories.
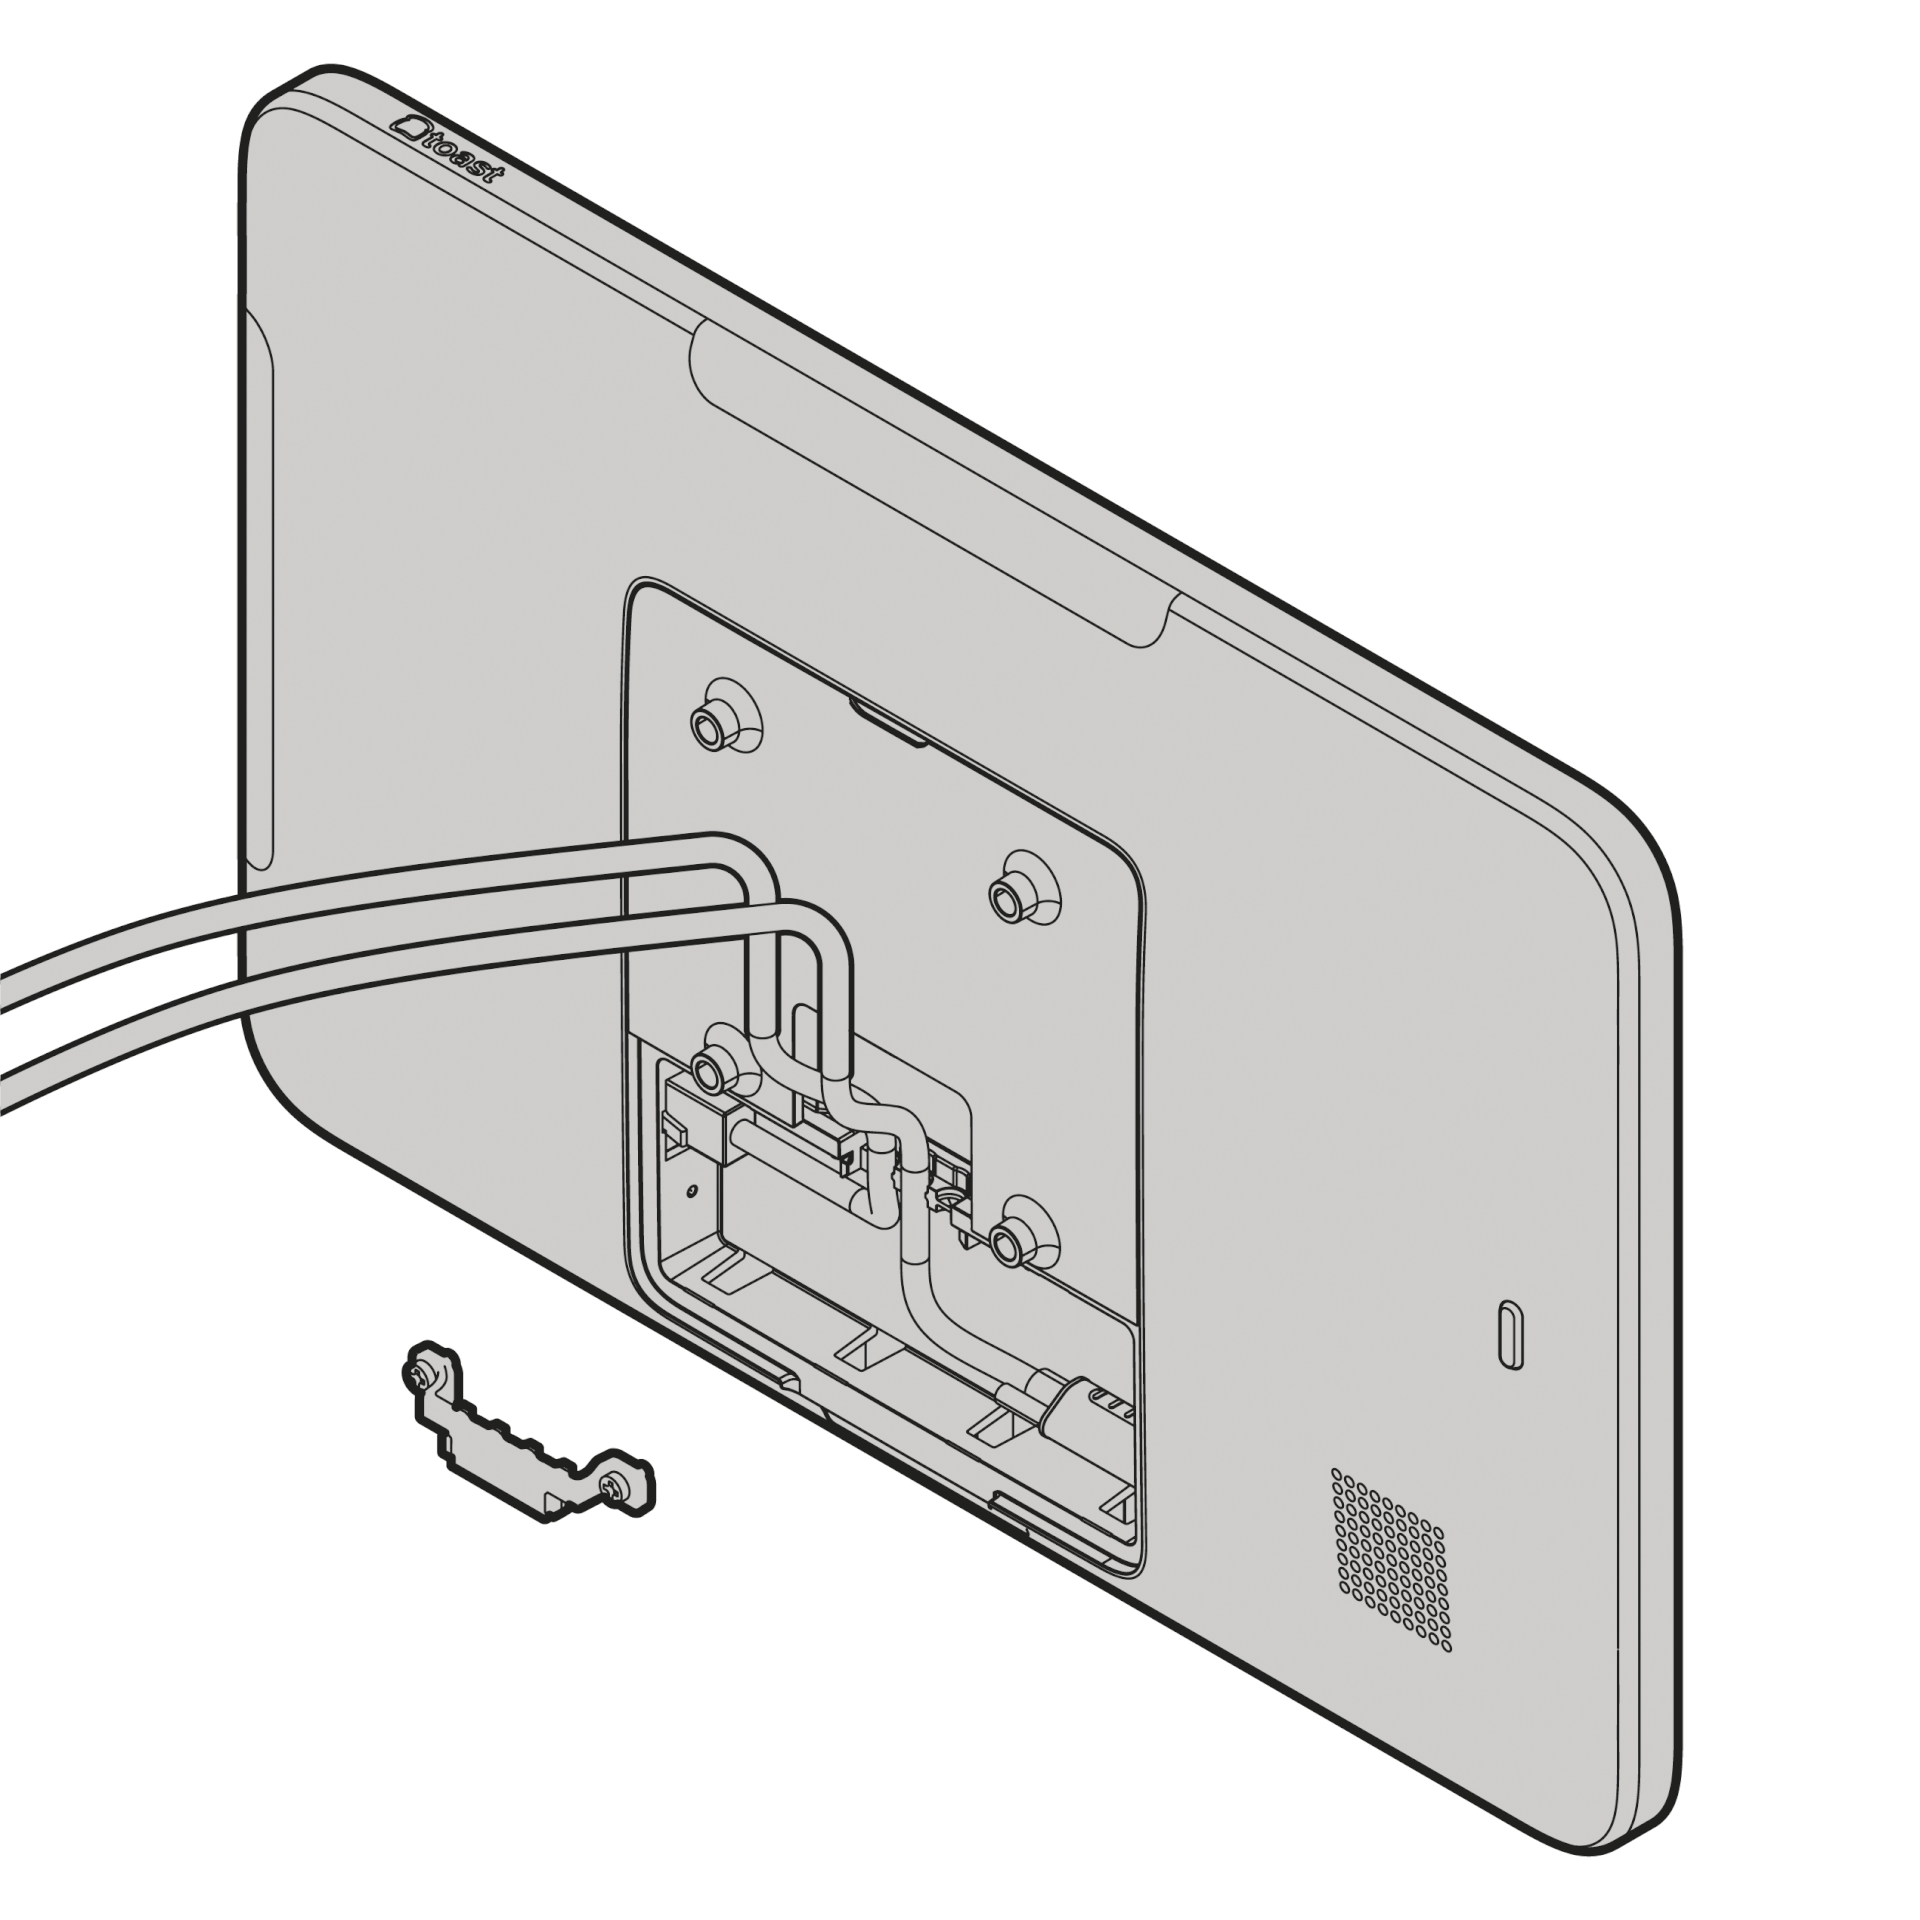
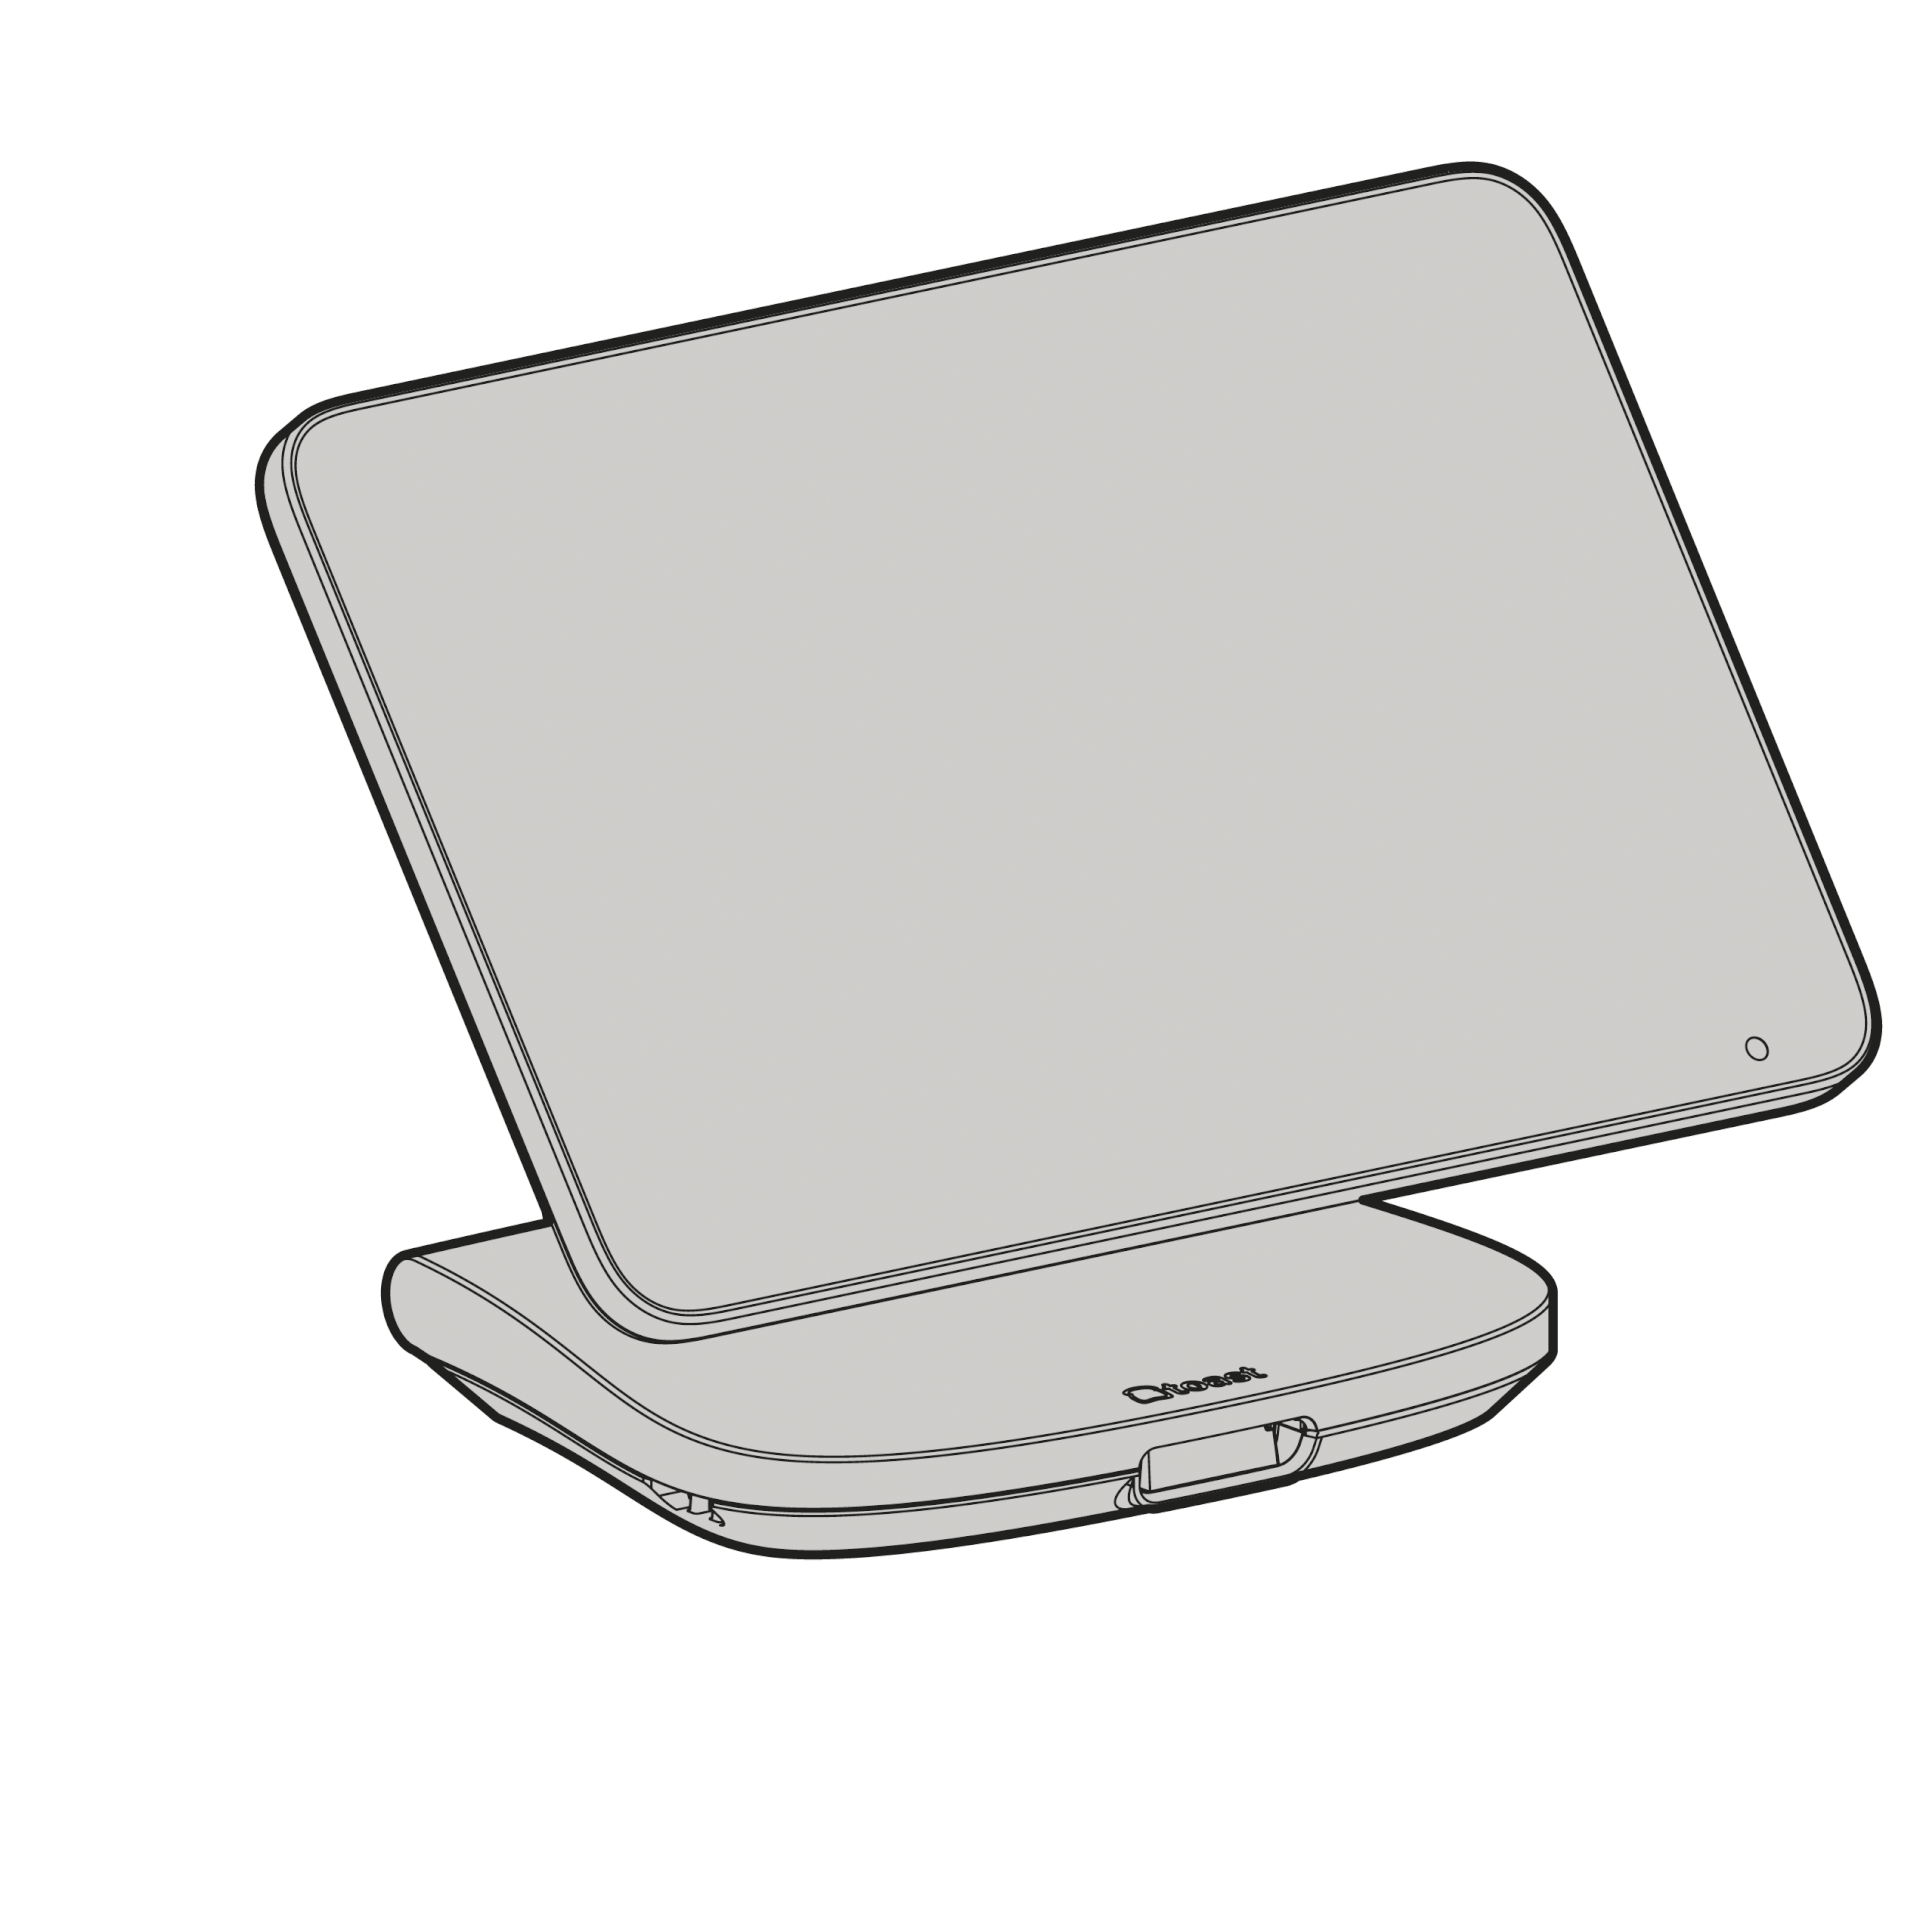
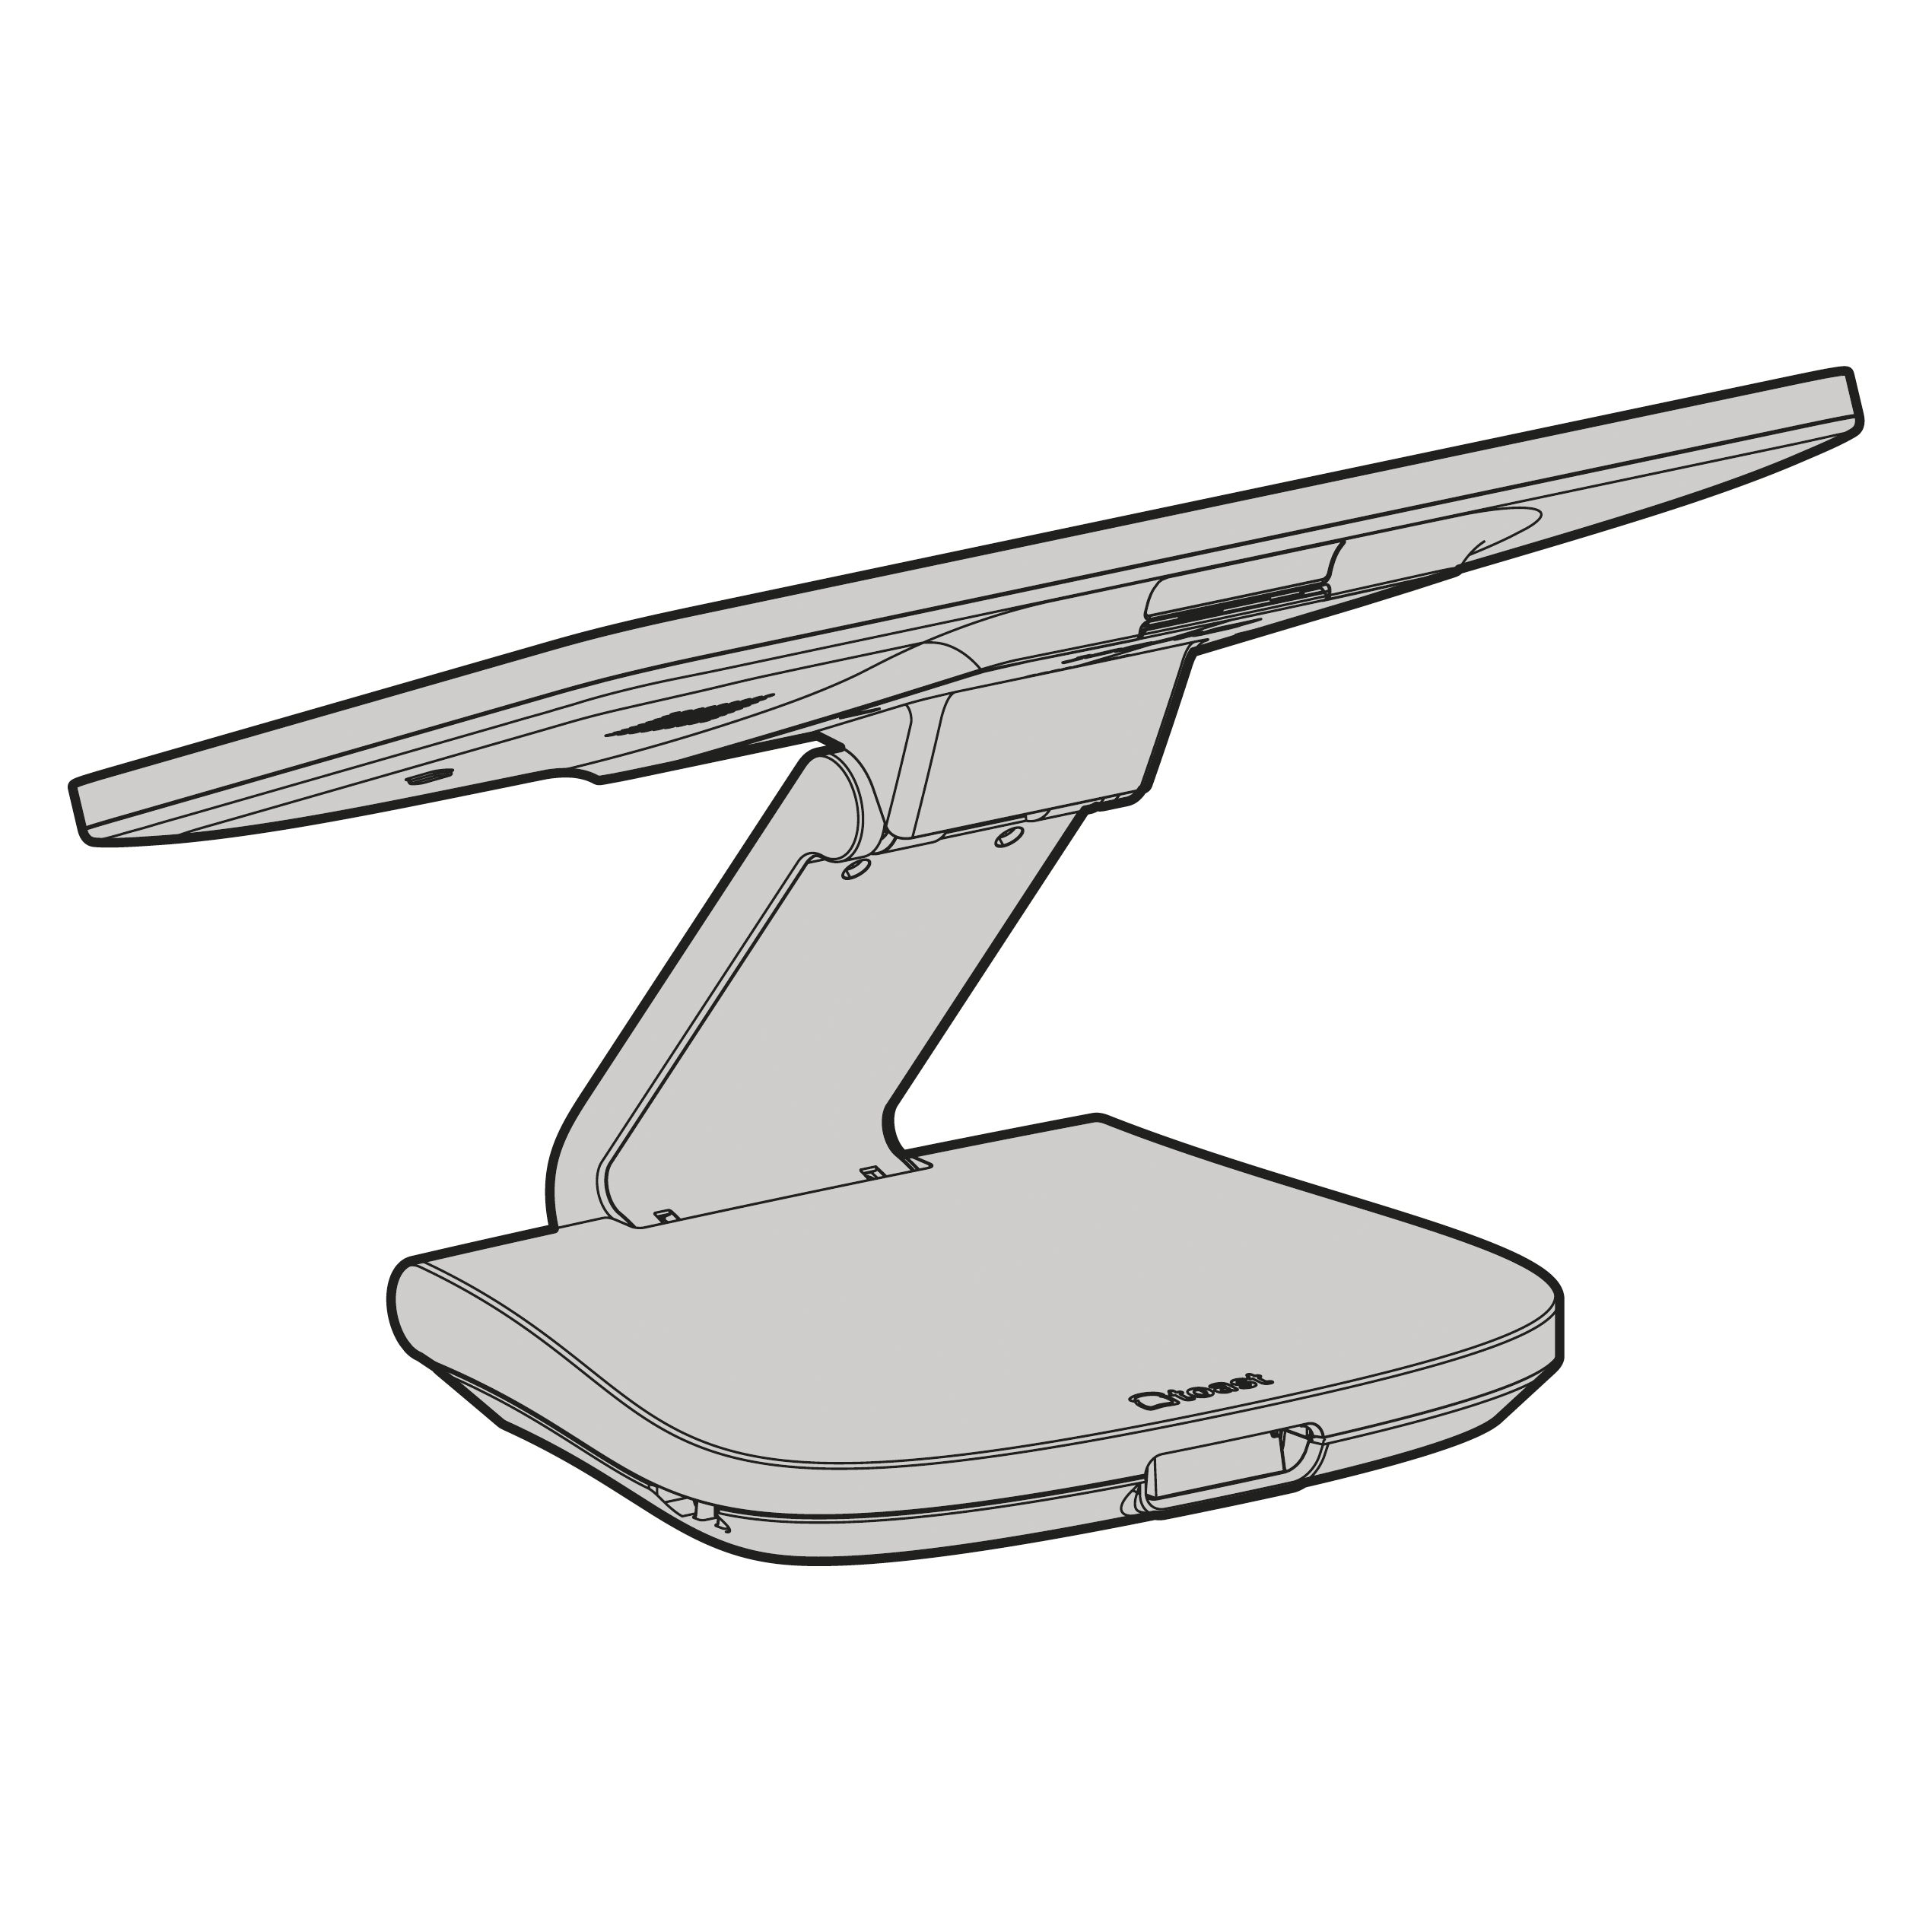
Set Up the Toast Flex 3 Terminal
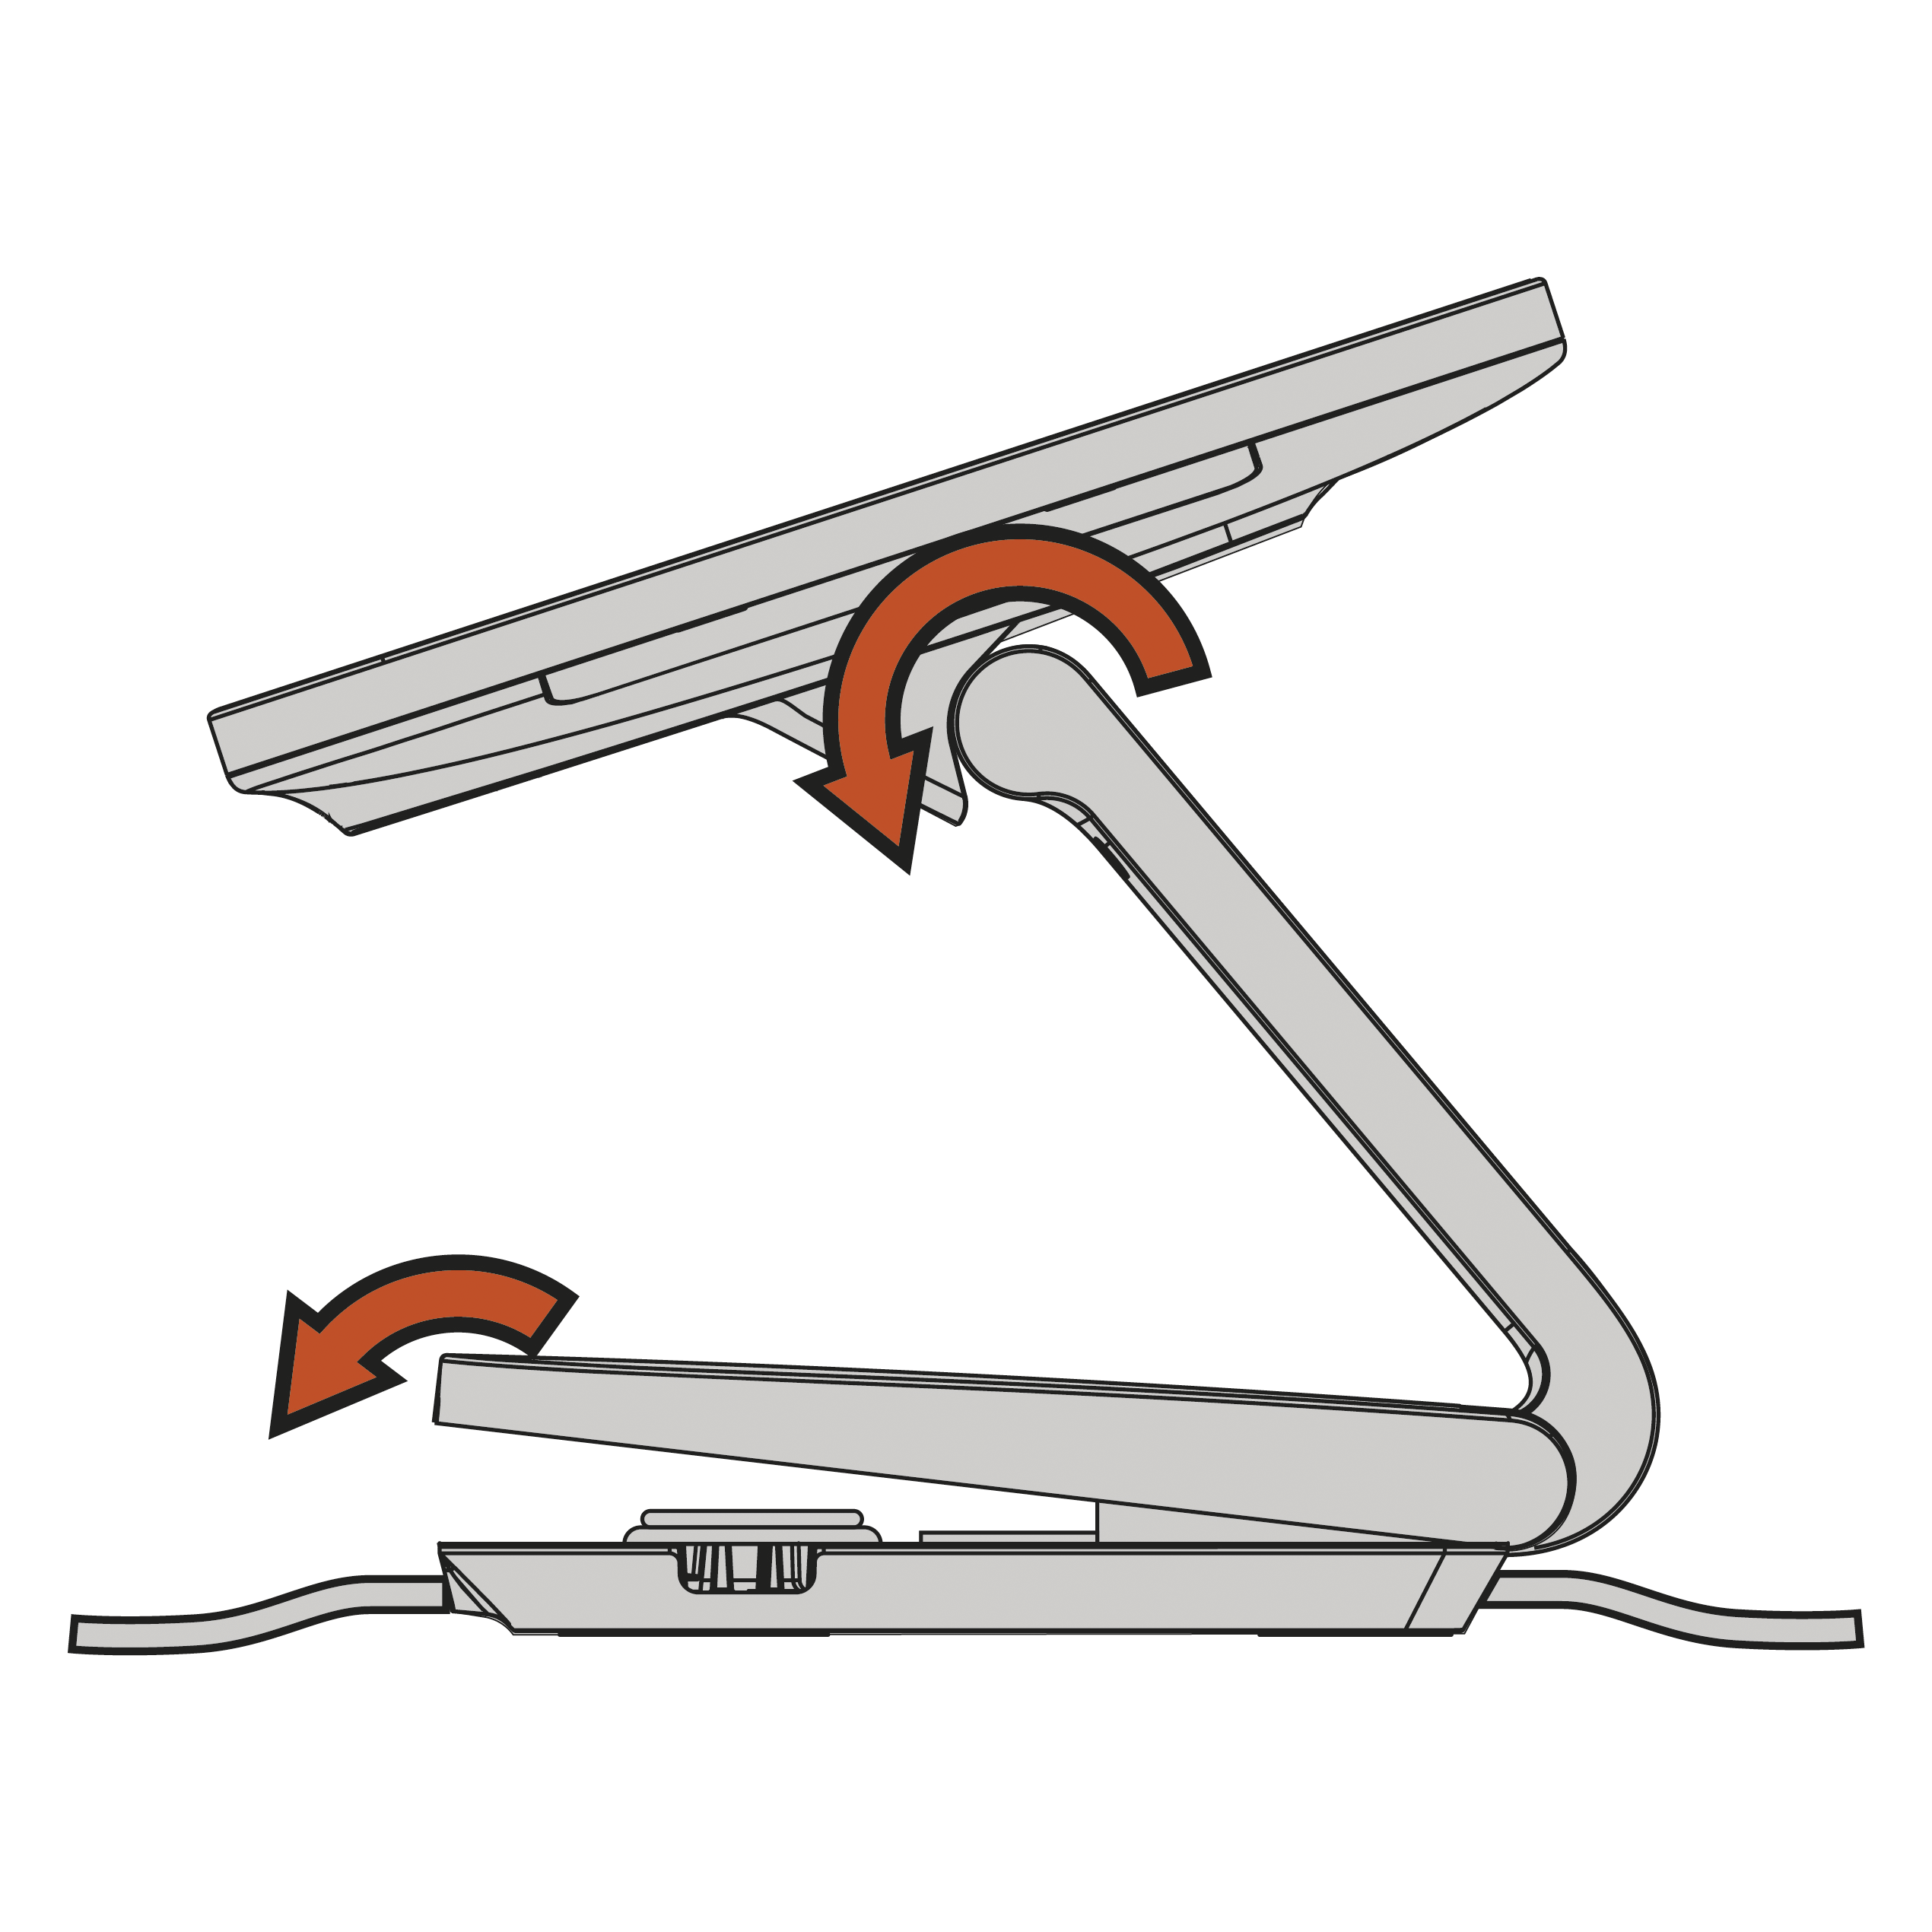
- Place the Toast Flex 3 terminal in your preferred location.
- Lift the neck until the terminal screen reaches its highest point.
- Tilt the terminal screen forward until it stops rotating, aligning it with the front of the Toast logo.
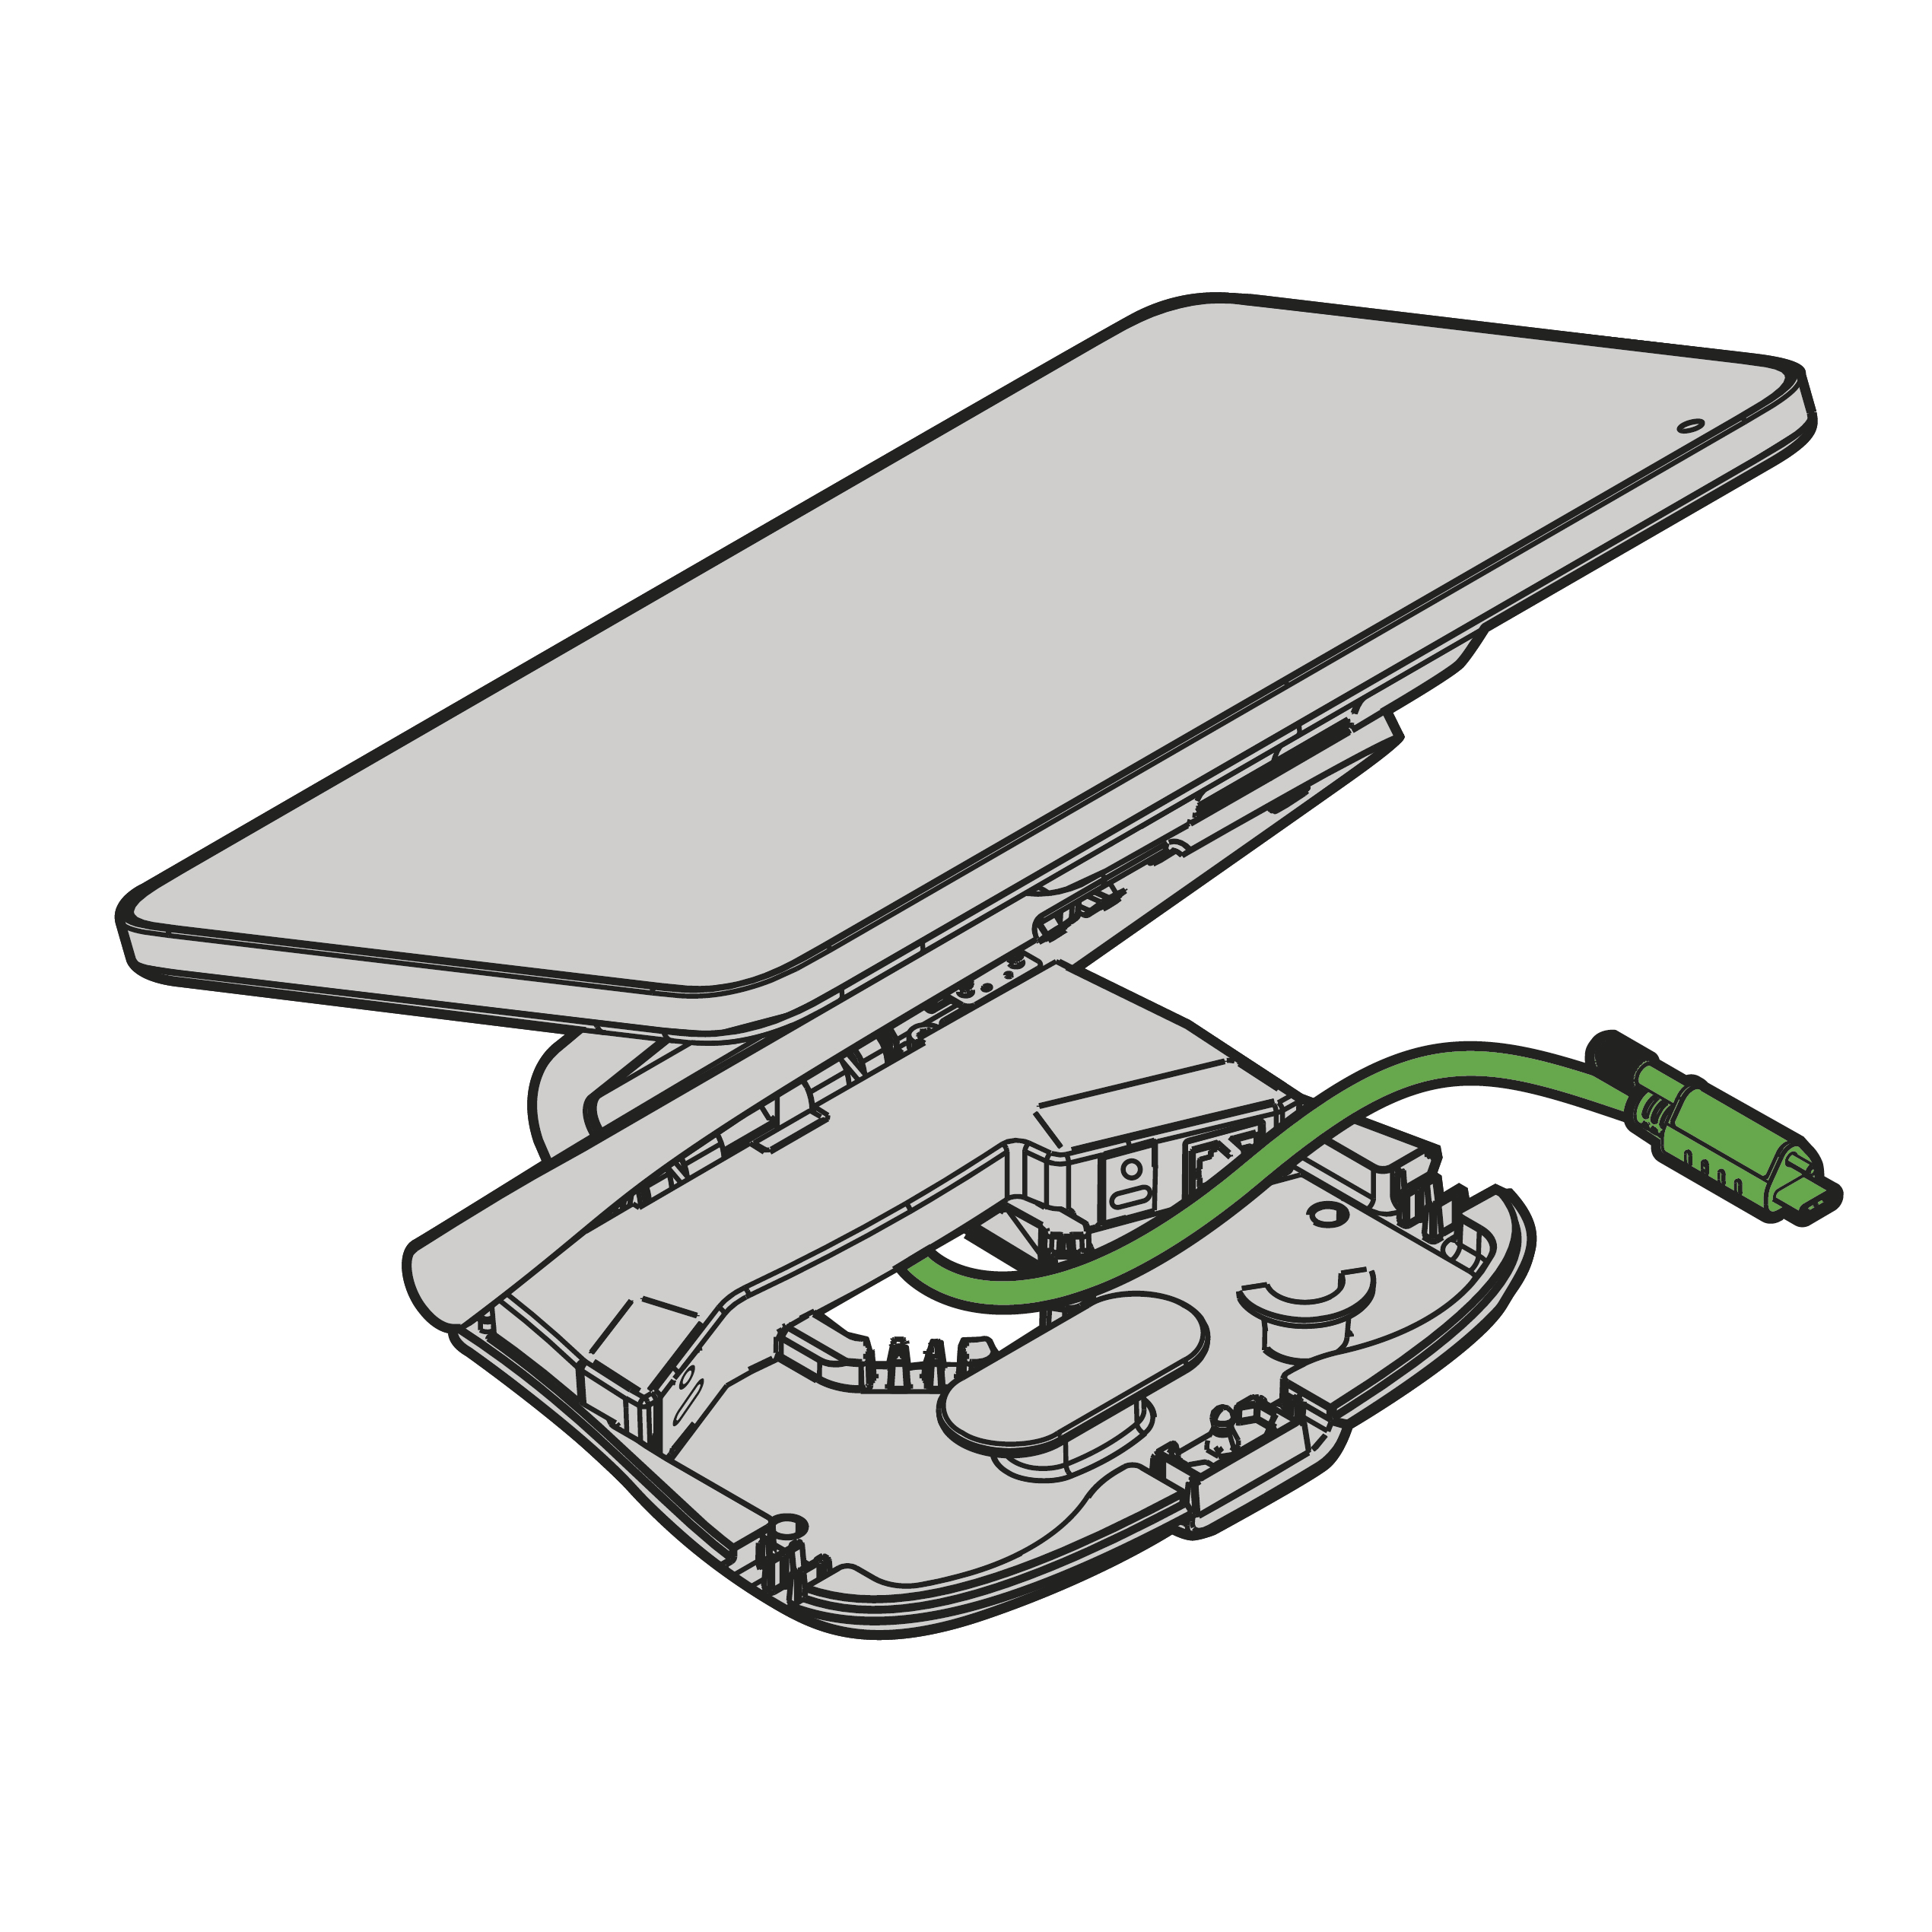
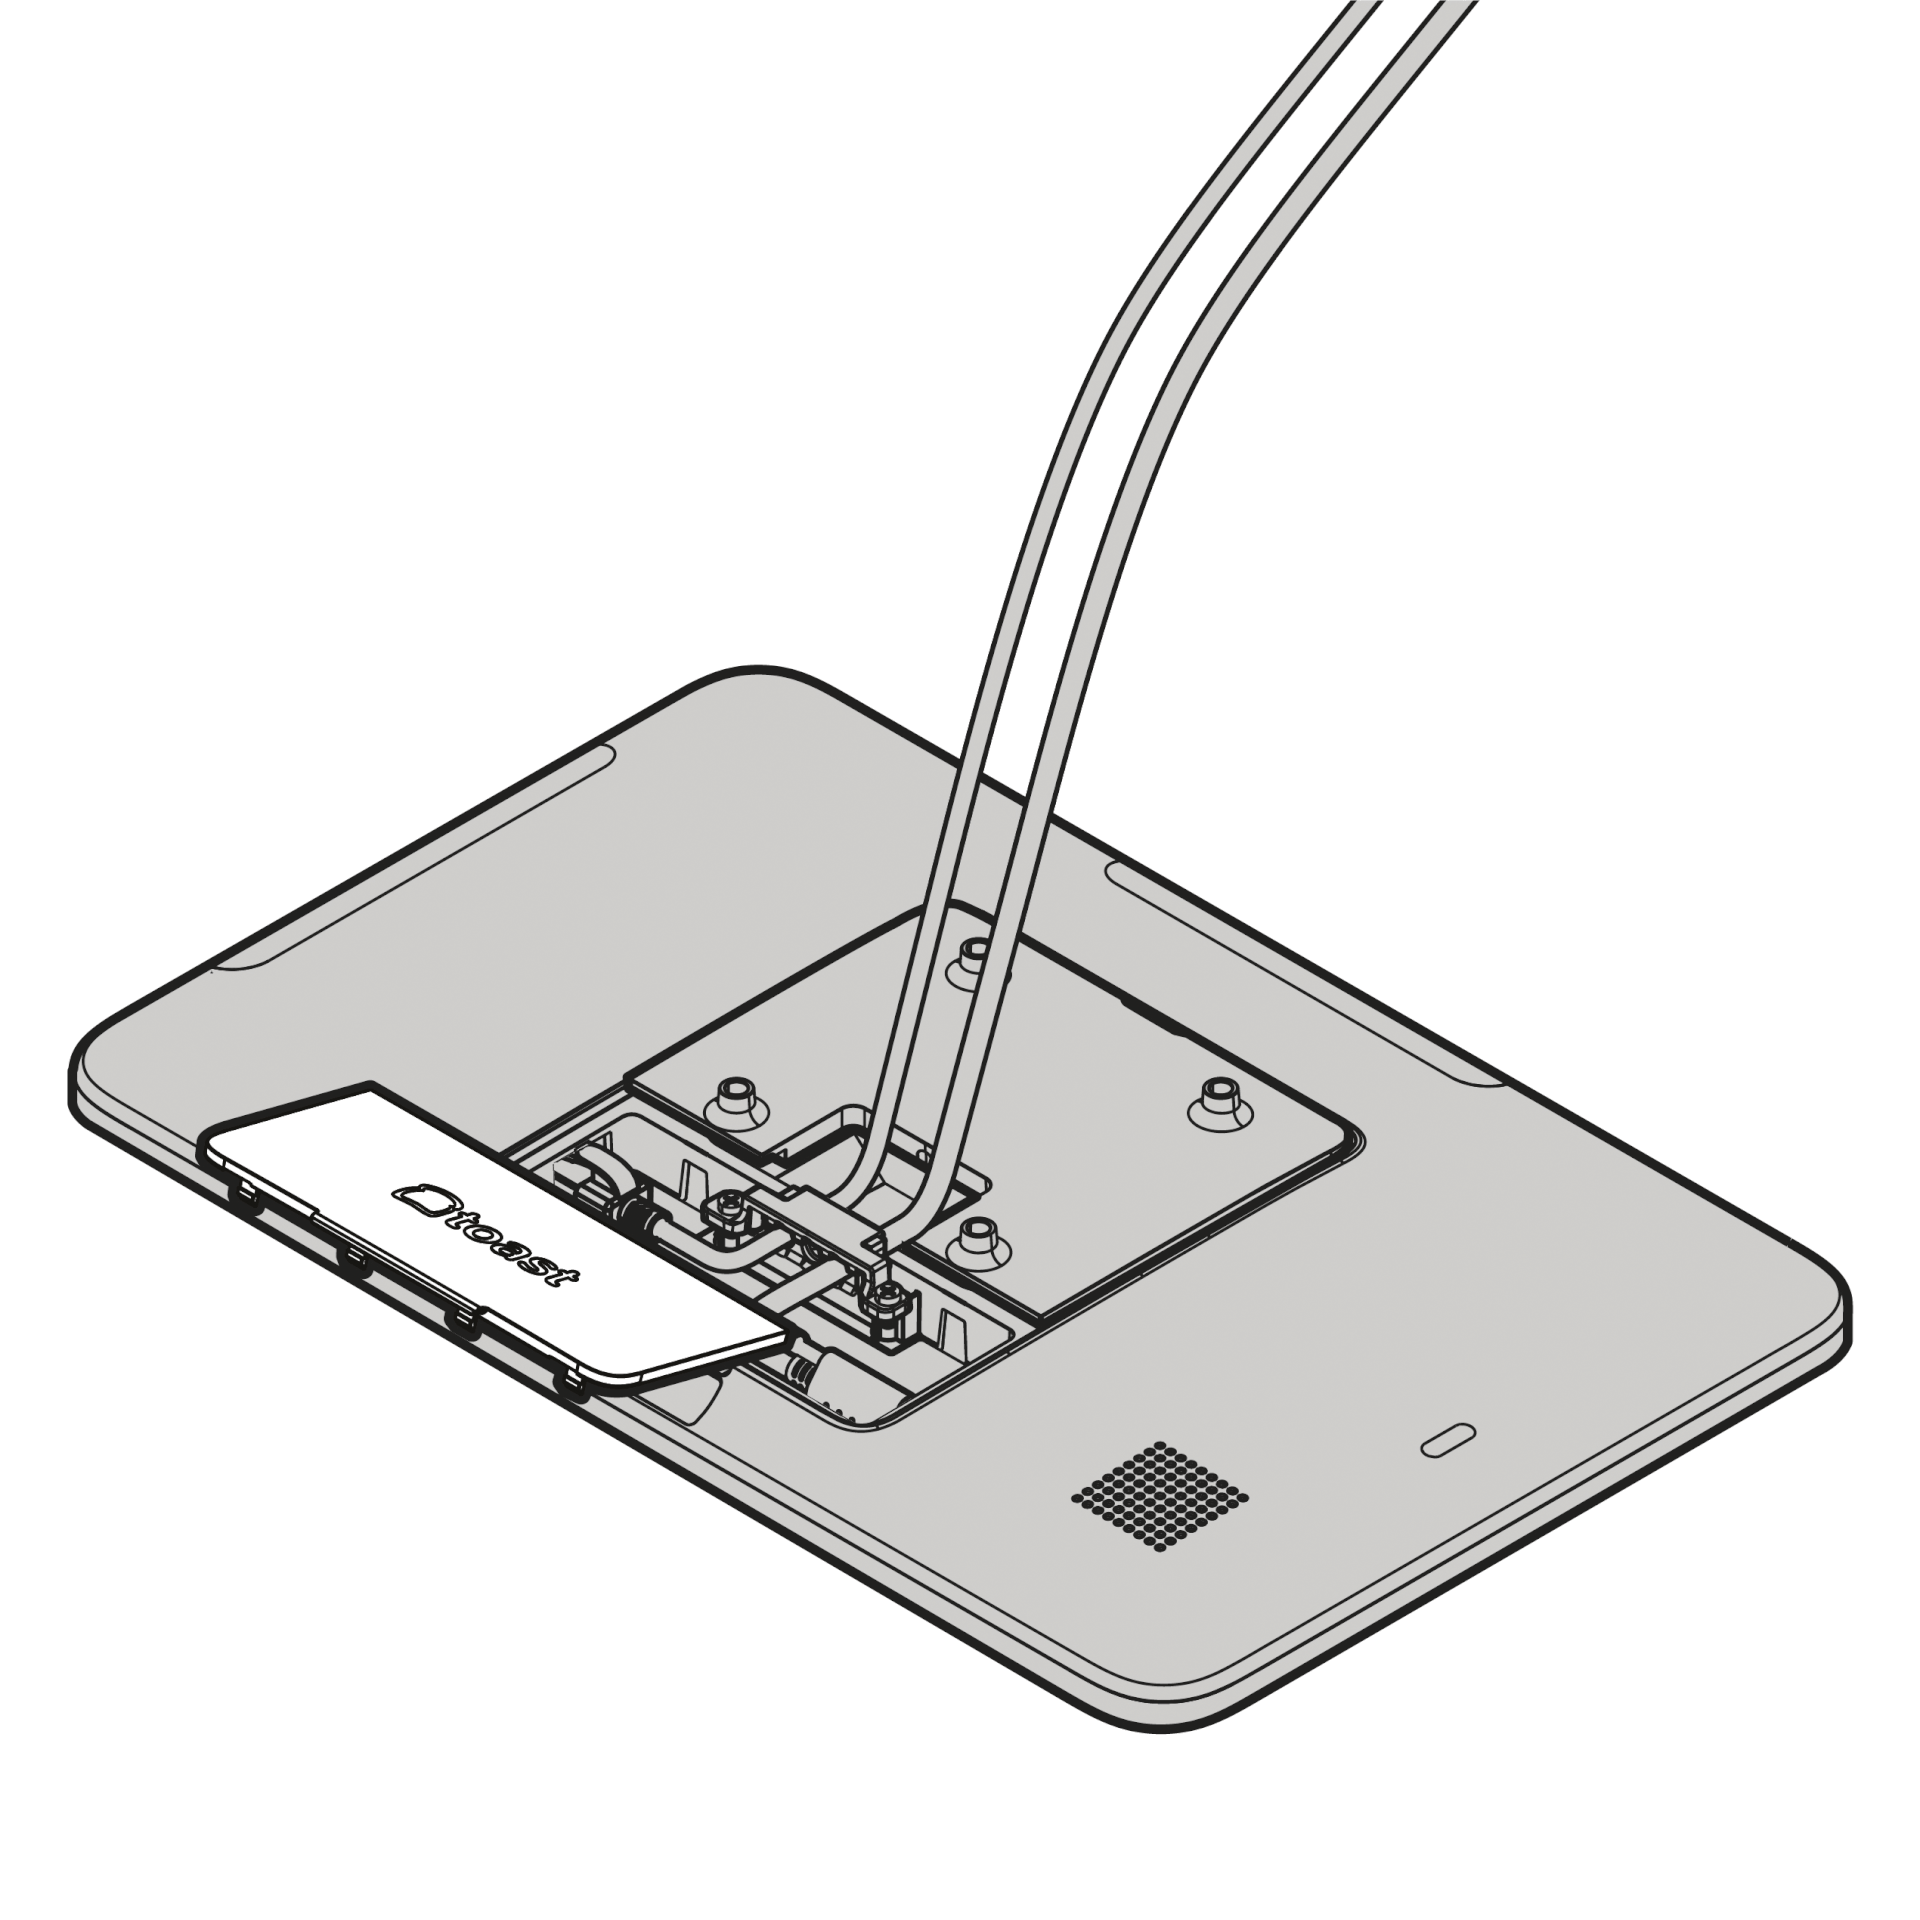
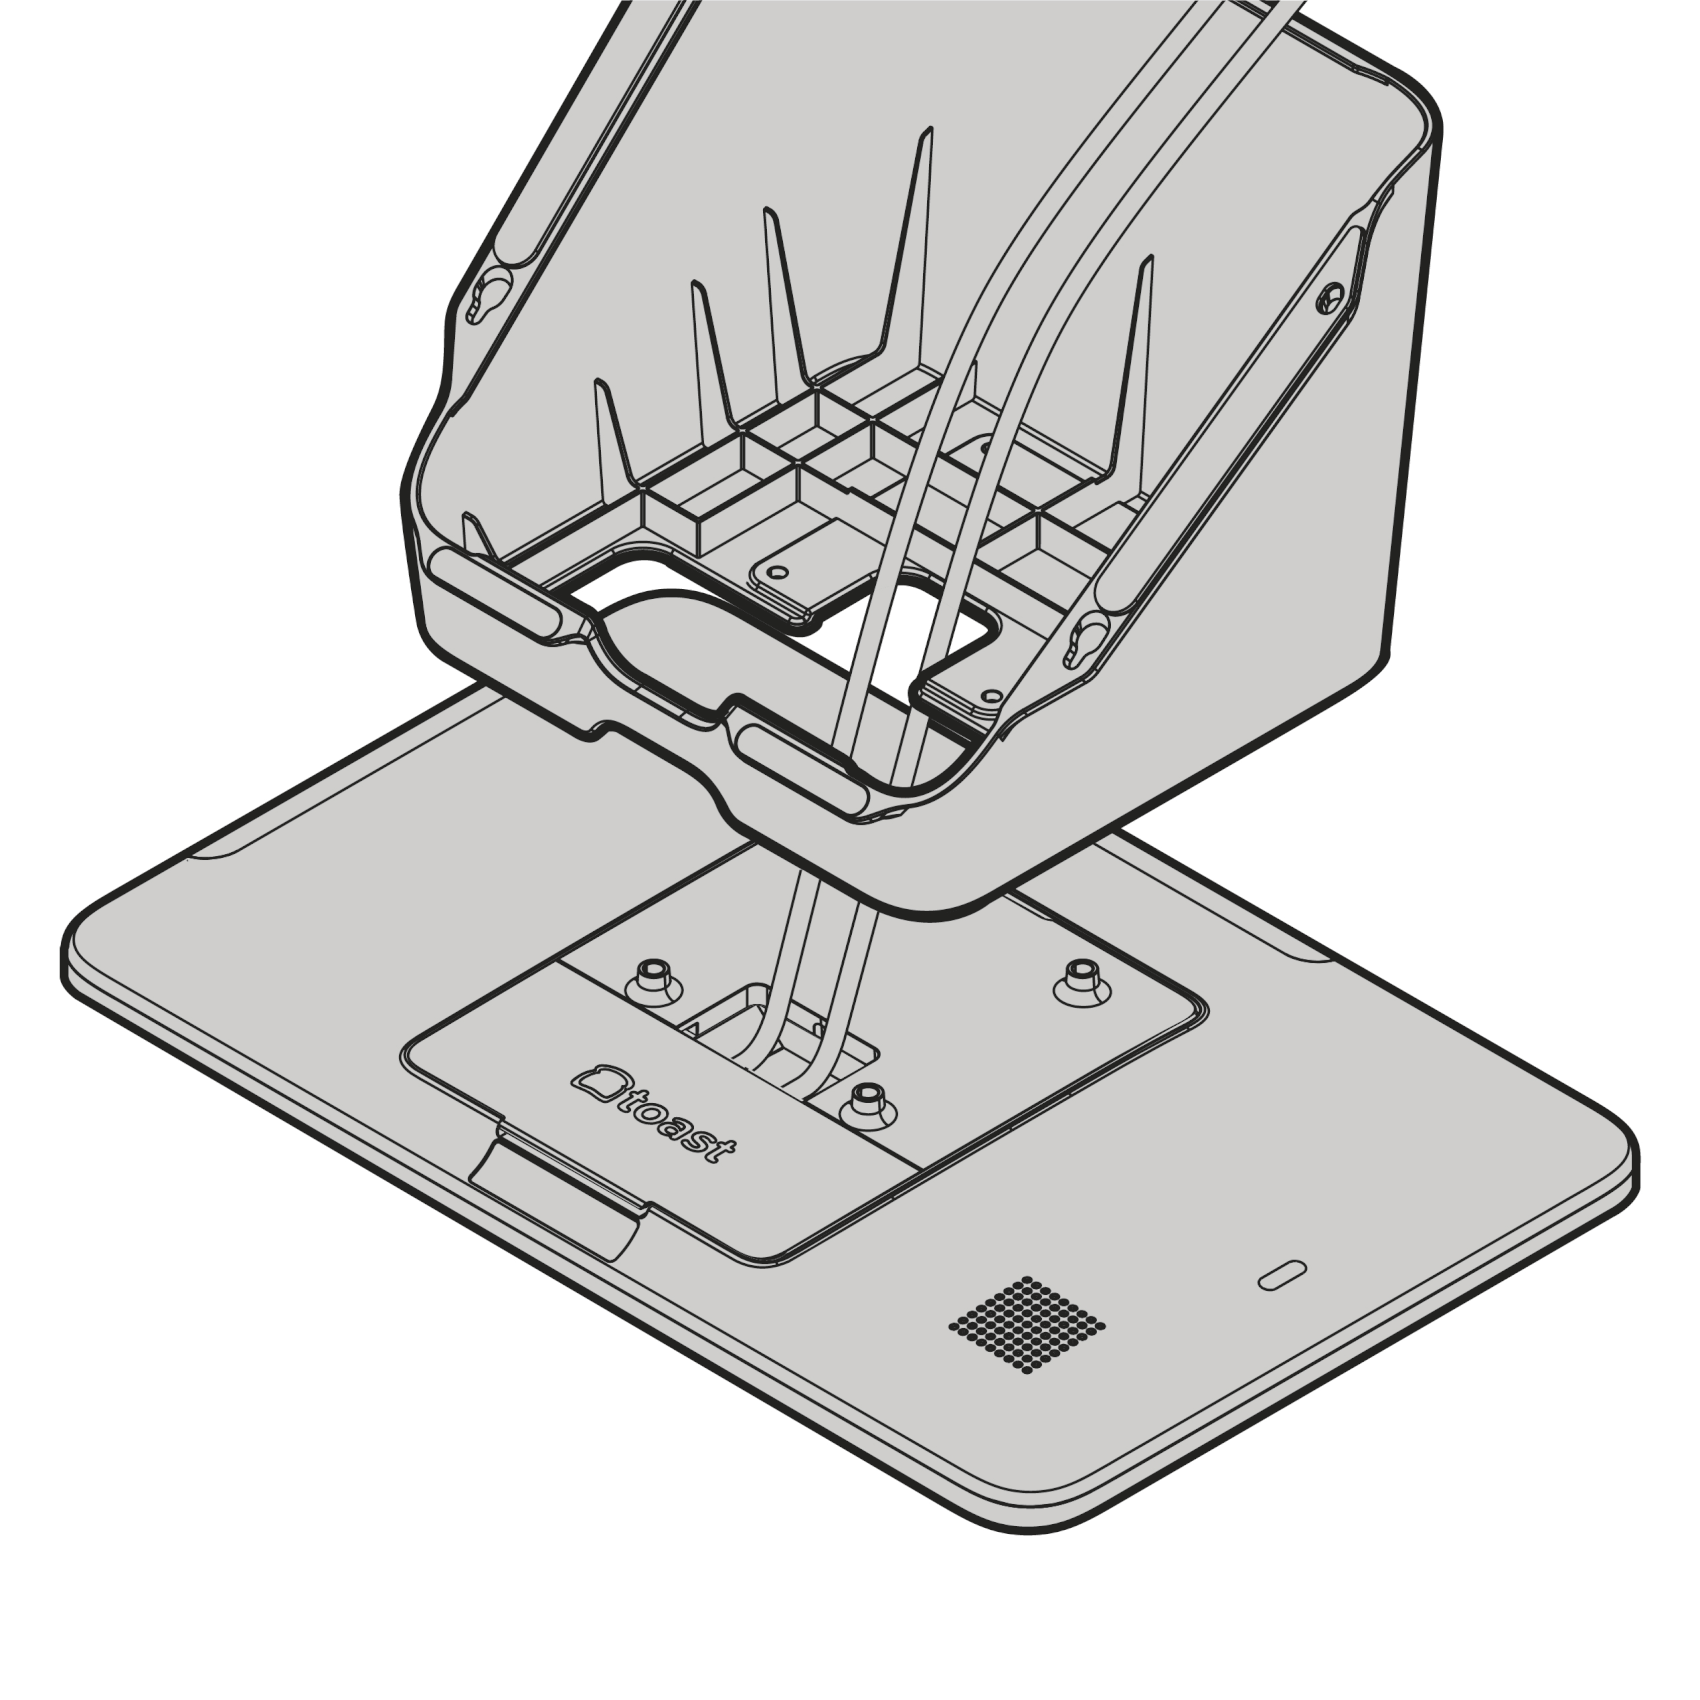
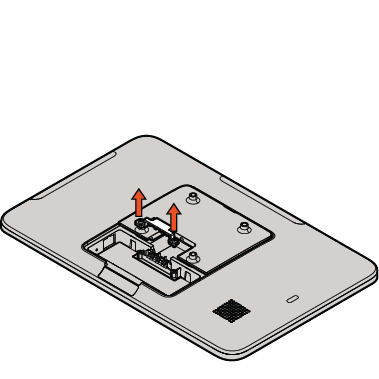
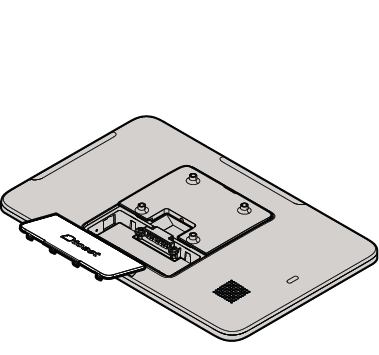
- Gently push up on the base cover until it releases from the base and opens, revealing the ports in the base.
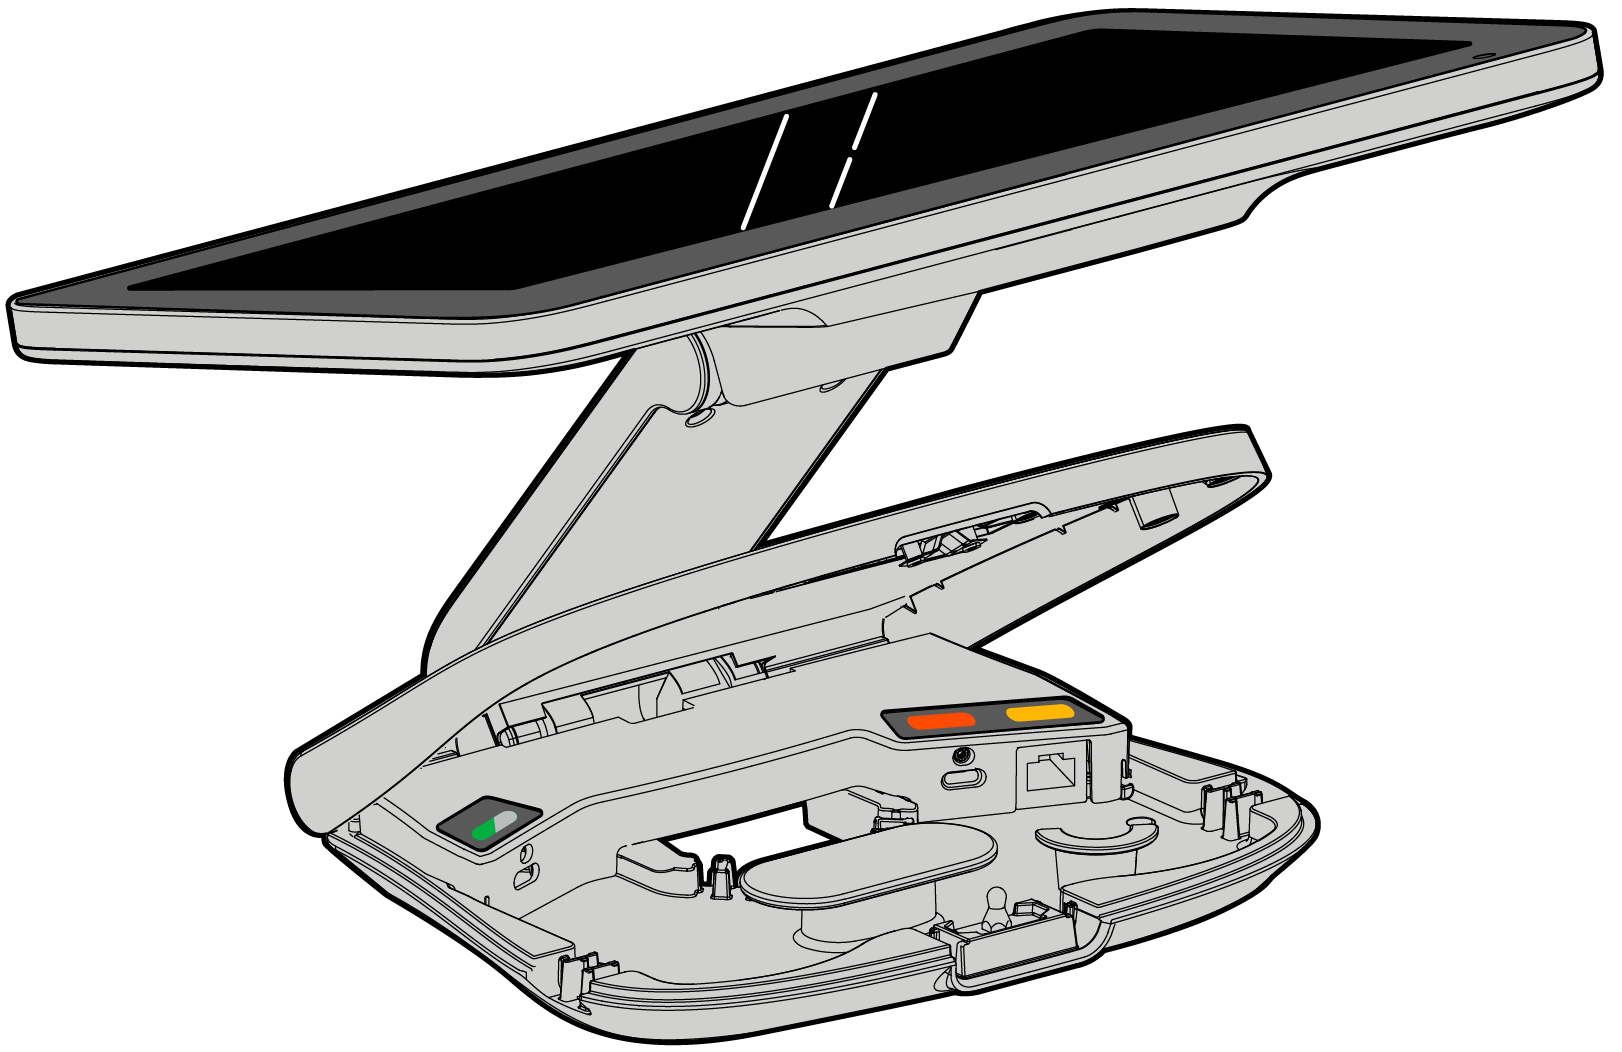
Power the Toast Flex 3 Terminal Supply and Ethernet
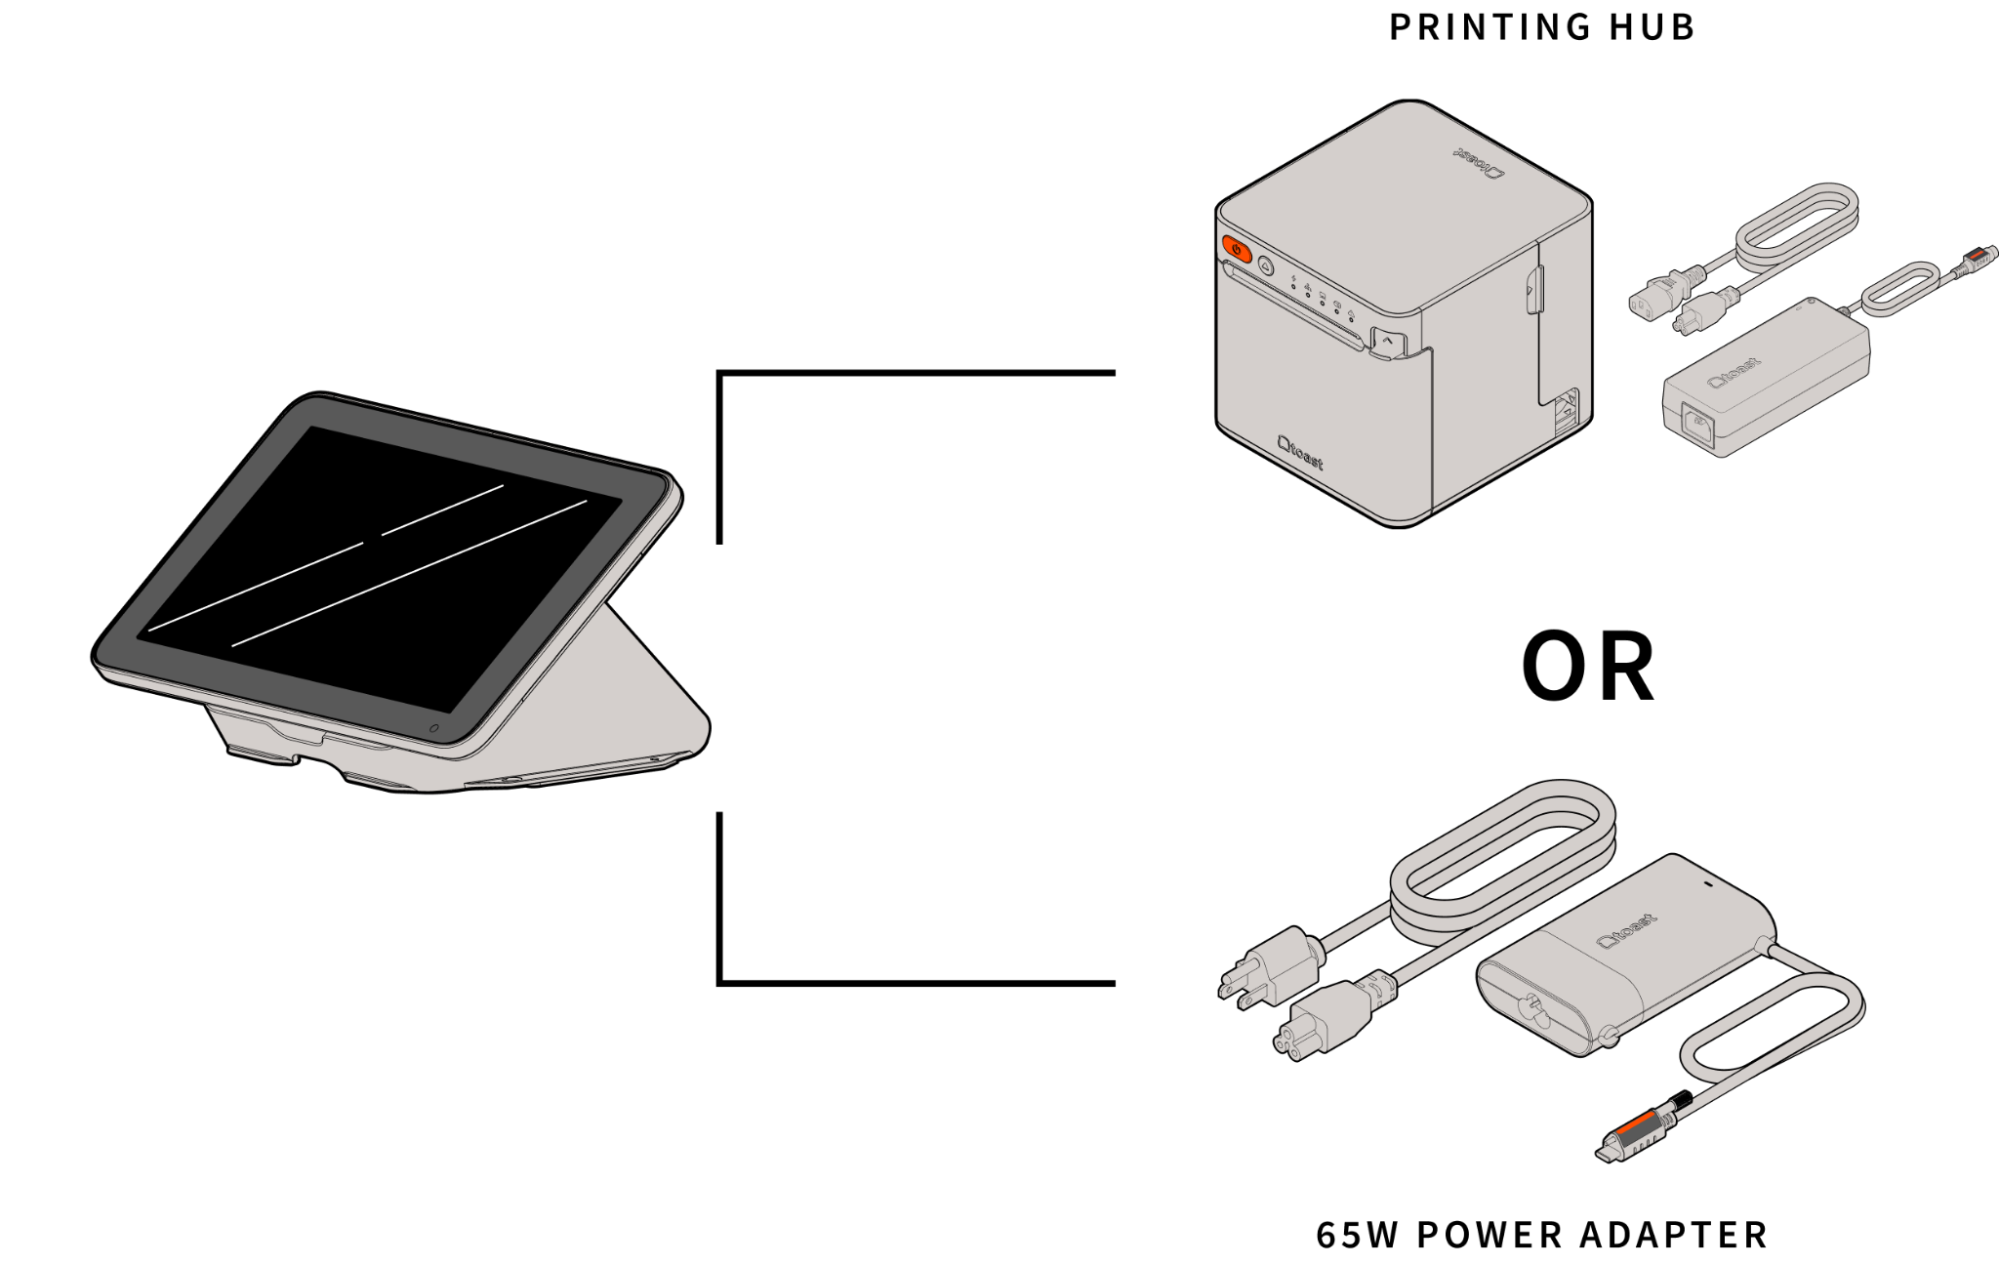
There are two ways to power the Terminal: either with a dedicated power adapter or using the USB Power Plus cable connected to the Printing Hub. If your Terminal does not have a power supply, you will want to use the USB Power Plus cable connected to the Printer as that also provides Internet, USB Hub access, and USB printing.
Power the Flex 3 Terminal With the 65W Power Adapter
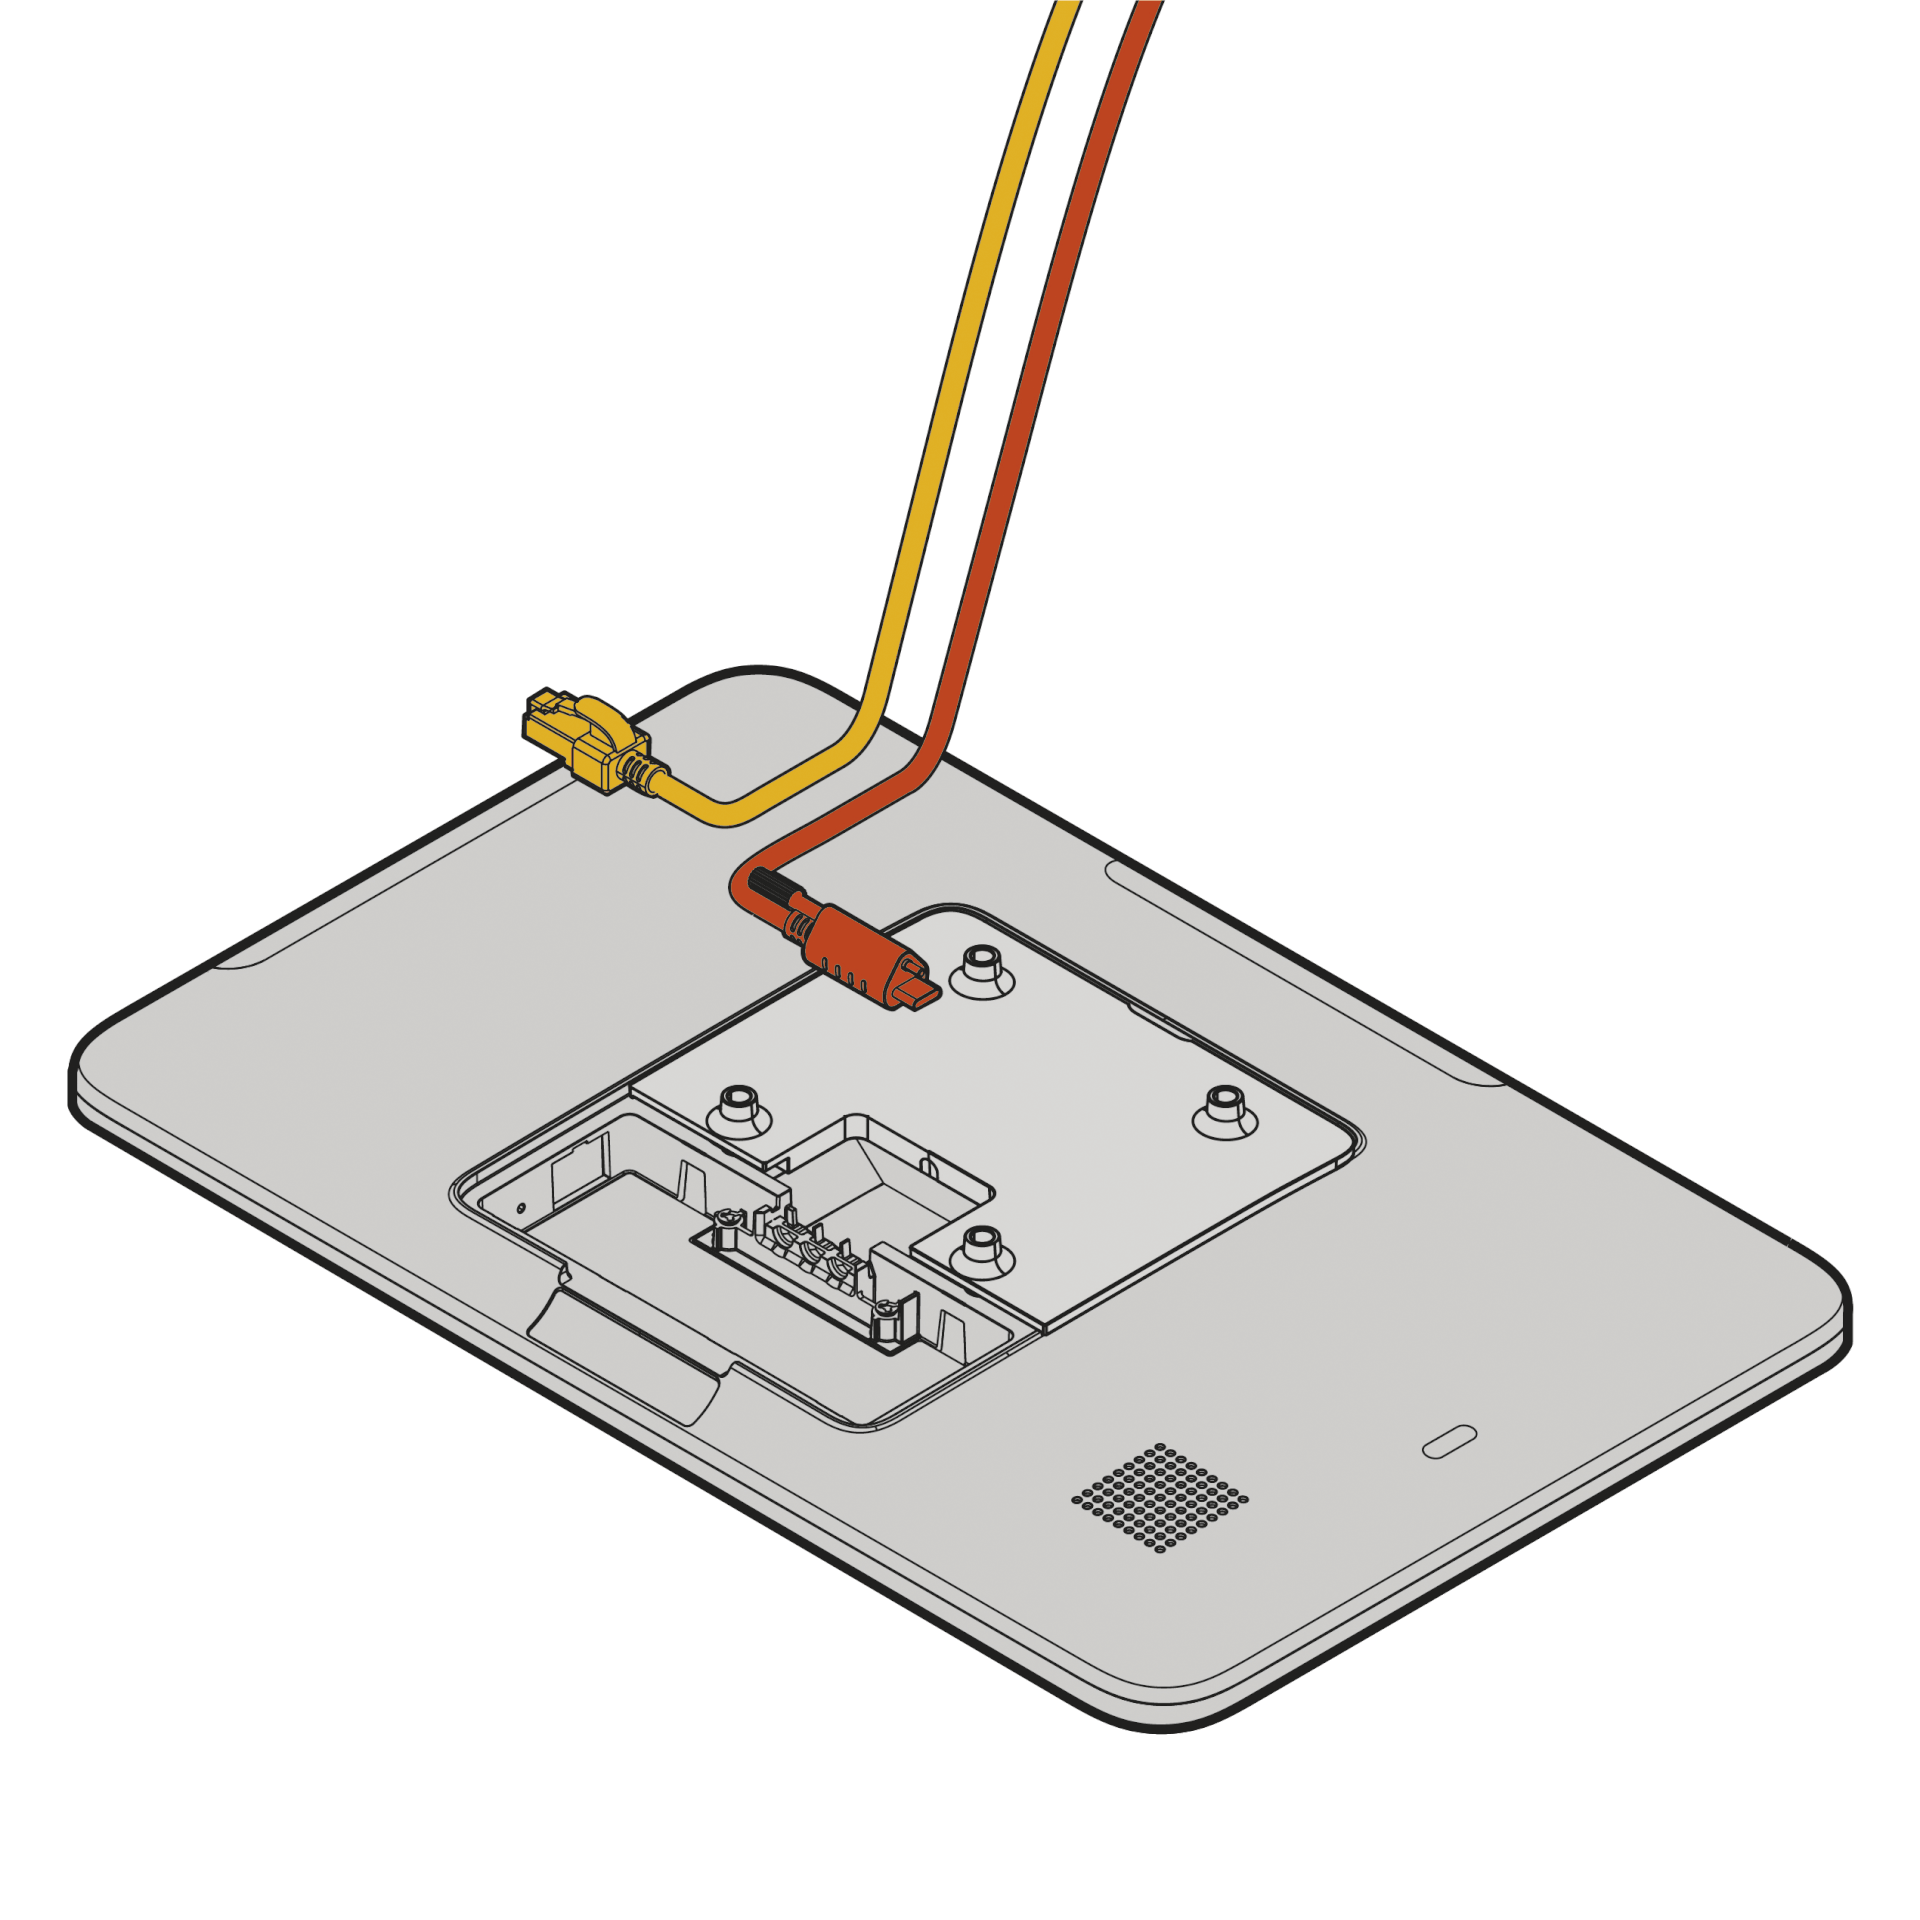
Plug in the Orange USB-C Power cable attached to the Power Supply into the port marked in orange and screw in the thumb screw for a secure connection.

Toast Printing Hub (TP300) as the Power Supply
- If you intend to use a Toast printer with the terminal, complete the setup instructions found in the Toast TP300 Printing Hub Installation Guide, and use the Power Plus Cable from the printer instead of the Power Supply.
- Plug the AC power cable into the power supply and the nearest power outlet.
If you intend to use a Toast Flex 3 Guest Display with this terminal, complete the steps found in this article in the Toast Flex 3 Guest Display Installation section.
Back to top
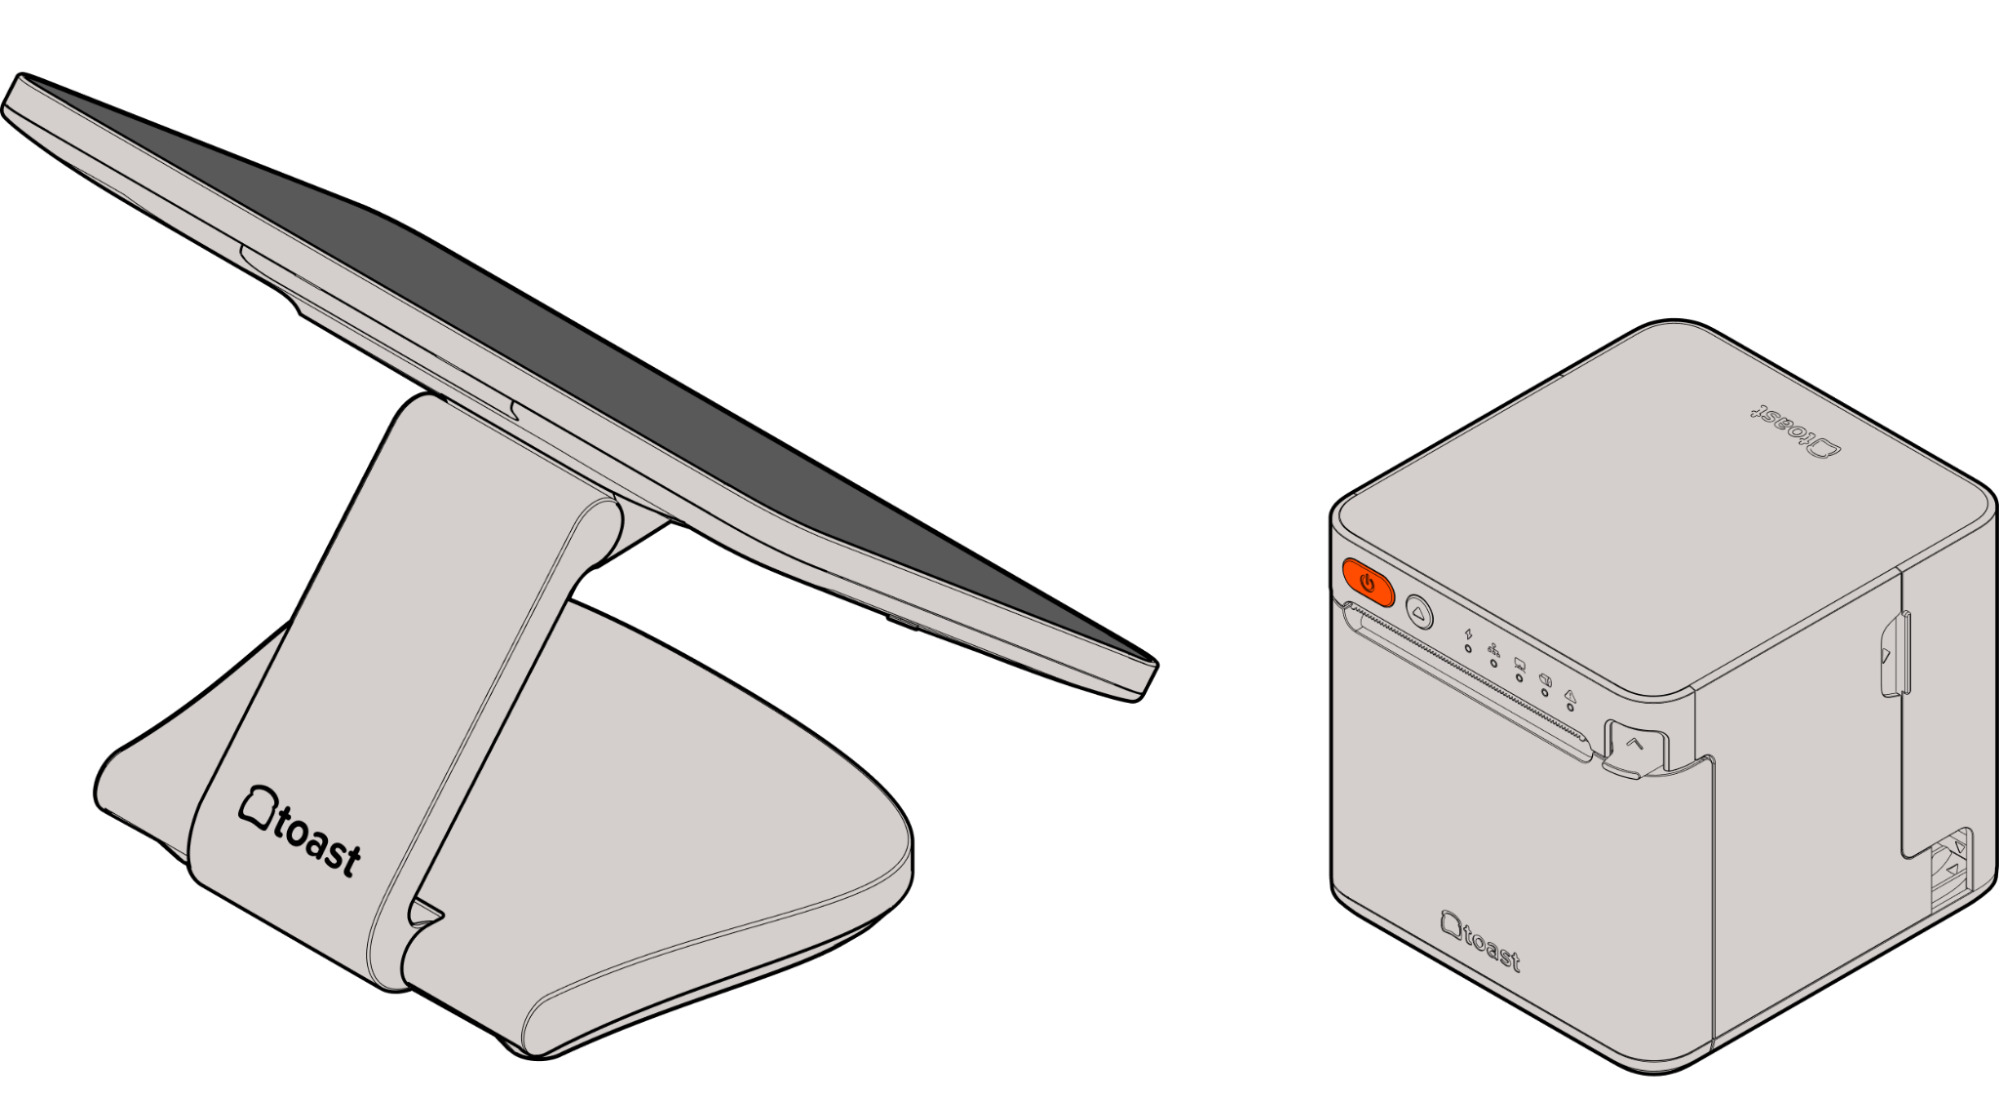
Toast Flex 3 Guest Display Installation
Before you get started, identify where you want your Flex 3 Guest Display to be located. Ensure it is within reach of the Toast Flex 3 Terminal using the Green USB-C Cable.
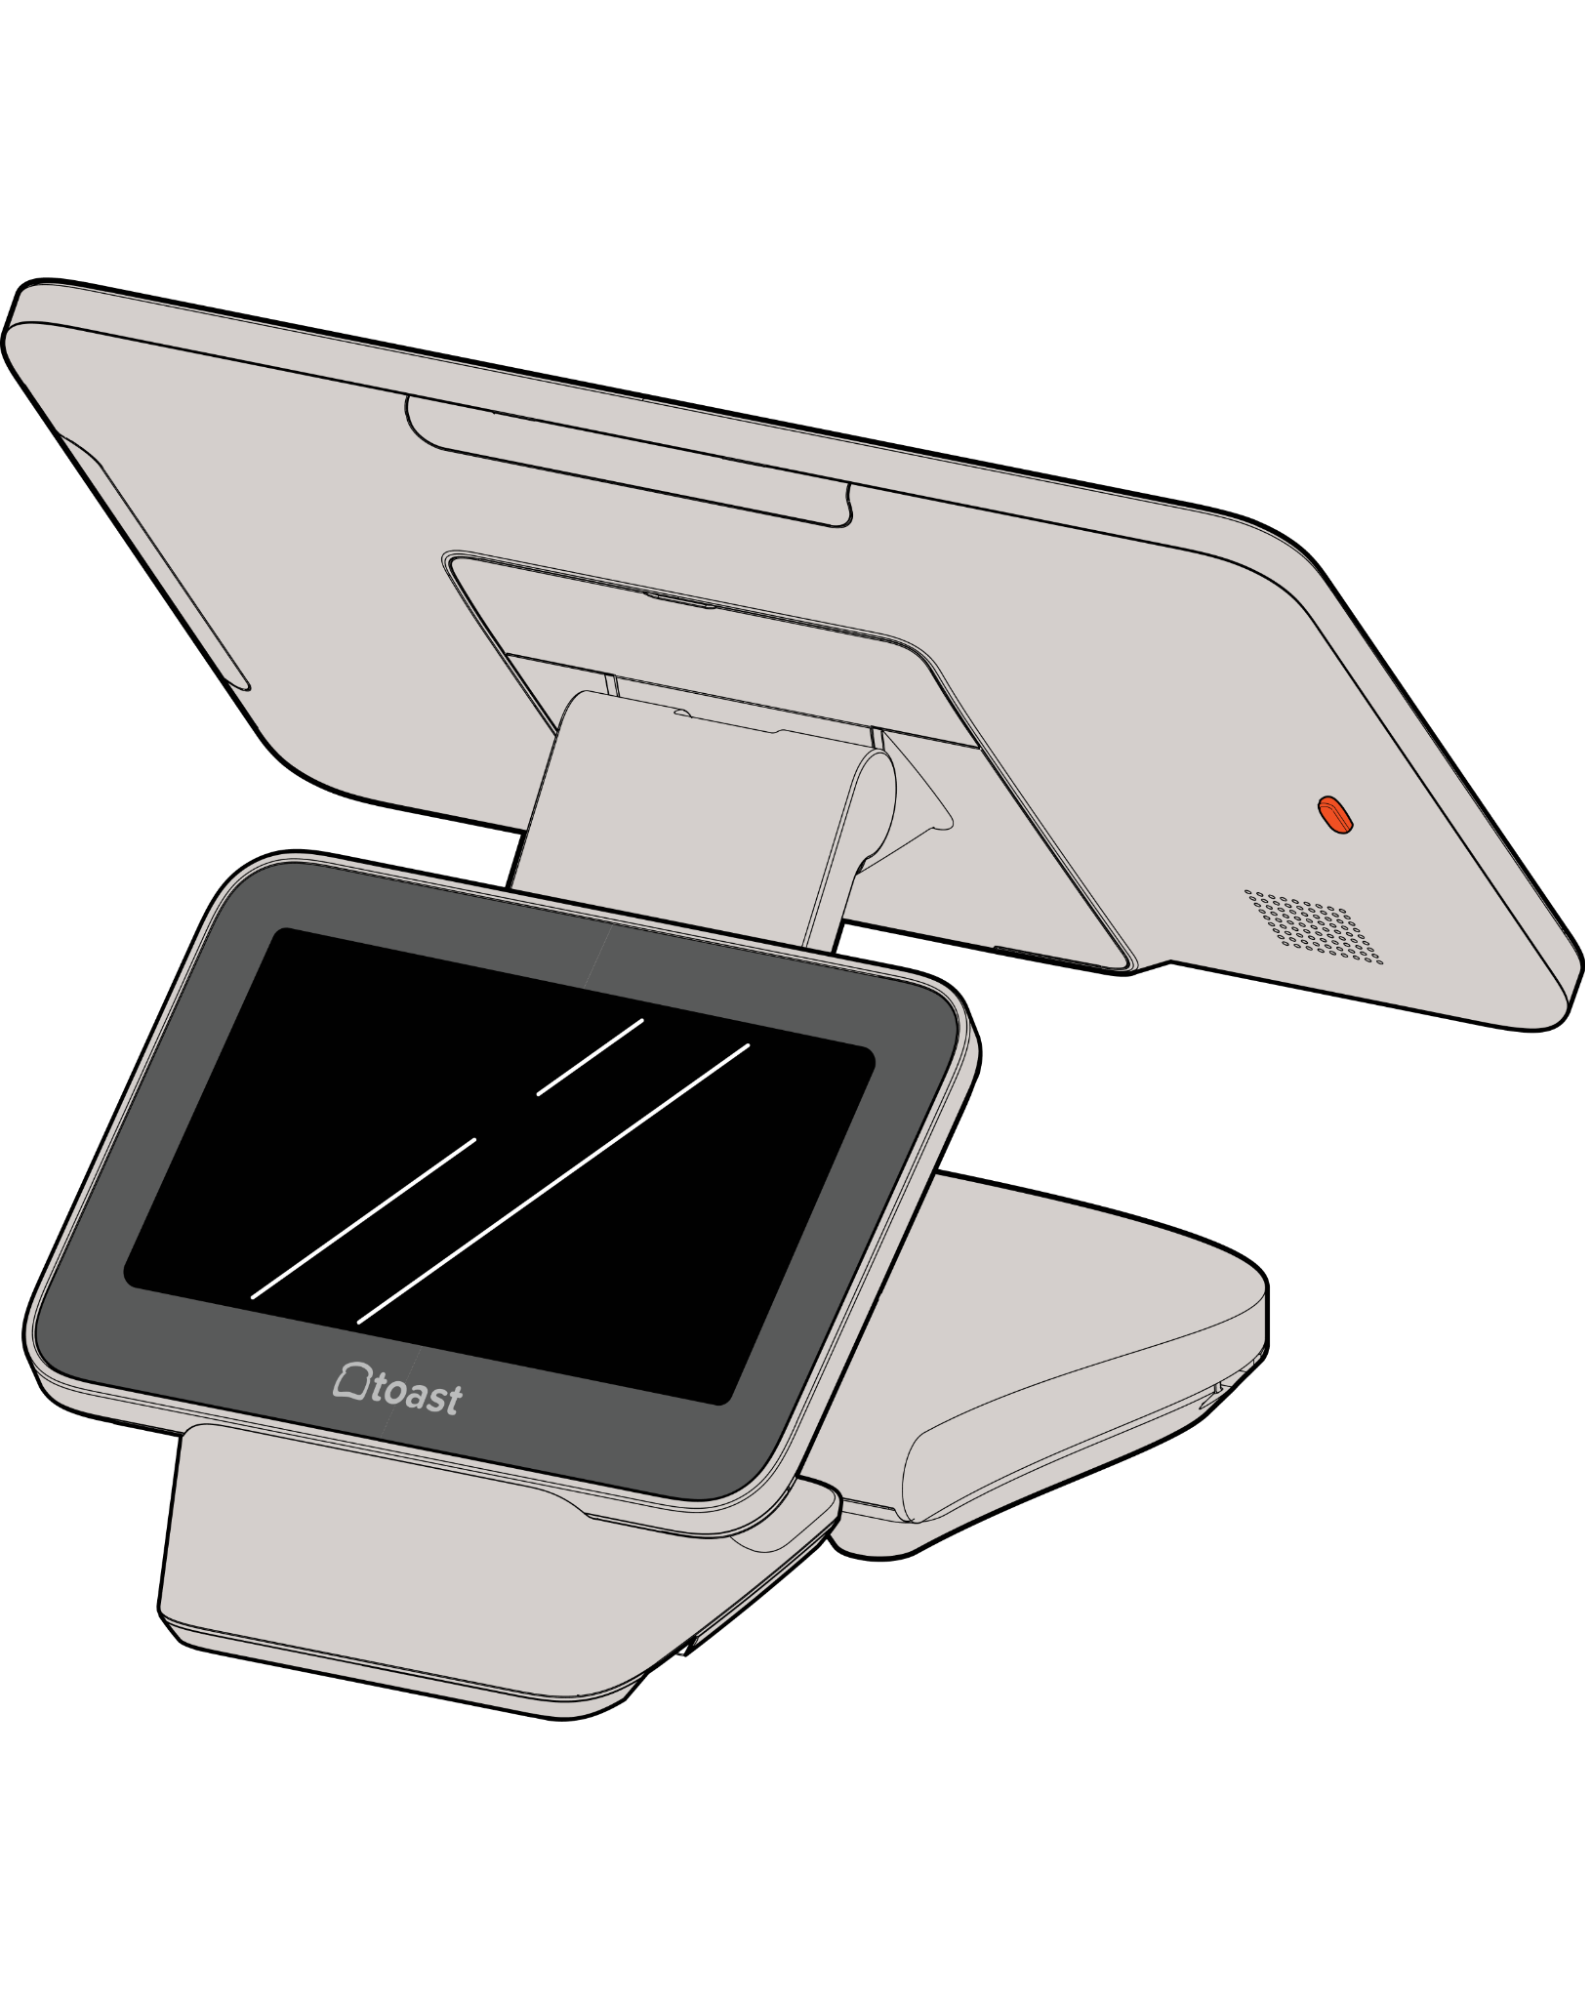
Note: To fully set up the Toast Flex 3 Display, you will need a Toast Flex 3 Terminal.
- Turn the Flex 3 Guest Display over and plug in the 90-degree end of the USB-C cable.
- Route the cable through the cable channel at the bottom of the Flex 3 Guest Display.
- Turn the Flex 3 Guest Display right side up and place it in your preferred location, ensuring the USB-C cable is able to reach the Toast Flex 3 Terminal. Note: If you need more length, a longer cable can be purchased from Toast.
- Choose which of the four cable entrances in the base of the terminal to route the TGD300 Cable. The TGD300 can be nested under the front of the terminal by feeding the USB-C cable under the front of the terminal and into the base.
- Wrap any extra USB-C Cable around the center cleat, leaving enough length to plug the remaining side of the cable into the Green USB-C Port in the base.
Card Reader Installation for Flex 3
Card readers can be connected to the Flex 3 Terminal in the following ways:
- On Counter Readers
- Readers with a USB-A cable can be plugged into the USB-A port in the Printer Hub (TP300) OR underneath the Guest Display (TGD300).
- Readers with a USB-C cable can be plugged into the USB-C port in the Printer Hub (TP300) OR in the USB-C port in the Flex 3 Terminal base or the back of the Flex 3 Display (TT300).
- Direct Attach Readers can be attached directly to the back of the Flex 3 Terminal (2 connector locations) or to 1 location on the Guest Display (TGD300) using the supplied M4 screws. Remove the connector covers first to expose these ports. More details on identifying and setting up your card readers can be found in Identify Your Card Reader Type.

Internet Connection Options for the Flex 3 Terminal
There are a few ways for the Terminal to connect to the Internet, including:
- USB Power Plus cable – this cable will provide an Internet connection when connected to the TP300 Printing Hub. The printer must be on and connected with an Ethernet cable.
- Ethernet cable – an Ethernet cable can be connected to the Terminal base. Plug the Yellow Ethernet cable into the Internet port marked in yellow, then plug the other end into the wall Ethernet outlet.
- Wi-Fi – connect to a Wi-Fi access point by turning Wi-Fi ON in settings, and you will be asked to connect to Wi-Fi
Note: once connected to one of the Internet sources above, it is possible to switch if a different source is more convenient. Go to Internet settings and enable the source you want to use. For more information, see Verify Your Internet Connection.
Complete Your Flex 3 Terminal Installation
- Choose any of the four cable exits at the base of the terminal and secure the cables in the exit channel.
- Wrap any remaining cable around the cleat inside the base.
- Close the Base Cover and rotate the screen to a comfortable position
- If you intend to use a Toast Direct Attach Card Reader with this terminal, complete the Card Reader Installation Guide steps.
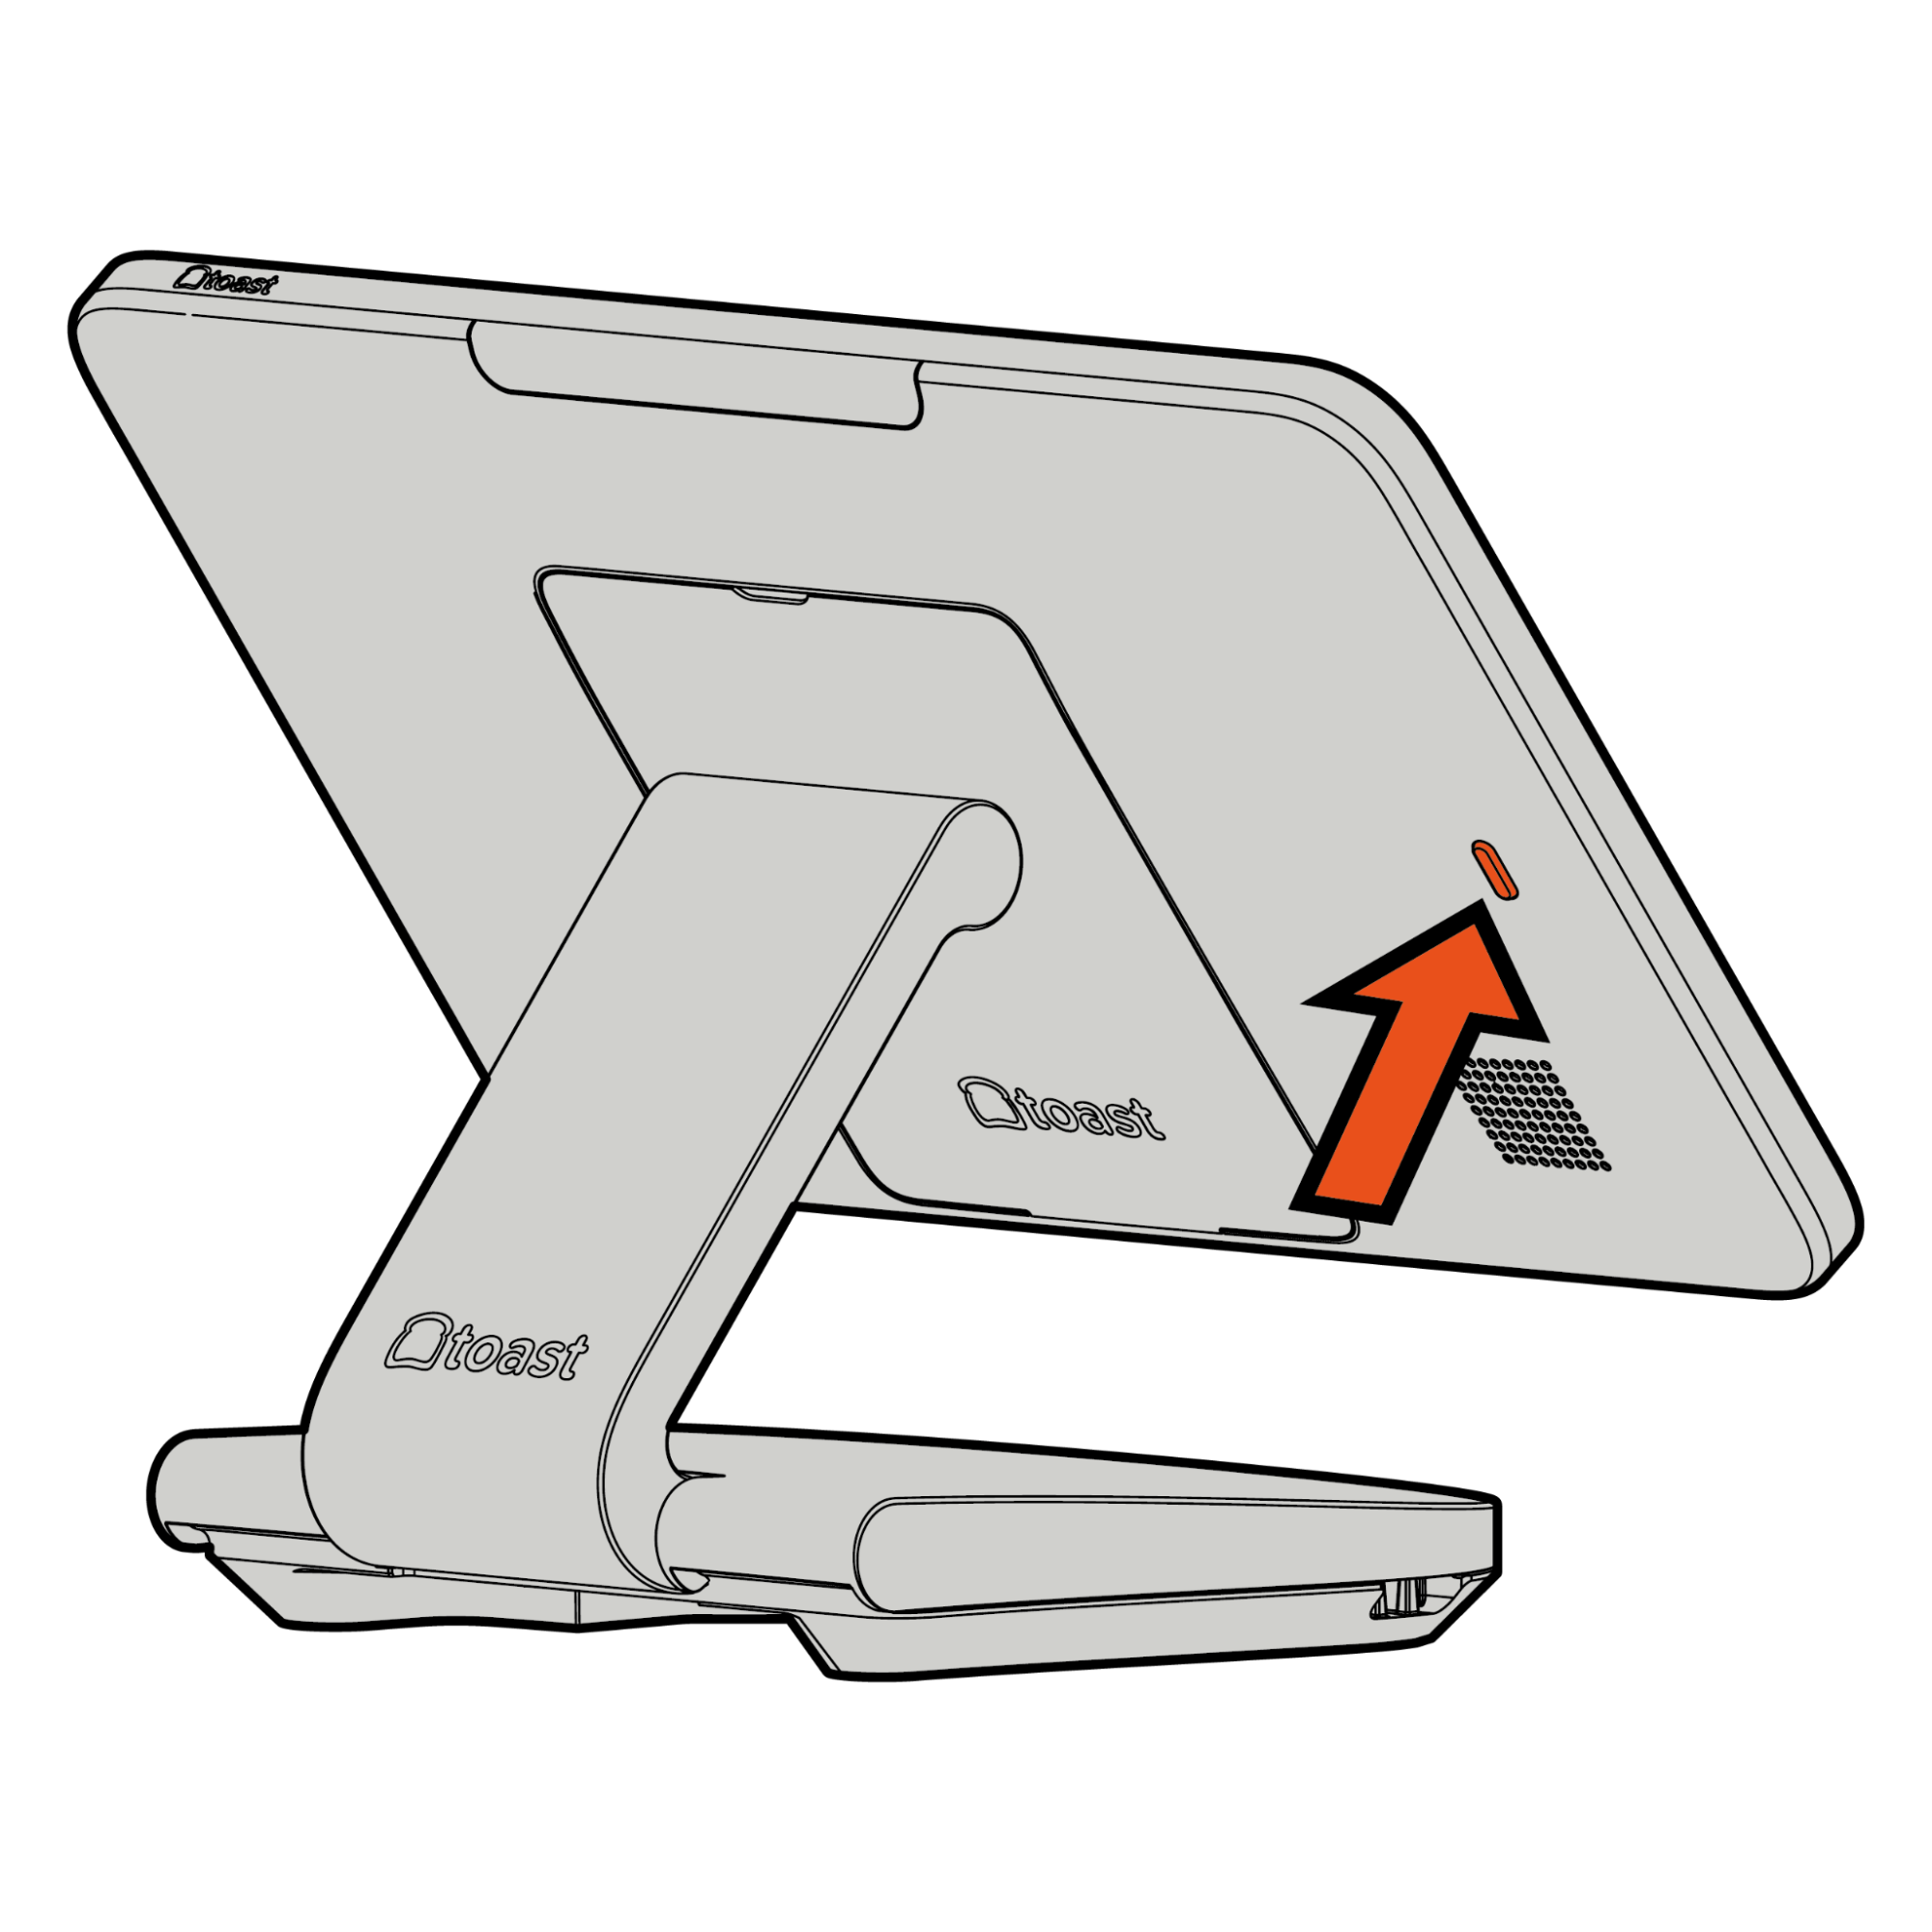
- Press the orange power button on the back cover of the terminal screen for 3 seconds to power on the terminal.
- Follow the prompts when the screen powers on to complete the Toast Flex 3 setup.
Flex 3 Terminal Wedge Setup
Flex 3 Terminal Wedge Install Video
Flex 3 Terminal Wedge installation overview video.
Prepare for Your Wedge Install
Note: Ensure you have the two screws and screwdriver included in your package to properly install the wedge on the Toast Flex 3 Display.
- Remove the Toast Flex 3 Display from the packaging and place it face down on a flat, clean surface.
- On the back of the Toast Flex 3 display, remove the connected cover.
- Using the screwdriver provided in the Display, unscrew the two captive screws on the cable clamp.
Install Power Supply and Ethernet to the Toast Flex 3 Display
- If you intend to use a Toast Printer with the Display, complete the setup instructions in the TP300 Instruction Manual, and use the Printer Plus Cable from the printer instead of the Power Supply.
- Plug in the Orange USB-C Power cable attached to the Power Supply into the port marked in orange and screw in the thumb screw for a secure connection.
- Plug in the Yellow Ethernet cable into the Internet port marked in yellow.
Install the Wedge to the Toast Flex 3 Display
- Feed the cables into the slots in the back of the display and screw down the Cable Stay, ensuring the cables stay in each slot.
- Install the cable cover back on the display, covering the ports.
- Remove the Wedge from its packaging, including the 4x Thumb Screws.
- Feed the Power cable and Ethernet cable through the hole in the Wedge.
- Align the base so that the four VESA mount holes align with the four posts on the universal back cover, and the opening below aligns with the cable ports on the back of the Display.
- Using the 4 thumb screws included with the Wedge, screw the Wedge to the Display.
- Flip the Display and Wedge over, placing the assembly with the rubber pads face down.
- Plug the Ethernet and Power Supply AC cables into their respective wall outlets.
- To power on the terminal, press the orange power button on the back cover of the screen for three seconds.
- Follow the prompts when the screen powers on to complete the Toast Flex 3 Display Setup.
Flex 3 Terminal Set Up the Mount
Flex 3 Terminal Mount Set Up Video
Toast Flex 3 Terminal Mount installation video.
- Follow the instructions found in the Flex 22” Counter Stand Installation Guide, Steps 1, 2a, 2b, or 2c.
- Remove the Toast Flex 3 Terminal Screen from the packaging and place it face down on a flat, clean surface.
- Remove the cable cover on the back of the Toast Flex 3 terminal screen.
- Using a Phillips-head screwdriver, unscrew the two captive screws on the cable hold-down tab.
Note: Ensure you use the screws from the Display packaging to secure the Display to the Mount. The screws in the Mount package are optimized to work with Flex 22.
Install Power Supply and Ethernet With the Toast Flex 3 Mount
- Plug in the Orange USB-C Power cable attached to the Power Supply into the port marked in orange and screw in the thumb screw for a secure connection.
- If you intend to use a Toast printer with the terminal, complete the setup instructions found in the Printing Hub (TP300) Installation Guide, and use the Orange USB-C cable from the printer instead of the Power Supply.
- Plug in the Yellow Ethernet cable into the RJ45 Ethernet port marked in yellow.
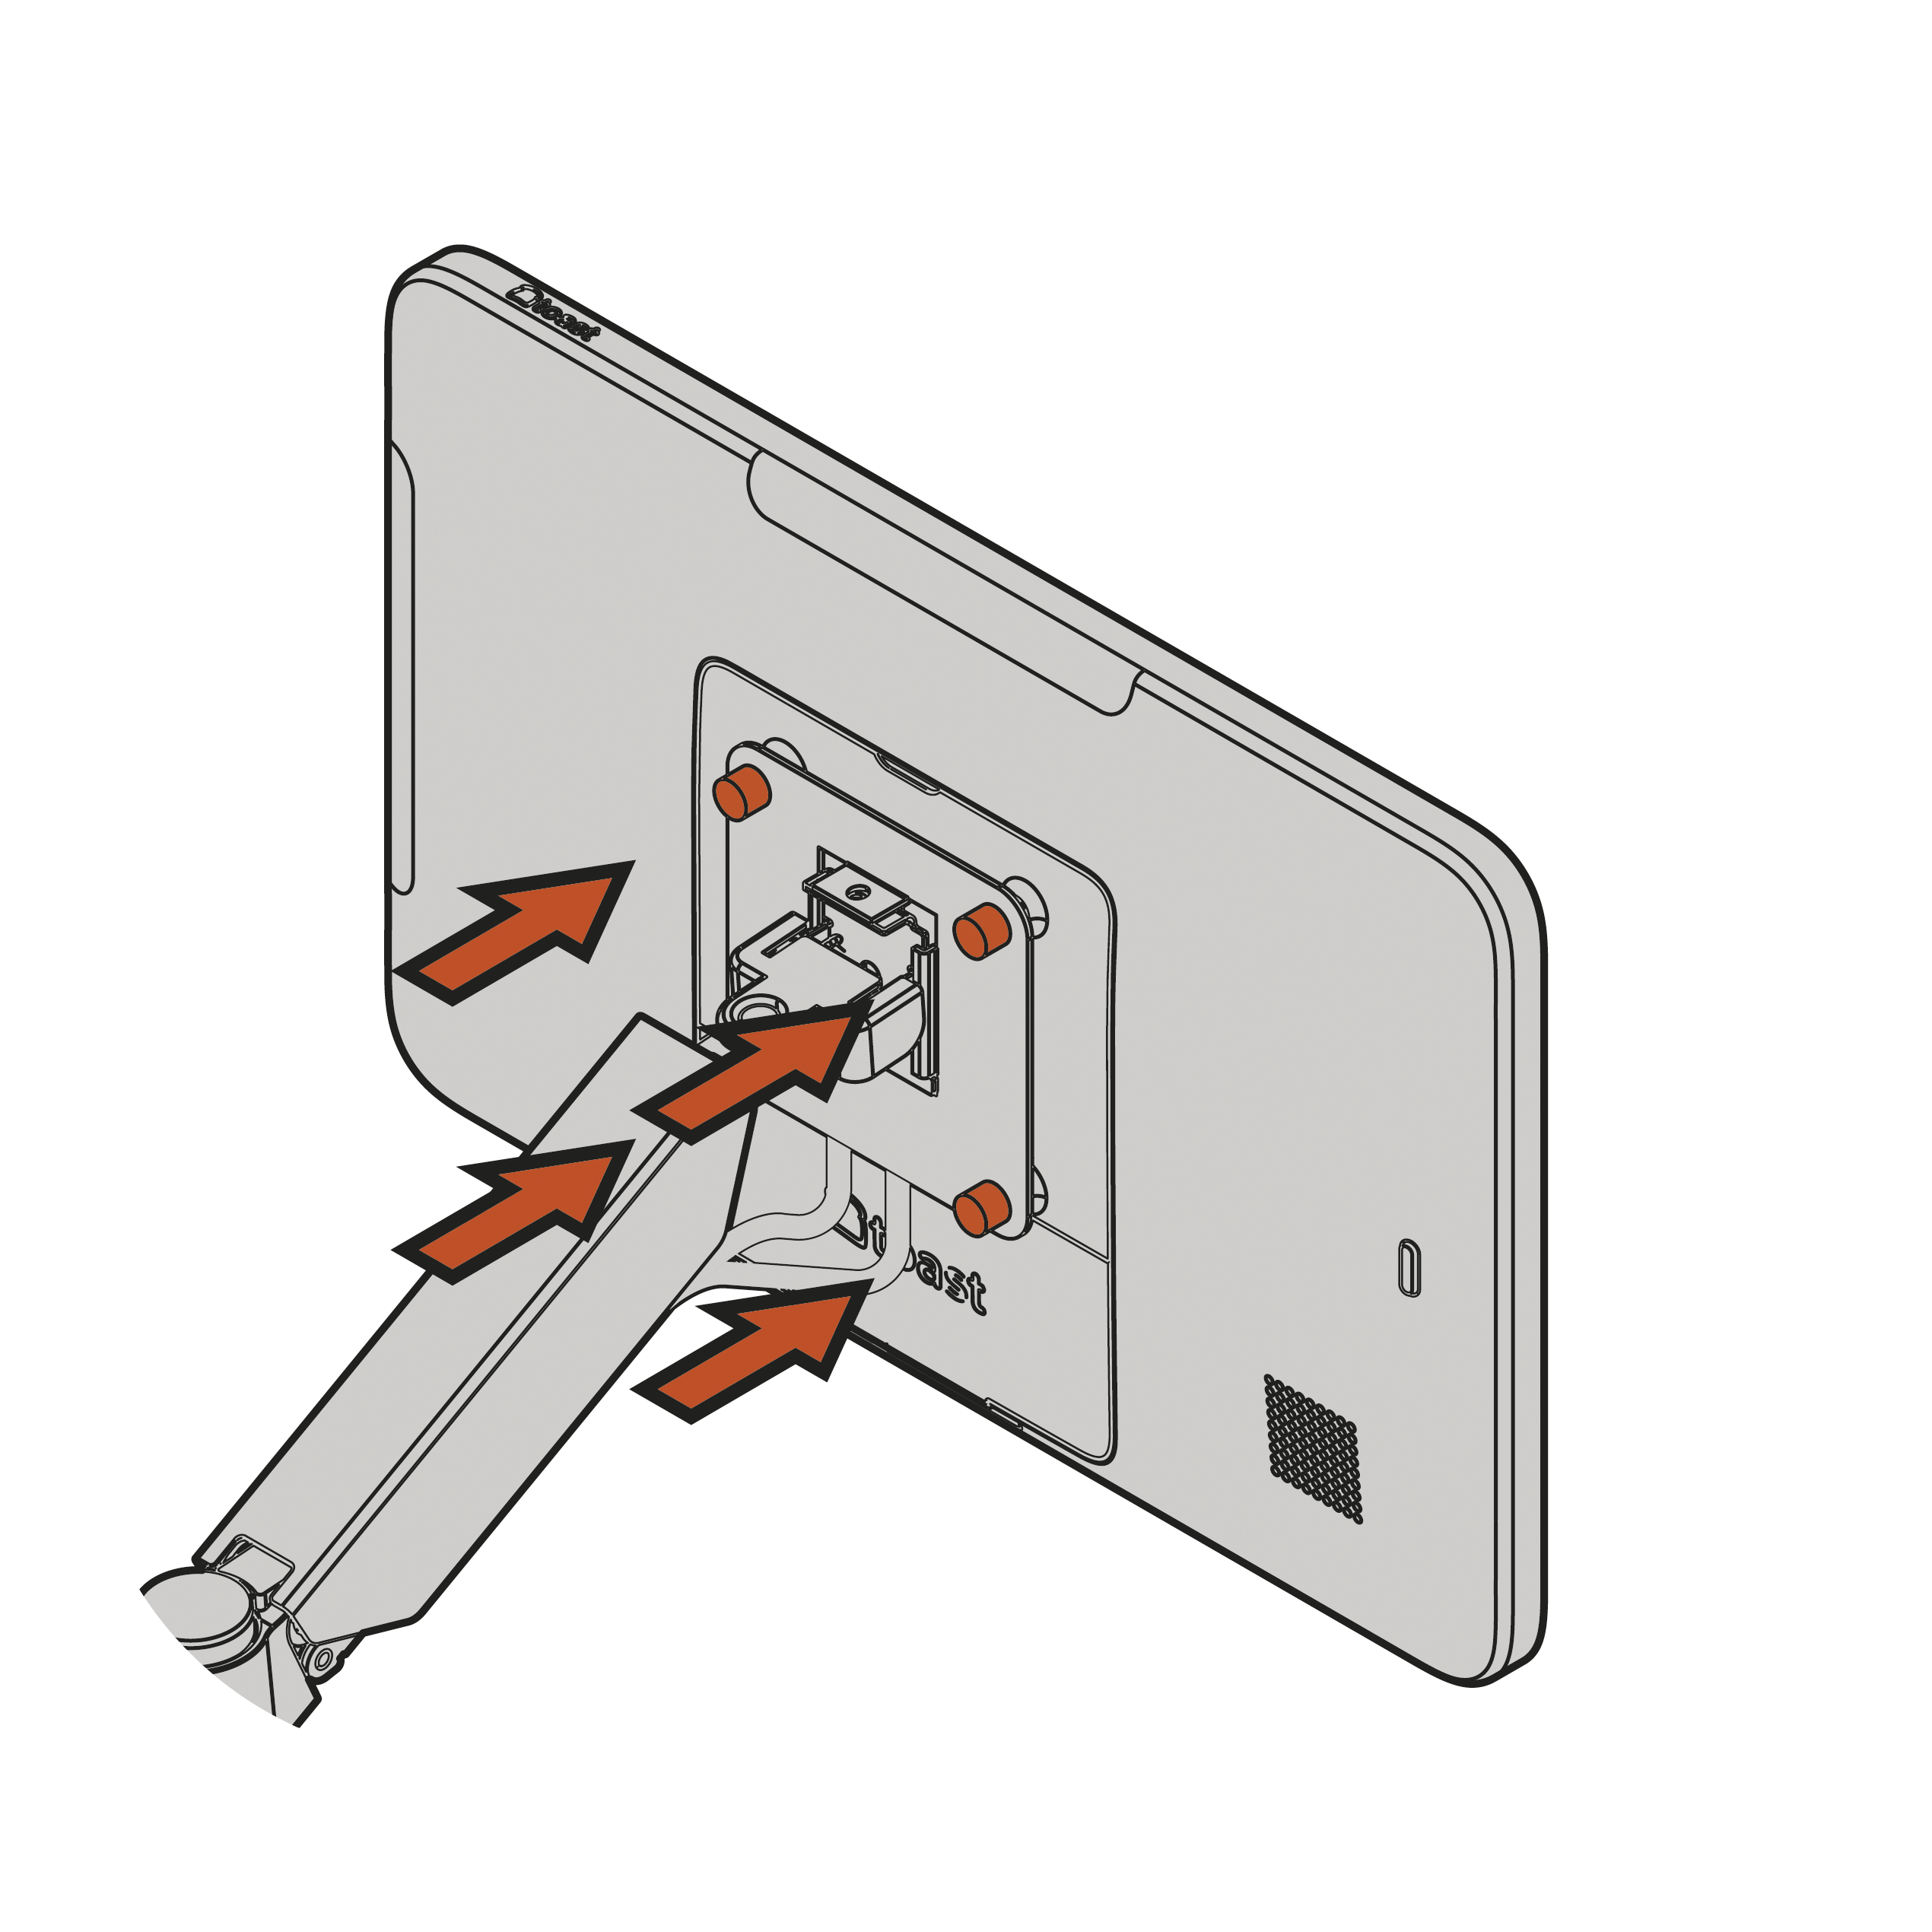
Install the Toast Flex 3 Display on the Mount
- Feed the cables into the slots in the back of the terminal screen and screw down the Cable Stay, ensuring the cables stay in each slot.
- Install the cable cover on the terminal screen, covering the ports
- Install the VESA plate on the terminal using the four thumb screws to attach the VESA plate to the back of the terminal screen.
- Attach the terminal screen to the mount using the four provided screws.
- Slide the VESA plate onto the end of the arm and align it within the support tabs.
- Secure in place using the vertical thumb screw.
- Plug in the Ethernet cable and the Power Supply AC cable into their respective wall outlets.
- Press the orange power button on the back cover of the terminal screen for three seconds to power on the terminal.
- Follow the prompts on the screen when it powers on to complete the Toast Flex 3 terminal setup.