xtraCHEF: Sube facturas y recibos desde tu móvil
Última actualización: 28 abr 2026, 4:22 p.m.
Sube documentos a través de tu aplicación móvil
La aplicación móvil de xtraCHEF facilita más que nunca la carga de facturas y recibos al combinar la automatización con la cámara de tu smartphone. ¿Listo para tener información sobre las finanzas de tu restaurante, inventario y más, literalmente al alcance de tu mano? Comienza descargando la aplicación xtraCHEF. Esta aplicación se puede descargar a través de Apple App Store o de Google Play Store.
Guía paso a paso
Para comenzar, inicia sesión en tu cuenta. Una vez que hayas iniciado sesión, selecciona el ícono de cámara ubicado en la parte inferior de tu tablero móvil.
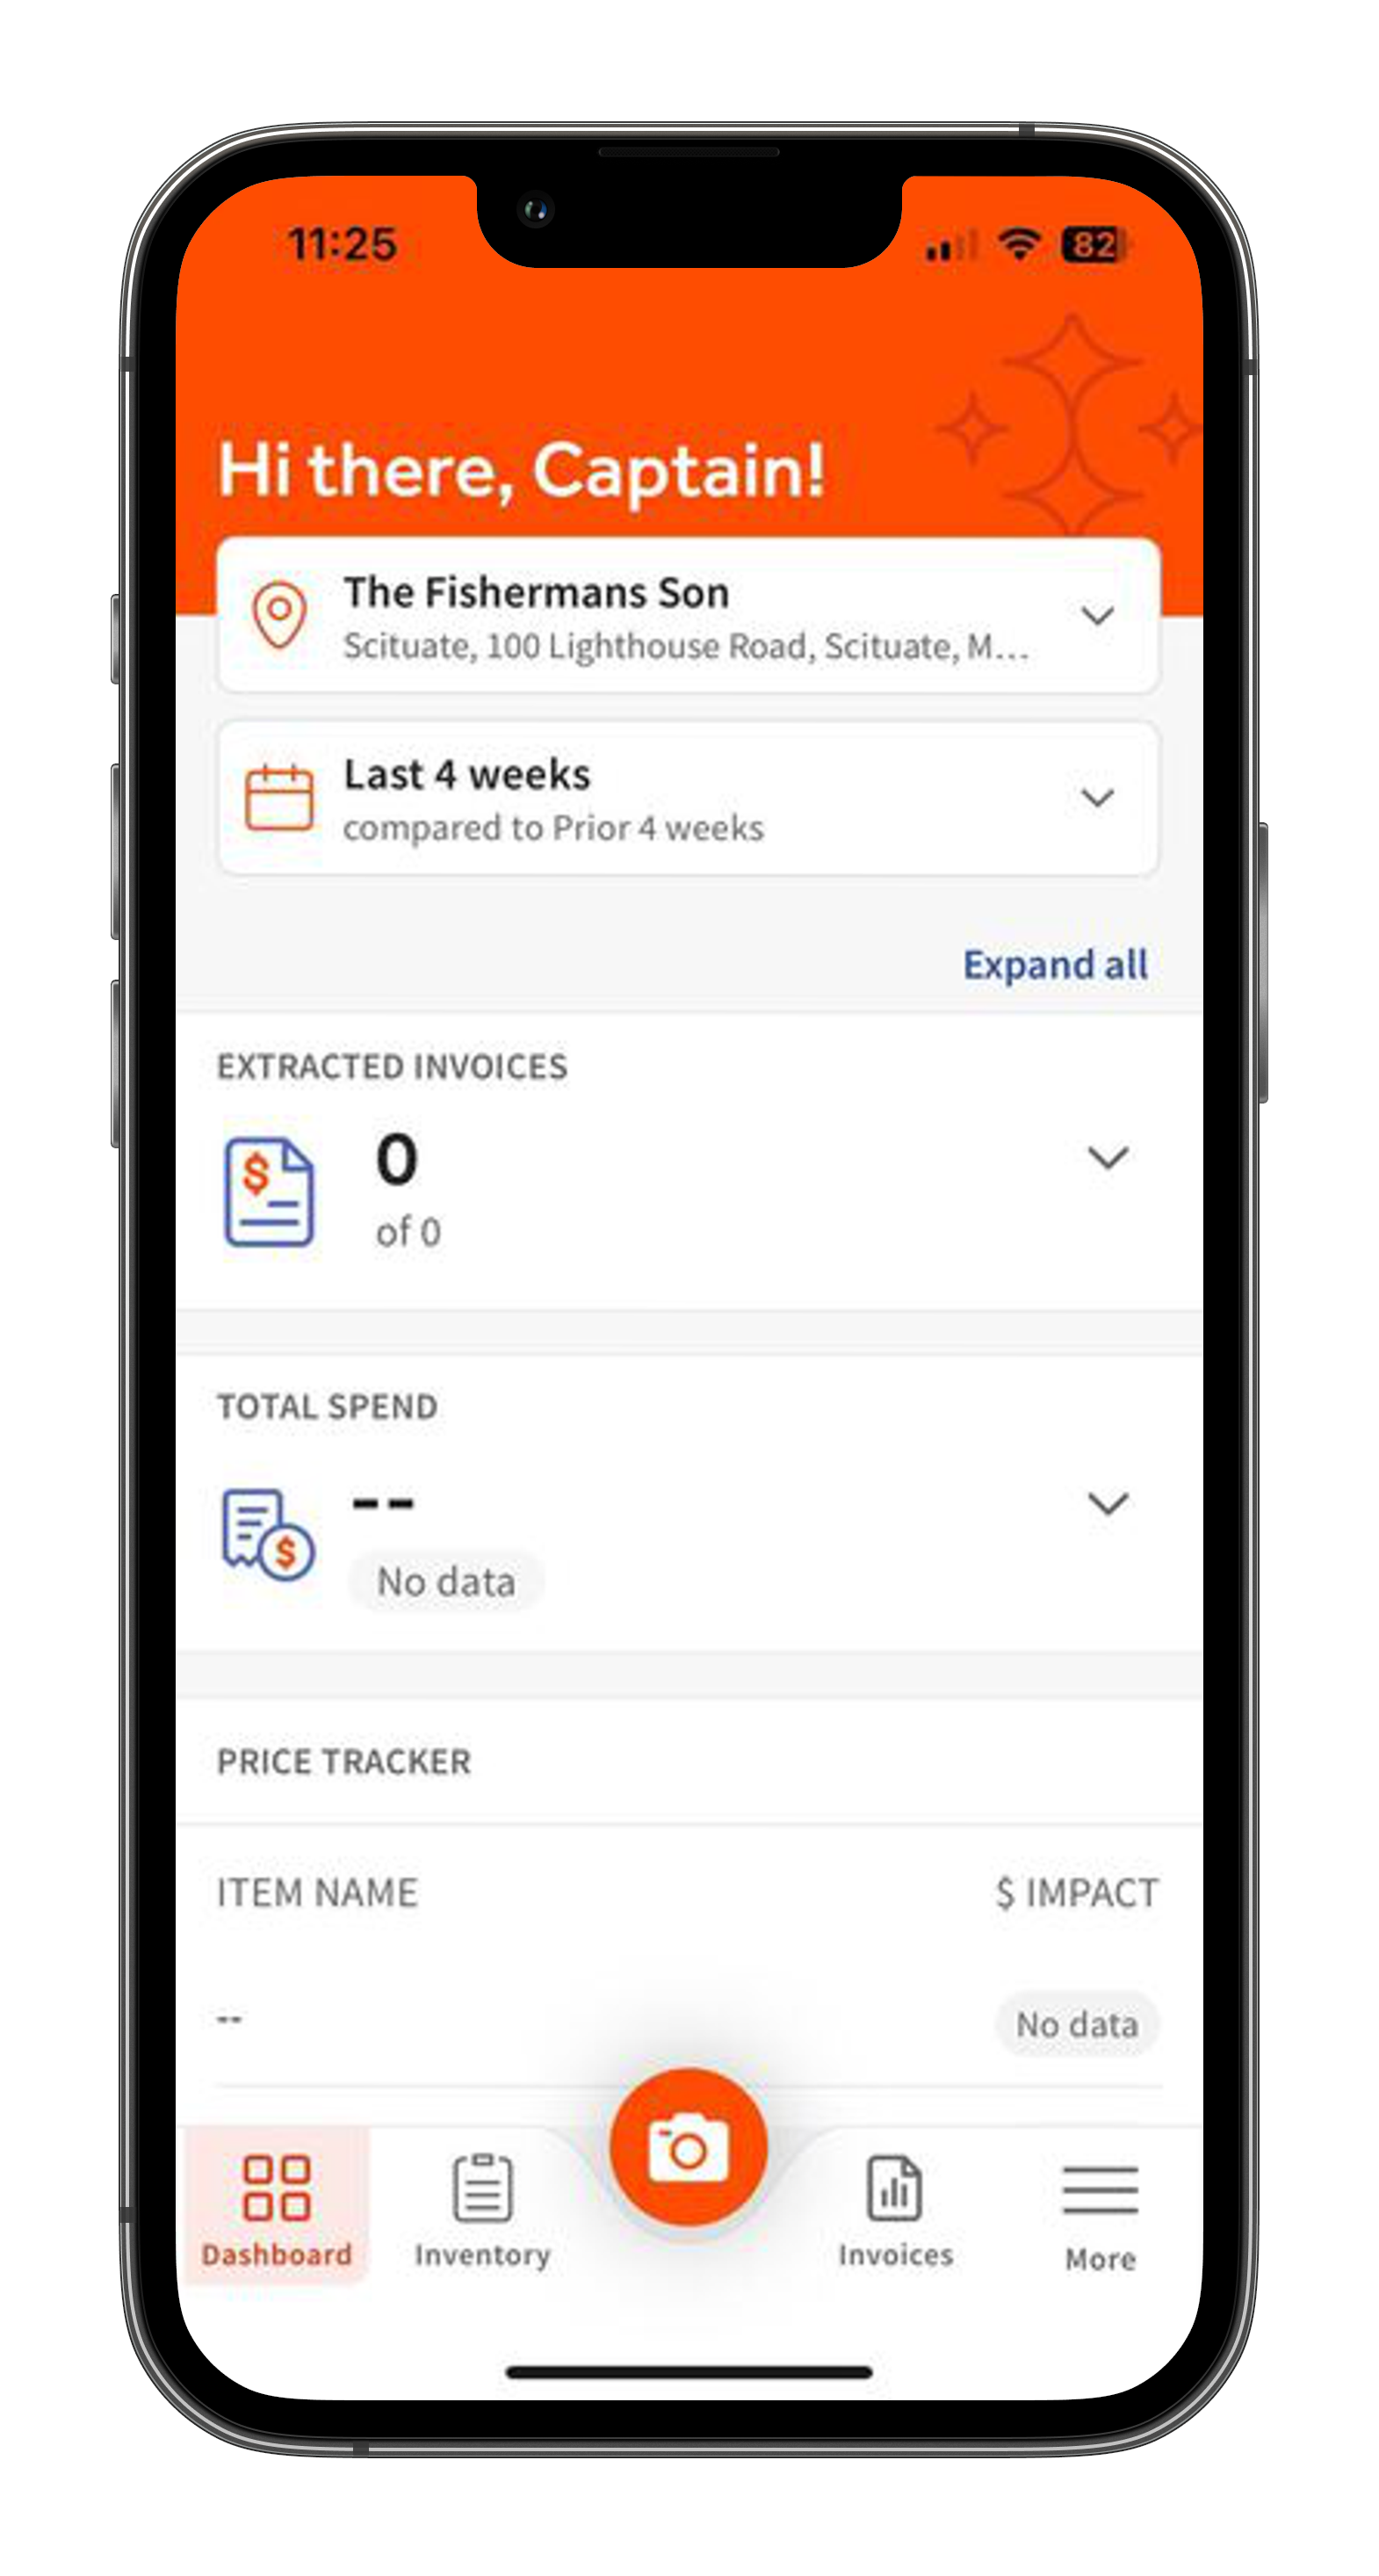
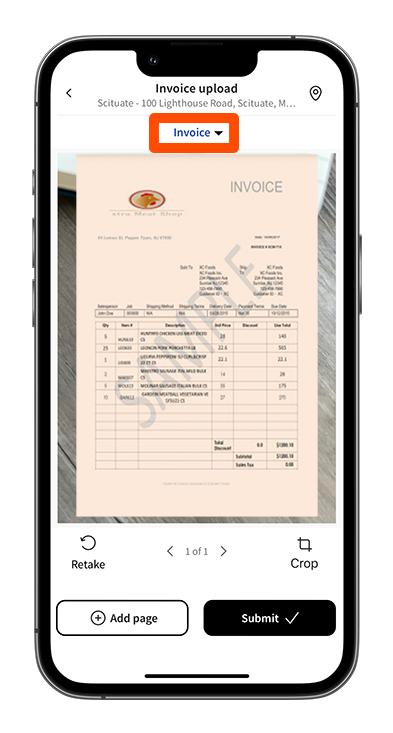
Esto te llevará a tu página de captura de facturas. Para capturar tu factura, inclina o mueve tu cámara hasta que esté paralela al documento.
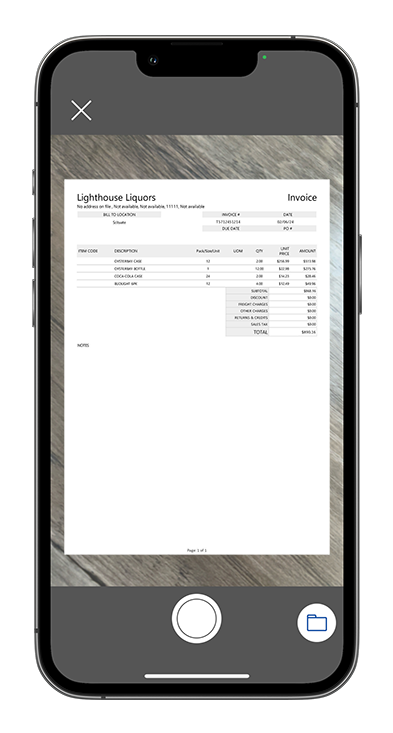
Nota: También recomendamos capturar tus facturas en un área bien iluminada y sobre un fondo plano. Esto maximizará la calidad de tu escaneo y asegurará que las facturas no sean rechazadas debido a una mala calidad de imagen.
Una vez capturada, se le pedirá que revise la imagen del documento. En esta página, puede optar por Agregar página, seleccionar el tipo de documento (es decir, Factura o Recibo), hacer una Nota de crédito o finalizar su Subida. Cuando esté listo, seleccione Enviar para subir su documento.
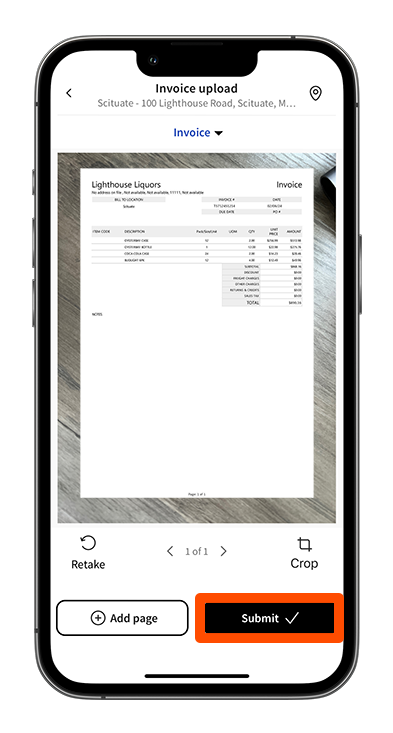
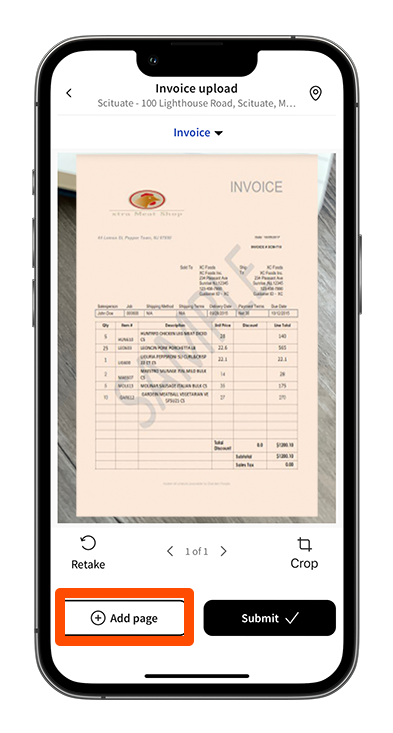
Agregar páginas
Si el documento que está capturando contiene múltiples páginas, es vital que todas se agreguen a su carga móvil. Para hacer esto, seleccione Agregar página ubicado en la esquina inferior izquierda de su Escaneo página. Esto le pedirá que capture la segunda página. Repita este paso según sea necesario hasta que se capturen todas las páginas.
Seleccionar un tipo de documento
En su Escaneo página, seleccione la flecha desplegable ubicada en la parte superior junto a su tipo de documento predeterminado.
Esto le permitirá seleccionar ya sea Factura o Recibo como el tipo de documento.
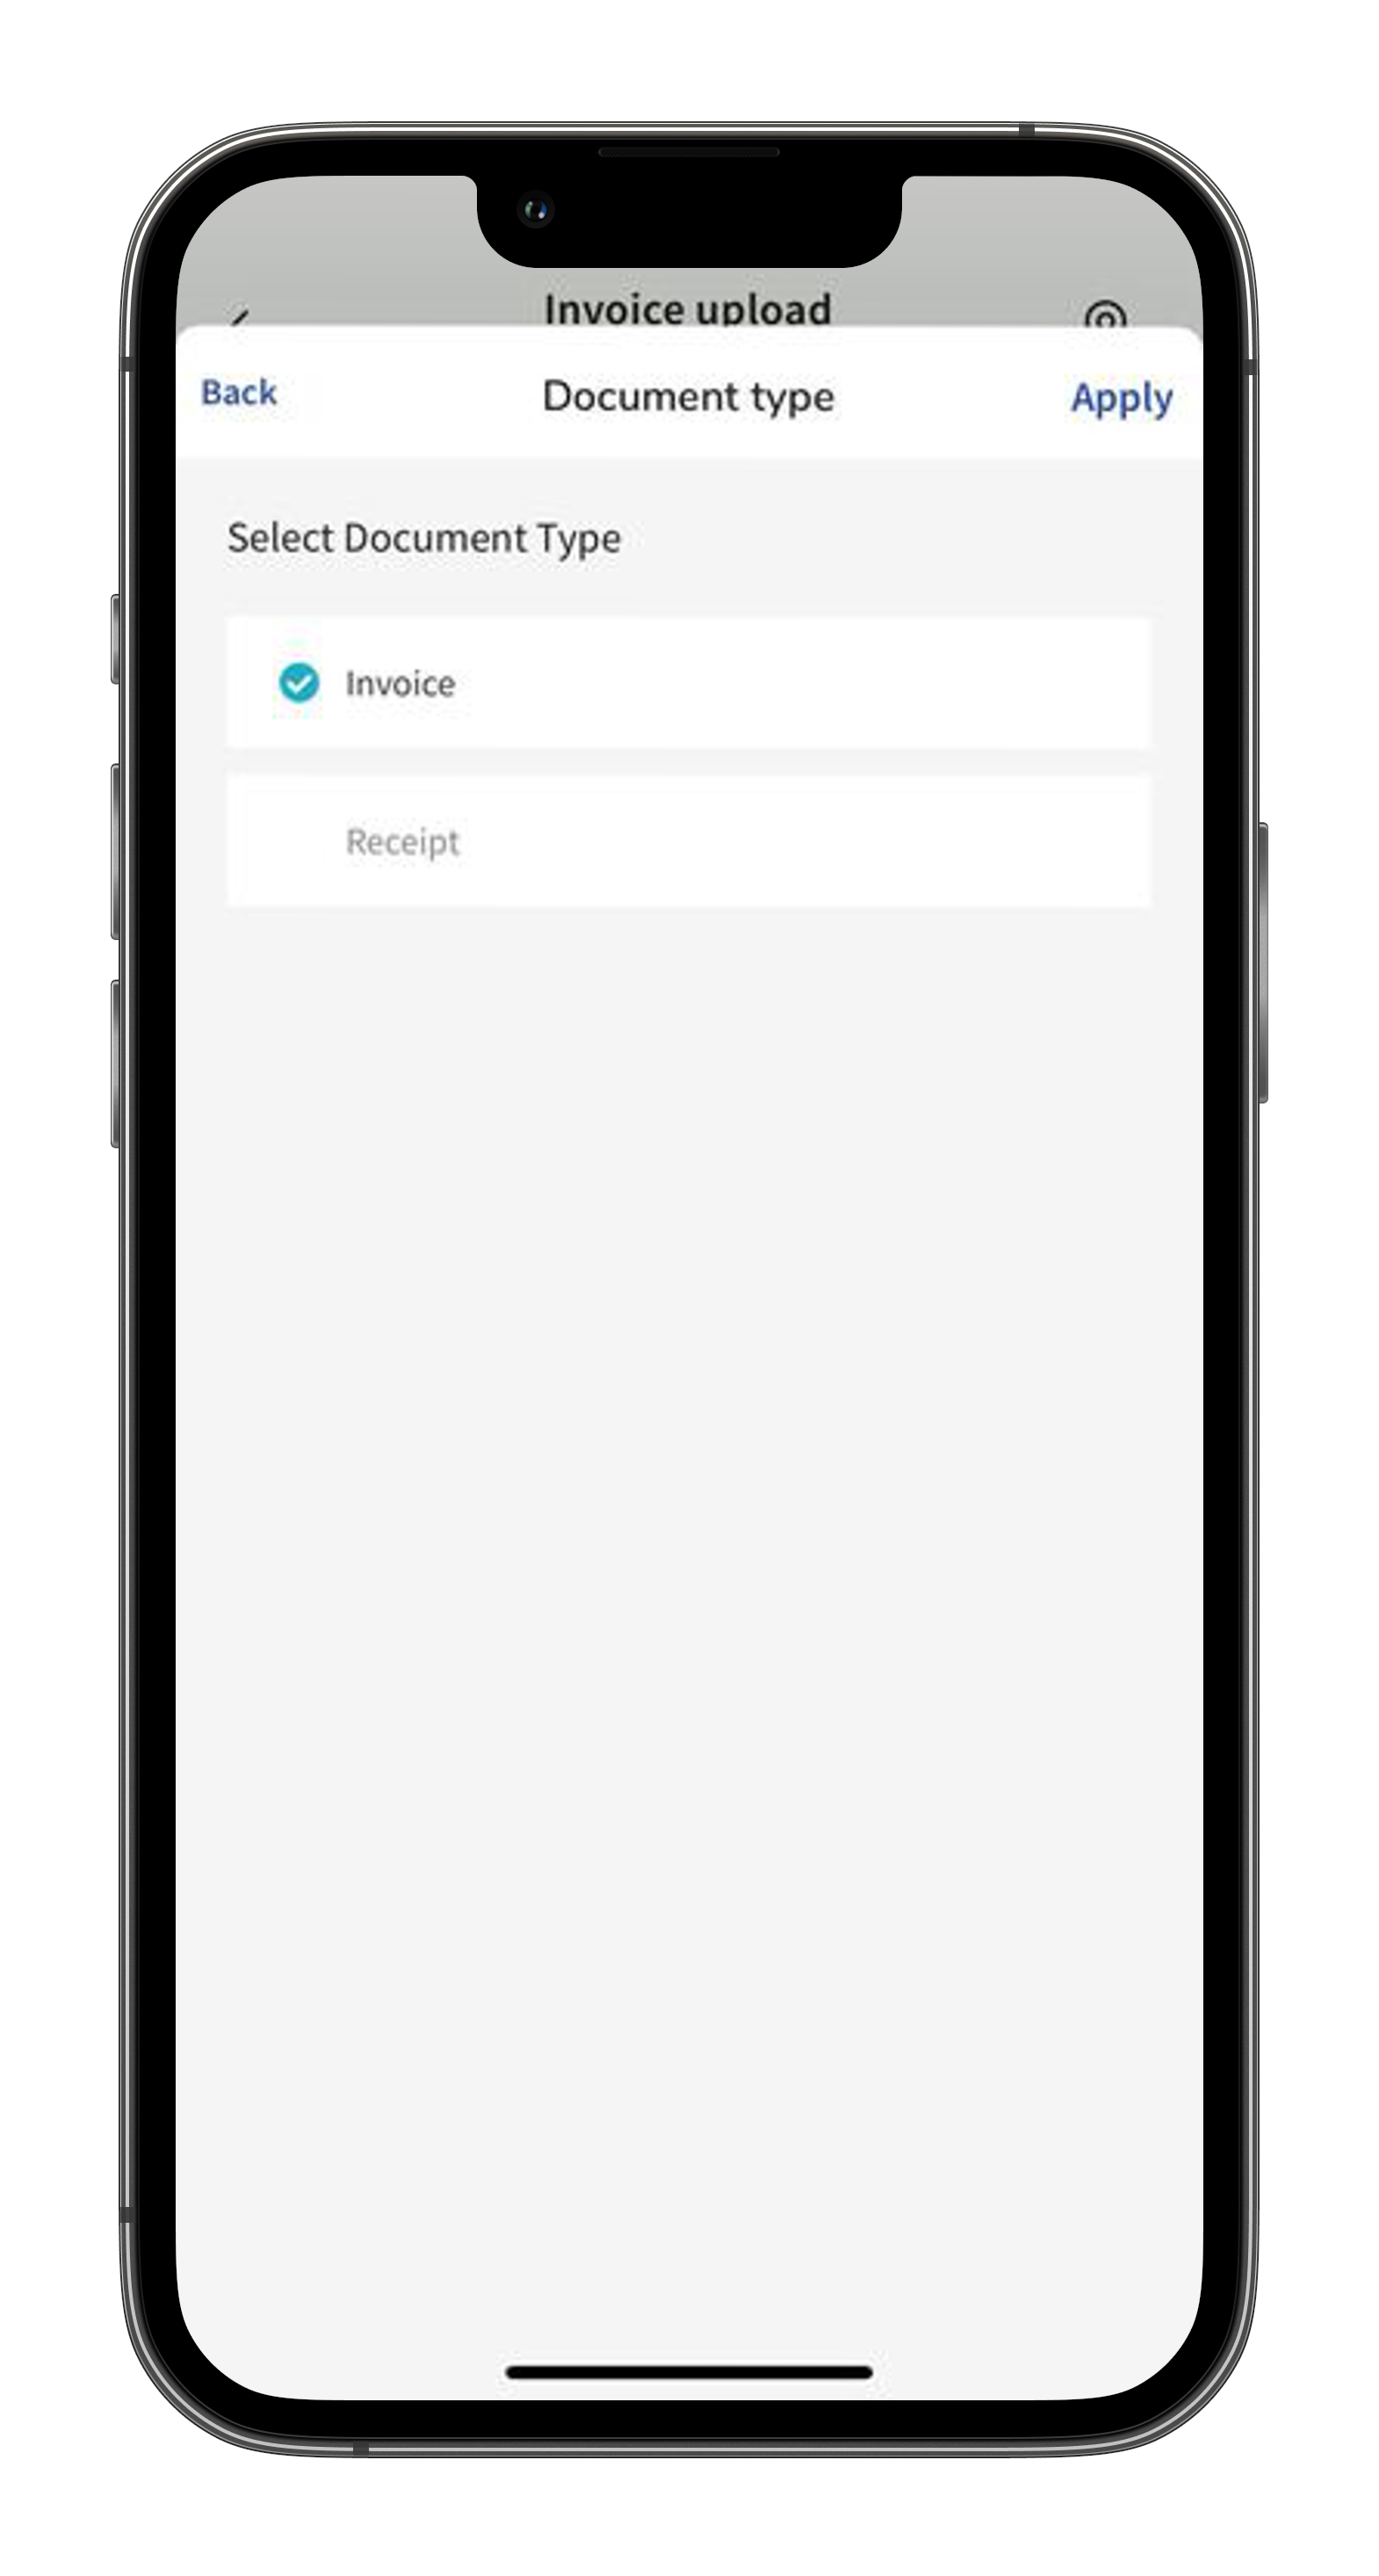
Una vez que se elija el nuevo tipo de documento, seleccione Aplicar. Esto confirmará su selección.
Volver al inicio
Próximos pasos
Una vez que se suban las facturas, comenzarán el proceso de conciliación. Al principio, este proceso requerirá acción de su parte para revisar y manejar lo siguiente:
- Rechazos: Las facturas pueden ser rechazadas si una foto o escaneo subido carece de demasiada información (debido a recortes o páginas faltantes) o si la calidad de la imagen es ilegible. Para más información sobre rechazos, visita xtraCHEF: Rechazos de Facturas.
- Acción Necesaria: Las facturas que faltan información parcial, como códigos de proveedor, números de factura, fechas y más, serán detenidas. Estas facturas siempre pueden ser avanzadas proporcionando la información faltante y requerida. Para más información sobre excepciones, visita nuestro artículo xtraCHEF: Facturas con Acción Necesaria.
- Mapeo de artículos de factura: Con el tiempo, xtraCHEF aprende a codificar tus artículos de línea de factura individuales a códigos de libro mayor (GL) y categorías para propósitos contables e informativos. Esto se hace a través del aprendizaje automático. Sin embargo, cuando apenas estás comenzando, tu IA de cuentas es una pizarra en blanco.
A medida que ‘codificas’ manualmente tus artículos de línea de factura a un código GL o categoría correspondiente, xtraCHEF recordará tus designaciones y las repetirá en tu nombre en el futuro. Para más información sobre el mapeo de artículos de factura, consulta xtraCHEF: Mapear Artículos de Factura.
Continuando con el proceso de conciliación de tus facturas, xtraCHEF comenzará a desbloquear información en forma de análisis, informes, presupuestos, resúmenes operativos y mucho más.
Cargando Preguntas Frecuentes
Mis facturas están siendo rechazadas debido a la mala calidad de la imagen. ¿Cómo puedo prevenir esto?
Las imágenes pueden ser rechazadas debido a la mala calidad de la imagen por varias razones. Normalmente, esto ocurre cuando una imagen está demasiado oscura, demasiado borrosa o el texto es ilegible. Capturar sus facturas sobre una superficie bien iluminada ayudará a prevenir rechazos de facturas.
Aprenda más sobre los rechazos de facturas leyendo xtraCHEF: Rechazos de Facturas
Cuando agrego créditos al subir, mis facturas son marcadas en la pestaña Acción Necesaria ya que los totales de la factura o de las líneas no coinciden. ¿Cómo puedo prevenir esto?
La razón proporcionada indica que el monto total a pagar en la factura no coincide con el total de todos sus artículos. Esto puede suceder cuando ajusta el monto total a pagar en una factura antes de subir y agrega un crédito al subir. Hacer esto puede duplicar el crédito y, por lo tanto, desbalancear su factura.
Para evitar esto, ajuste el total en la factura antes de subir su documento o Agregue Crédito al subir su documento.
Aprenda más aquí: xtraCHEF: Facturas Acción Necesaria.
No puedo subir múltiples páginas de facturas. ¿Cómo puedo adjuntar todo esto a una sola carga?
Al revisar su escaneo inicial de la factura en la página Escanear, tiene la opción de seleccionar Agregar Página. Esto le permitirá adjuntar imágenes adicionales de su documento. No suba múltiples fotografías por separado, ya que estas podrían ser leídas como facturas separadas por el sistema.