Use Barcodes With Toast
Last updated: Apr 27, 2026, 10:56 AM
- Barcodes Overview
- Enable Barcodes on Your Device
- Add a Barcode to an Item
- Barcodes and Hidden Menus (Category Groups)
- Toast Retail: Generate and Print Barcodes
- Additional Resources
Barcodes Overview
If you use a barcode scanner or a Toast Go 3® handheld device, SKUs and other embedded barcodes (UPC, EAN, etc.) can be entered in Toast Web on the menu (category group) or item level, or on your POS device in Quick Edit mode. Barcodes can be scanned in both Quick Order and Kiosk modes.
Toast allows all barcode formats, but we most commonly see the following:
- UPCE (8-digit) barcodes
- UPCA (12-digit) barcodes
- EAN13 (13-digit) barcodes
- Embedded barcodes (6-digit codes input into Toast beginning with 2, or 7-digit codes beginning with 02)
Embedded barcodes are a specific type of barcode used for items with custom data, like a price or weight encoded within the barcode. These are commonly used for items like sliced deli meat, pre-weighed prepared foods like potato salad or cheese, or bulk goods like nuts or candy. For more information on menu best practices for delis and markets, see this Support Center article: Menu Best Practices for Delis & Markets. Learn more about supported embedded barcode types and how to set them up in Toast Web in this Support Center article: Configure Embedded Barcodes.
Note: While the Toast Retail module is not required in order to use a scanner and sell retail items with Toast, Retail will help make the management and overall use of Toast easier if you have a large number of barcodes. To learn more, see Expand Your Reach With Retail.
Enable Barcodes on Your Device
Before you can scan barcodes, you must enable them on each Toast device that will have a barcode scanner by following these steps:
- On your device’s main menu, navigate to Setup > Device Setup.
- Scroll down to the Order Screen section, and select the Enable SKUs setting.
- Select Yes to enable SKUs.
- Select Continue to save your selection.
Note: This must be done for the POS your external barcode scanner attaches to or the Toast Go 3® handheld you will be using to scan.
Add a Barcode to an Item
When scanning a barcode, Toast will search for an item that has a matching SKU and add that item to the current order. If it can’t find an item with a matching SKU, Toast will check if the barcode is an embedded barcode and add the corresponding item to the order.
There are many ways to add a barcode to an item:
- Toast Retail
- Advanced properties (menu bulk management)
- The menu manager (menu editor)
- Quick Edit mode on the POS
You can add multiple SKUs to a single item if needed.
Note: You can't add a SKU to a modifier. If you want to be able to scan something that exists as a modifier in your menu (for example, a bottled beverage), you will need to set it up as an item instead so that you can add a SKU.
Back to top
Using Toast Retail to Add Barcodes
With Toast Retail, barcodes can be managed within your item library.
- In Toast Web, navigate to Retail > Item management > Item Library.
- Ensure that the Barcodes column is showing on your item library. If not, you can select Columns and then select the Barcodes option.
- Search for your desired item.
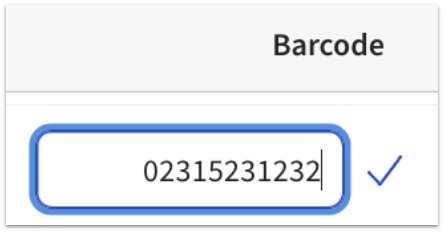
- Enter the barcode for the item, and then select the check mark to save your changes.
- Select Publish at the top of the item library page when you’re finished making changes.
You can also add a barcode to a single item by going to an item editor and editing the Barcode field under the POS item configuration section.
Note: The item library will only show the first barcode associated with an item. If you'd like to add multiple barcodes/SKUs to the same item, select the item name to open the item editor and make your changes in the POS item configuration section.
Using Advanced Properties to Add Barcodes
You can add a barcode to an item on the Advanced properties page in Toast Web by following the instructions below. Note that only the first SKU entered on an item will be displayed in the Advanced properties view. If you have multiple SKUs for a single item, you can view them all using the menu manager or Toast Retail.
- In Toast Web, navigate to Menus > Bulk management > Advanced properties.
- Select the Show/Hide drop-down menu and enable the SKU column located in the Properties section.
- You should now see the SKU column on your Advanced properties page. Use the arrow (>) icons on the left side of the page to expand menus and menu groups to find the specific item you’d like to add a barcode to.
- Enter the item’s SKU in the corresponding field.
- Save and publish your changes.
Using the Menu Manager to Add Barcodes
To add a SKU to an item using the Menu manager, follow these steps:
- Navigate to Menus > Menu management > Menu manager.
- Select Items at the top of the page to show your full item list. Search for and select the name of the item you wish to edit.
- Scroll down to the Properties section and find the SKU setting. Select the plus (+) icon to add a SKU. You can select the plus icon again if you'd like to add more than one SKU to the same item, or select the trash can icon to remove a SKU associated with the item.
- Save and publish all changes.
Using Quick Edit Mode to Edit a Barcode on Your POS
Note: You must have the 5.7 SKU permission to edit a barcode on your POS. To learn more, check out the Permissions Reference Guide.
On your device, you can assign SKUs to items by entering Quick Edit mode and entering the number into the SKU field. To access Quick Edit mode, tap and hold your finger on an item on your POS screen.
You can learn more in this Support Center article: Quick Edit Mode.
In Quick Order mode on your device, Toast allows you to scan items on menus (category groups in Toast Retail) that are not marked as visible to the POS. Hiding menus from the POS allows you to have scannable items (for example, on retail menus) without requiring them to be visible to employees on the Quick Order screen.
To learn more, visit this Support Center article: Manage Your Menu Visibility Settings.
If you’re using Toast Retail, you can adjust the visibility settings by selecting the item from the item library and selecting the desired setting in the Visibility section.
Toast Retail: Generate and Print Barcodes
When an item doesn’t have a barcode already created, you can use Toast Retail to generate and print a barcode.
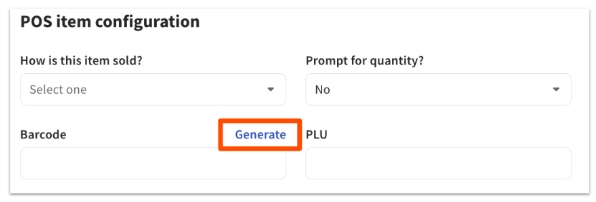
On the item details page, in the POS configuration section, select Generate next to the Barcode field.
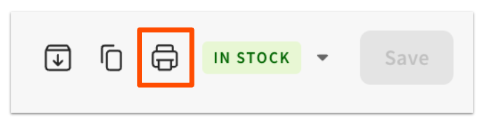
Select the printer icon at the top of the page. Note: If you're creating a brand new item, you must select Save before looking for the printer icon.
On the Print barcode labels pop-up window, you can select a label size, the quantity you’d like to print, and the label details (item name, price, barcode) you’d like to include. A preview of your label will be displayed.
Once you’re satisfied with your settings, select Print to send to your printer or Download PDF if you prefer to save the labels and apply them differently. Note: Barcode label printers are not sold or supported by Toast. If you’re interested in using label printers for your barcodes, you must purchase and set up a printer to use for this purpose. This printer will be connected to a PC (Windows or Mac), not a Toast terminal.
You can also generate and print barcodes for multiple items at once. Select all of the desired items in the item library, open the Barcode actions drop-down at the bottom of the screen, then choose Generate barcodes or Print barcode labels.
To generate embedded barcodes, keep these things in mind:
- The item's selling strategy must be set to Embedded barcode on the item details page. This can also be updated for multiple items at once using bulk actions in the item library.
- Toast can then generate a five-digit identifier (barcode) that will be associated with the item and entered into the scale before it is weighed.
- Toast does not sell deli scales; however, most deli scales are compatible.