xtraCHEF:食谱入门指南
上次更新时间:2026年4月8日 10:05
xtraCHEF 食谱概览
您可能已经知道,管理餐盘成本对于餐厅的成功至关重要。然而,您可能并不知道,xtraCHEF 为计算和跟踪餐盘成本提供了一种便捷的方式,以确保贵组织在为客人创造价值的同时实现利润最大化。
了解如何在 xtraCHEF 中创建食谱和备餐食谱,这有助于揭示关键成本并为高级报告奠定基础。此外,请注册参加由 Toast Classroom 提供支持的即将到来的食谱网络研讨会。
创建食谱和食谱
注意:食谱和备餐食谱使用您的产品在 xtraCHEF 中创建。因此,您必须在开始制作食谱之前,在您的 xtraCHEF 账户中创建产品。如果您已经设置好产品,让我们开始吧。
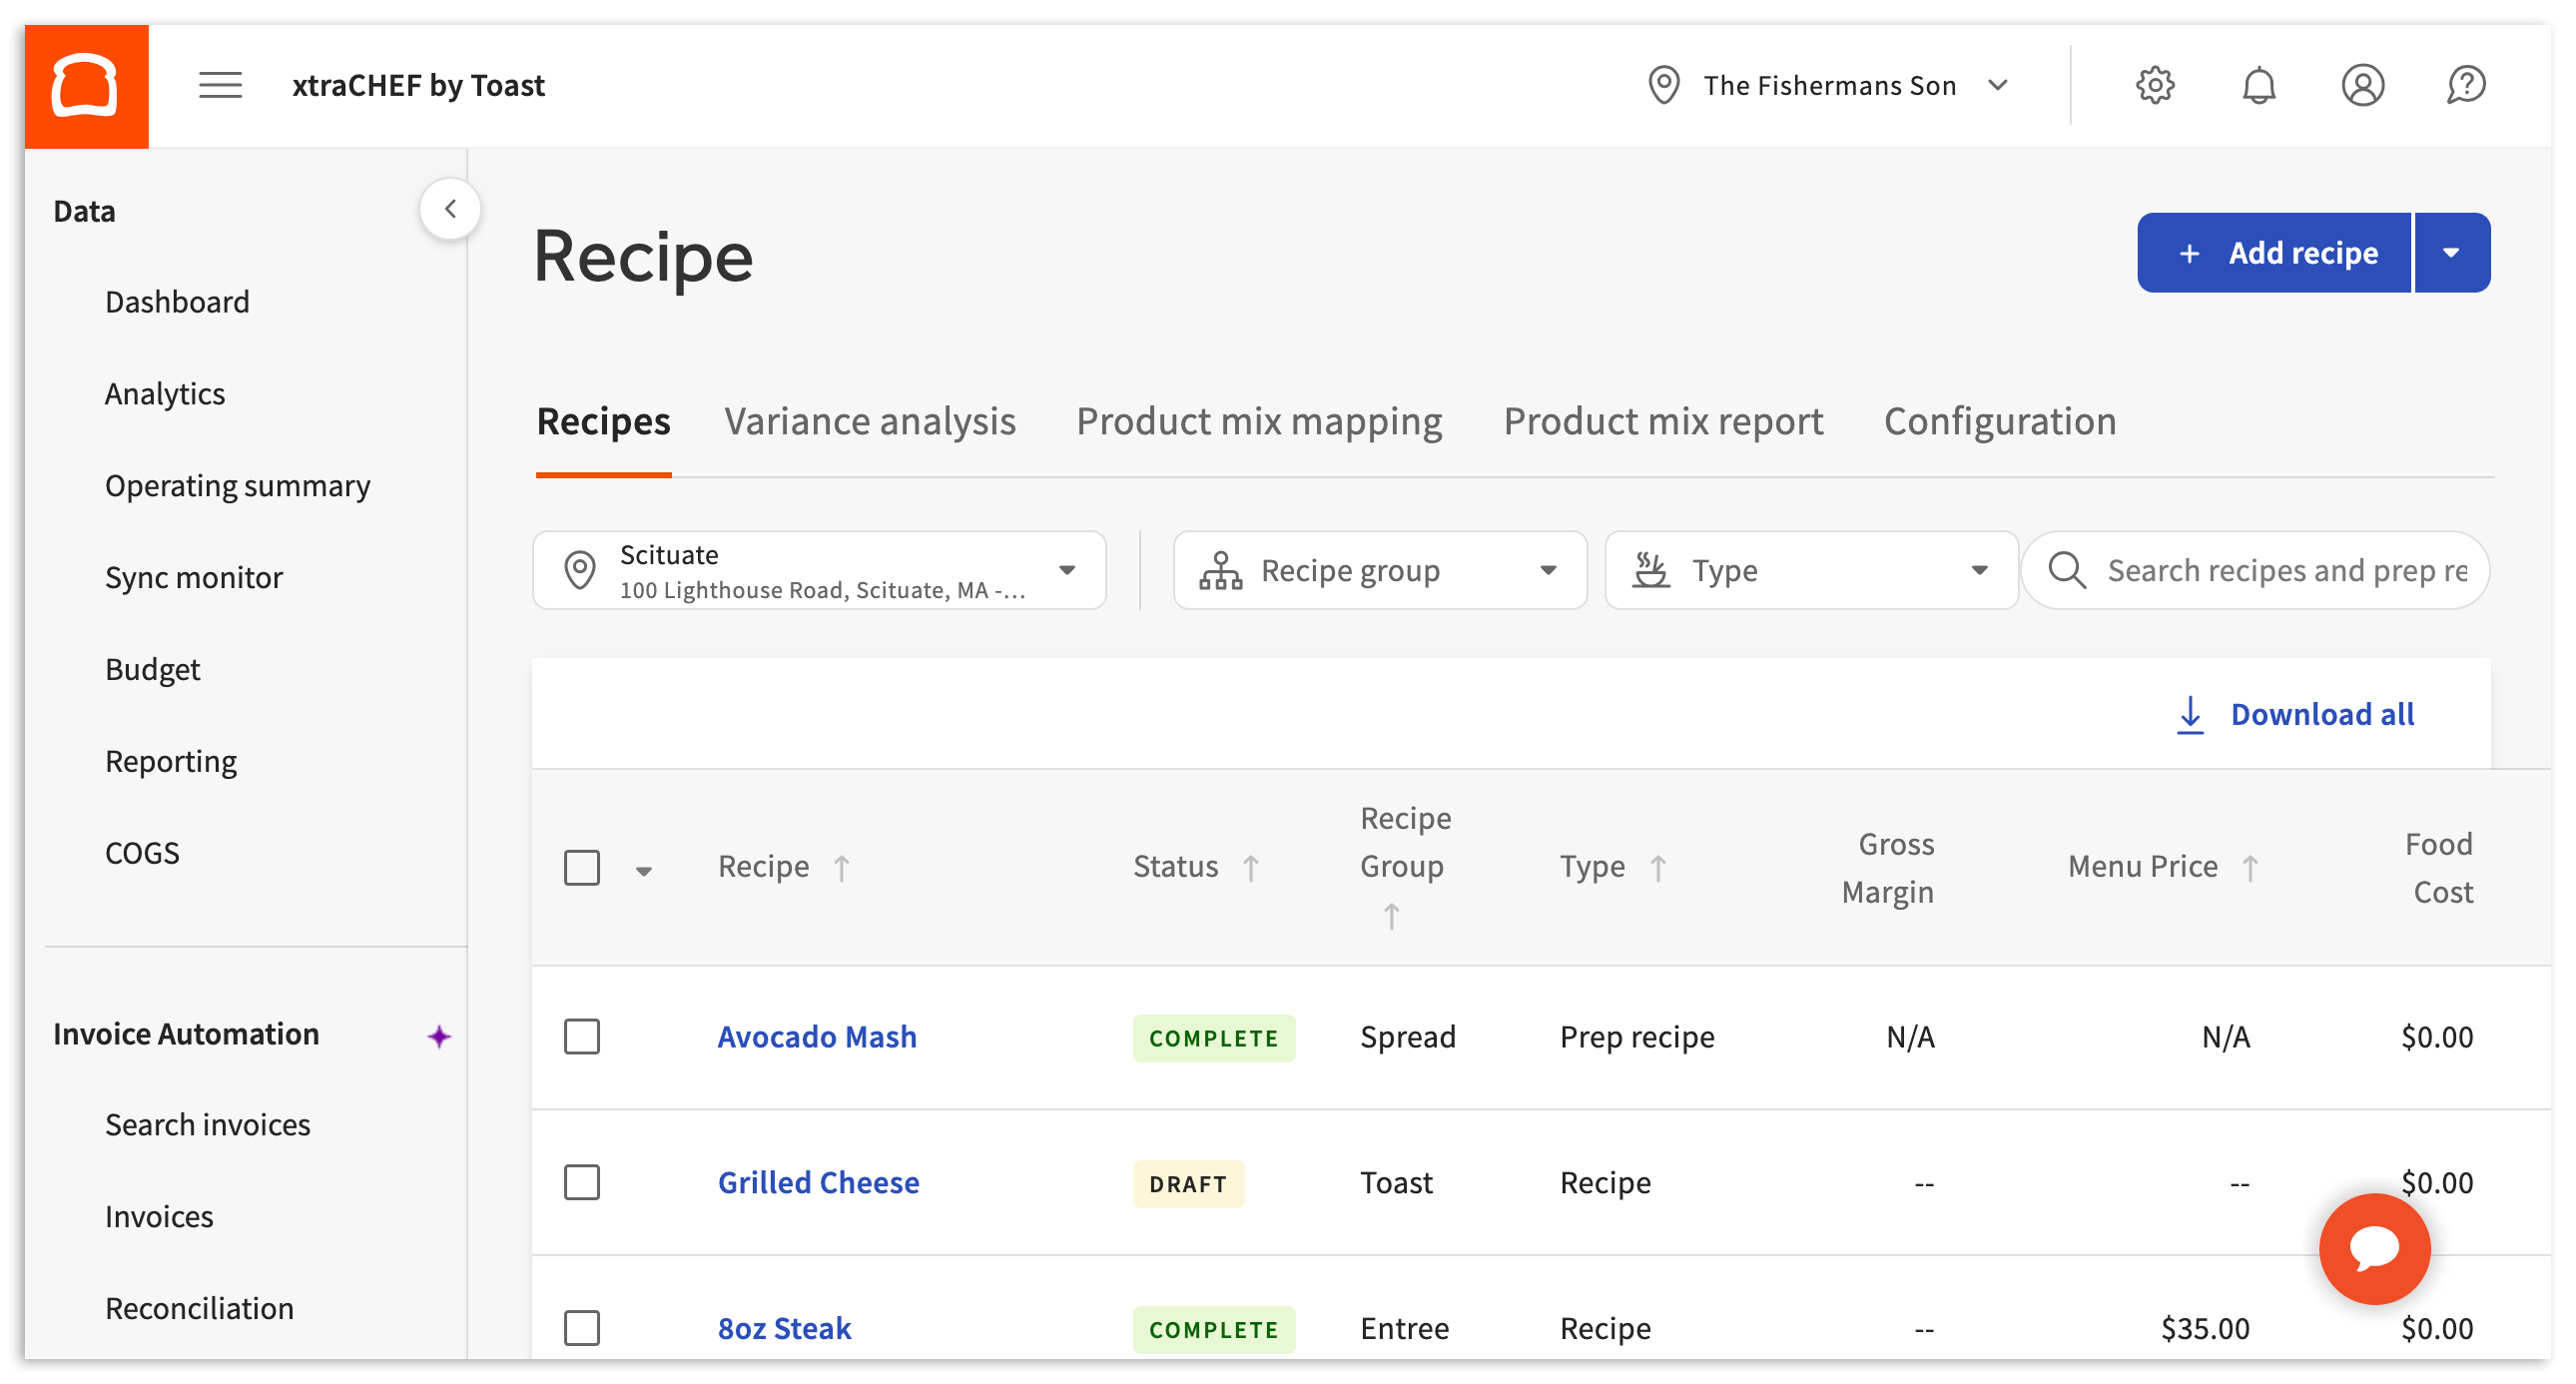
- 在左侧导航栏底部选择“食谱”,即可开始使用此工具。
- 在本页顶部,您将看到“食谱”、“方差分析”、“配置”等选项卡。Toast POS 与 xtraCHEF 集成后,您还将看到产品组合映射和产品组合报告等食谱选项。
- 要创建新食谱,请选择“+ 添加食谱”按钮。
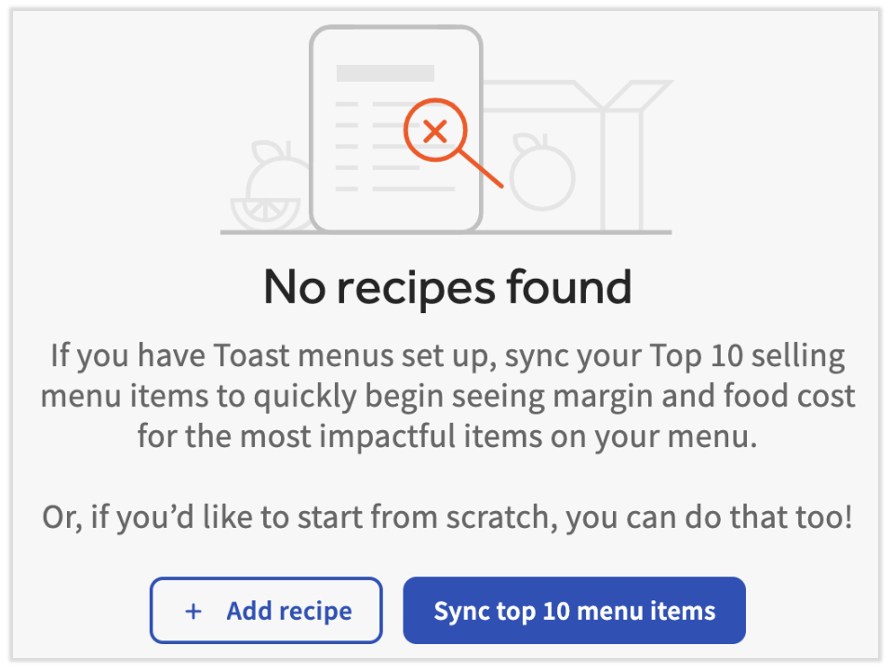
- 如果您是首次访问此页面,您将看到一个选项,自动从 Toast Web 中提取您最受欢迎的 10 个单品。选择“同步前 10 个菜单单品”以调出数据并创建食谱,命名(使用菜单名称),并将食谱链接到 Toast 菜单单品。
- 如果您是首次访问此页面,您将看到一个选项,自动从 Toast Web 中提取您最受欢迎的 10 个单品。选择“同步前 10 个菜单单品”以调出数据并创建食谱,命名(使用菜单名称),并将食谱链接到 Toast 菜单单品。
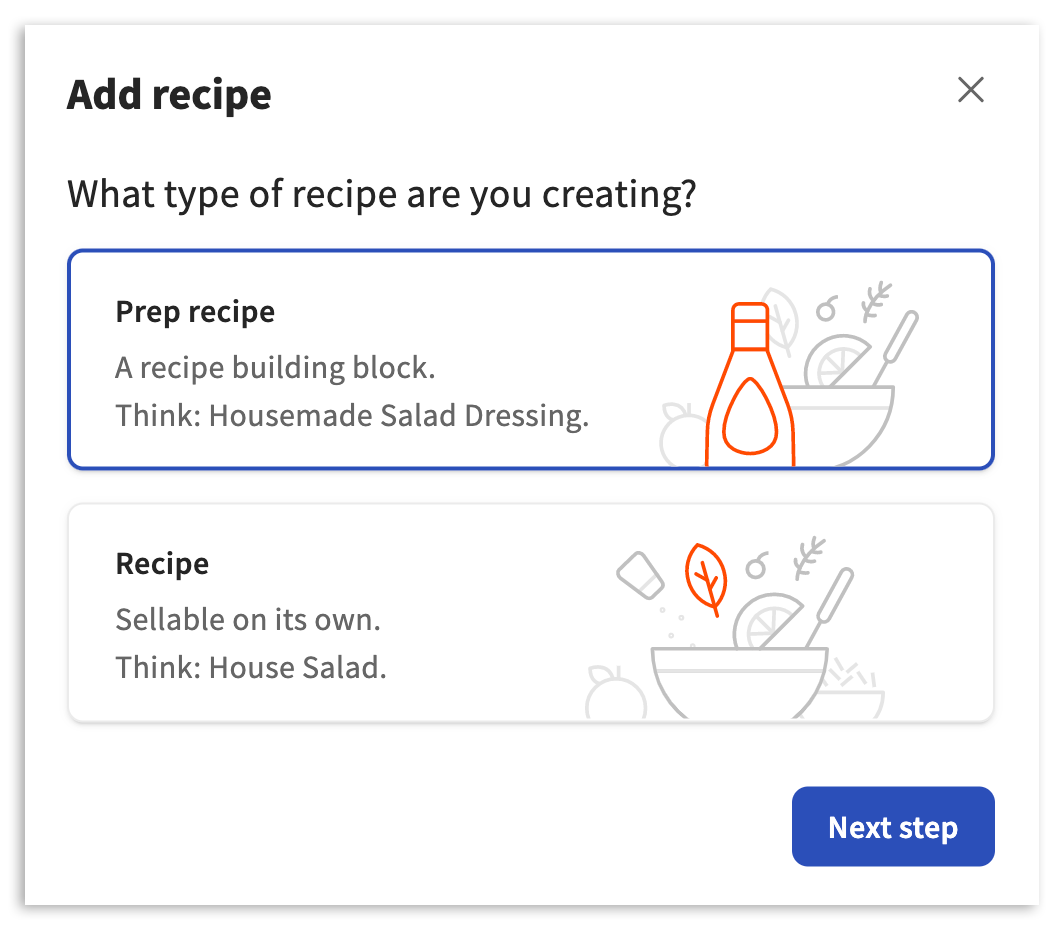
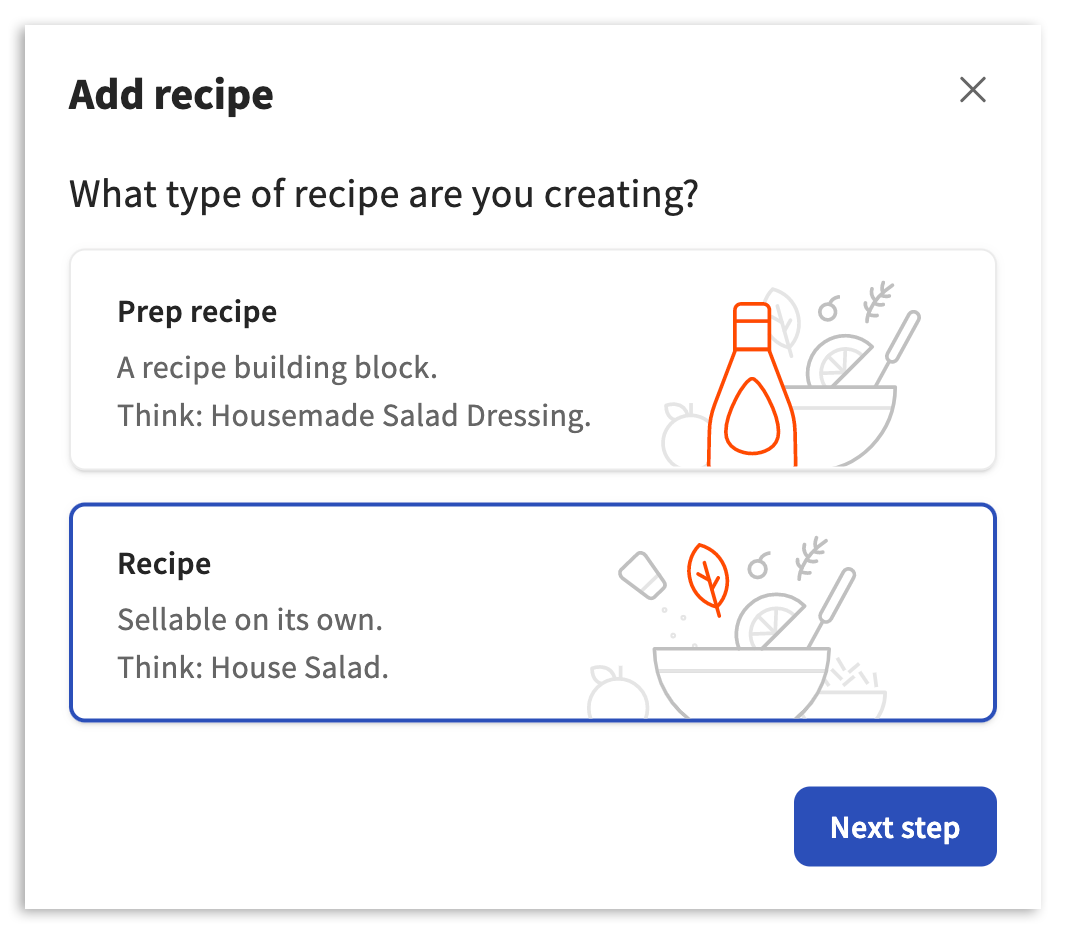
- 然后,xtraCHEF 会询问您希望创建哪种类型的食谱。
准备食谱
选择“备餐食谱”“下一步”,将其带到备餐食谱生成器中。
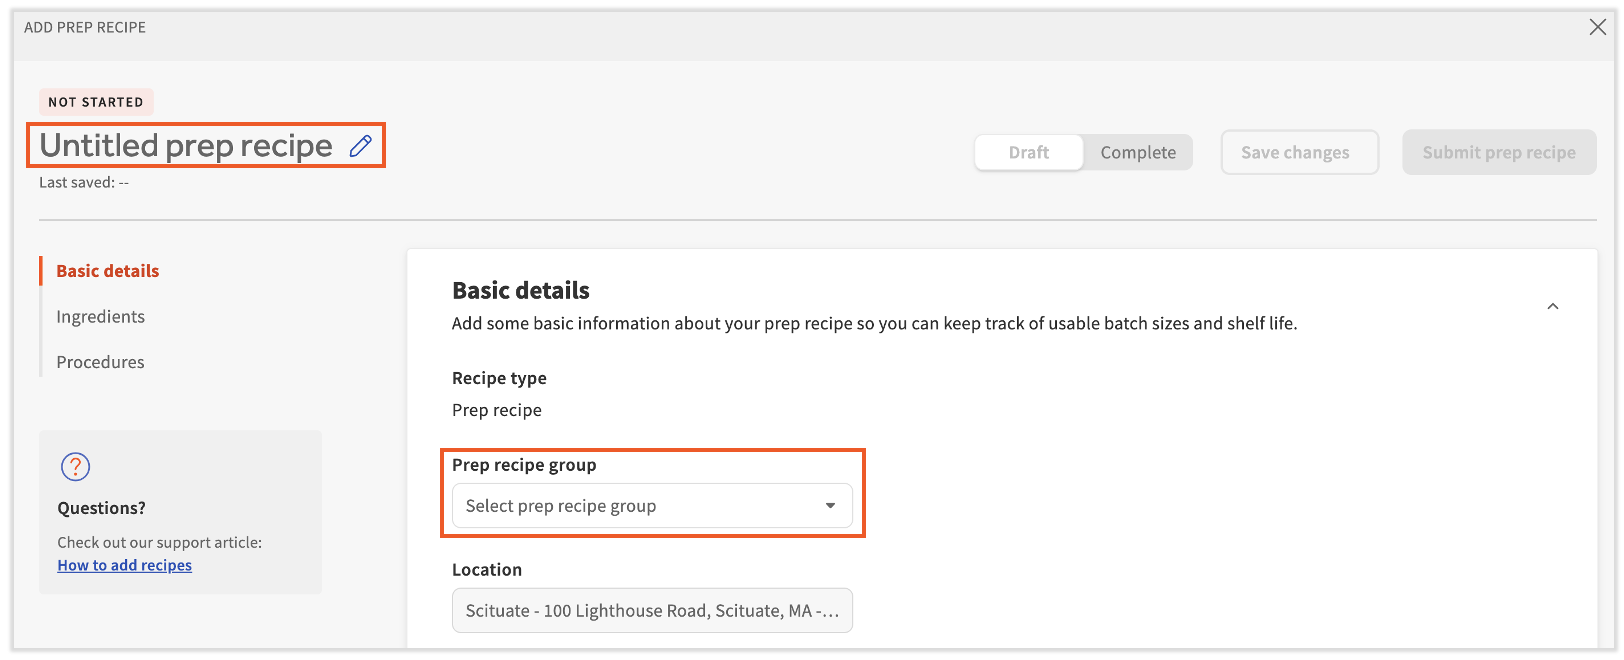
步骤 #1:基本详情
默认情况下,您将从“基本详情”开始。并非所有基本详情都是必需的。要开始,请选择空字段,然后键入或选择适用的选项。基本详情字段包括:
| 详情名称 | 描述 |
| 准备食谱名称 | 命名/重命名备餐食谱。 |
| 备餐食谱组 | 将备餐食谱与类似的备餐食谱类型(例如调味品、酱汁等)分组 |
| 门店 | 定义正在为其创建备餐食谱的门店。注意:稍后可以将预制食谱复制到其他门店。 |
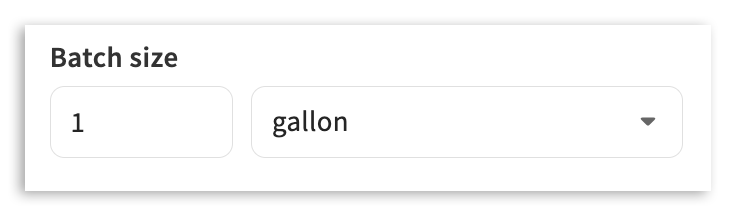
| 批次大小 | 定义预制食谱批次完成后的大小。注意:此字段决定您在食谱中使用的预制食谱的定价方式。 |
| 收益 | 可用批次的百分比。 |
| 保质期 | 确定备餐食谱的有效期。 |
| 备注 | 如有需要,介绍备餐食谱。 |
并非所有基本详情均为必填项。但是,我们建议始终为备餐食谱名称、备餐食谱组和批次大小分配属性。
批次大小尤为重要。这是备餐食谱的大致最终测量值,未来成本计算基于您的备餐食谱用于其他备餐食谱或食谱时。 为此,请选择空字段并输入单位数量。然后选择计量单位。
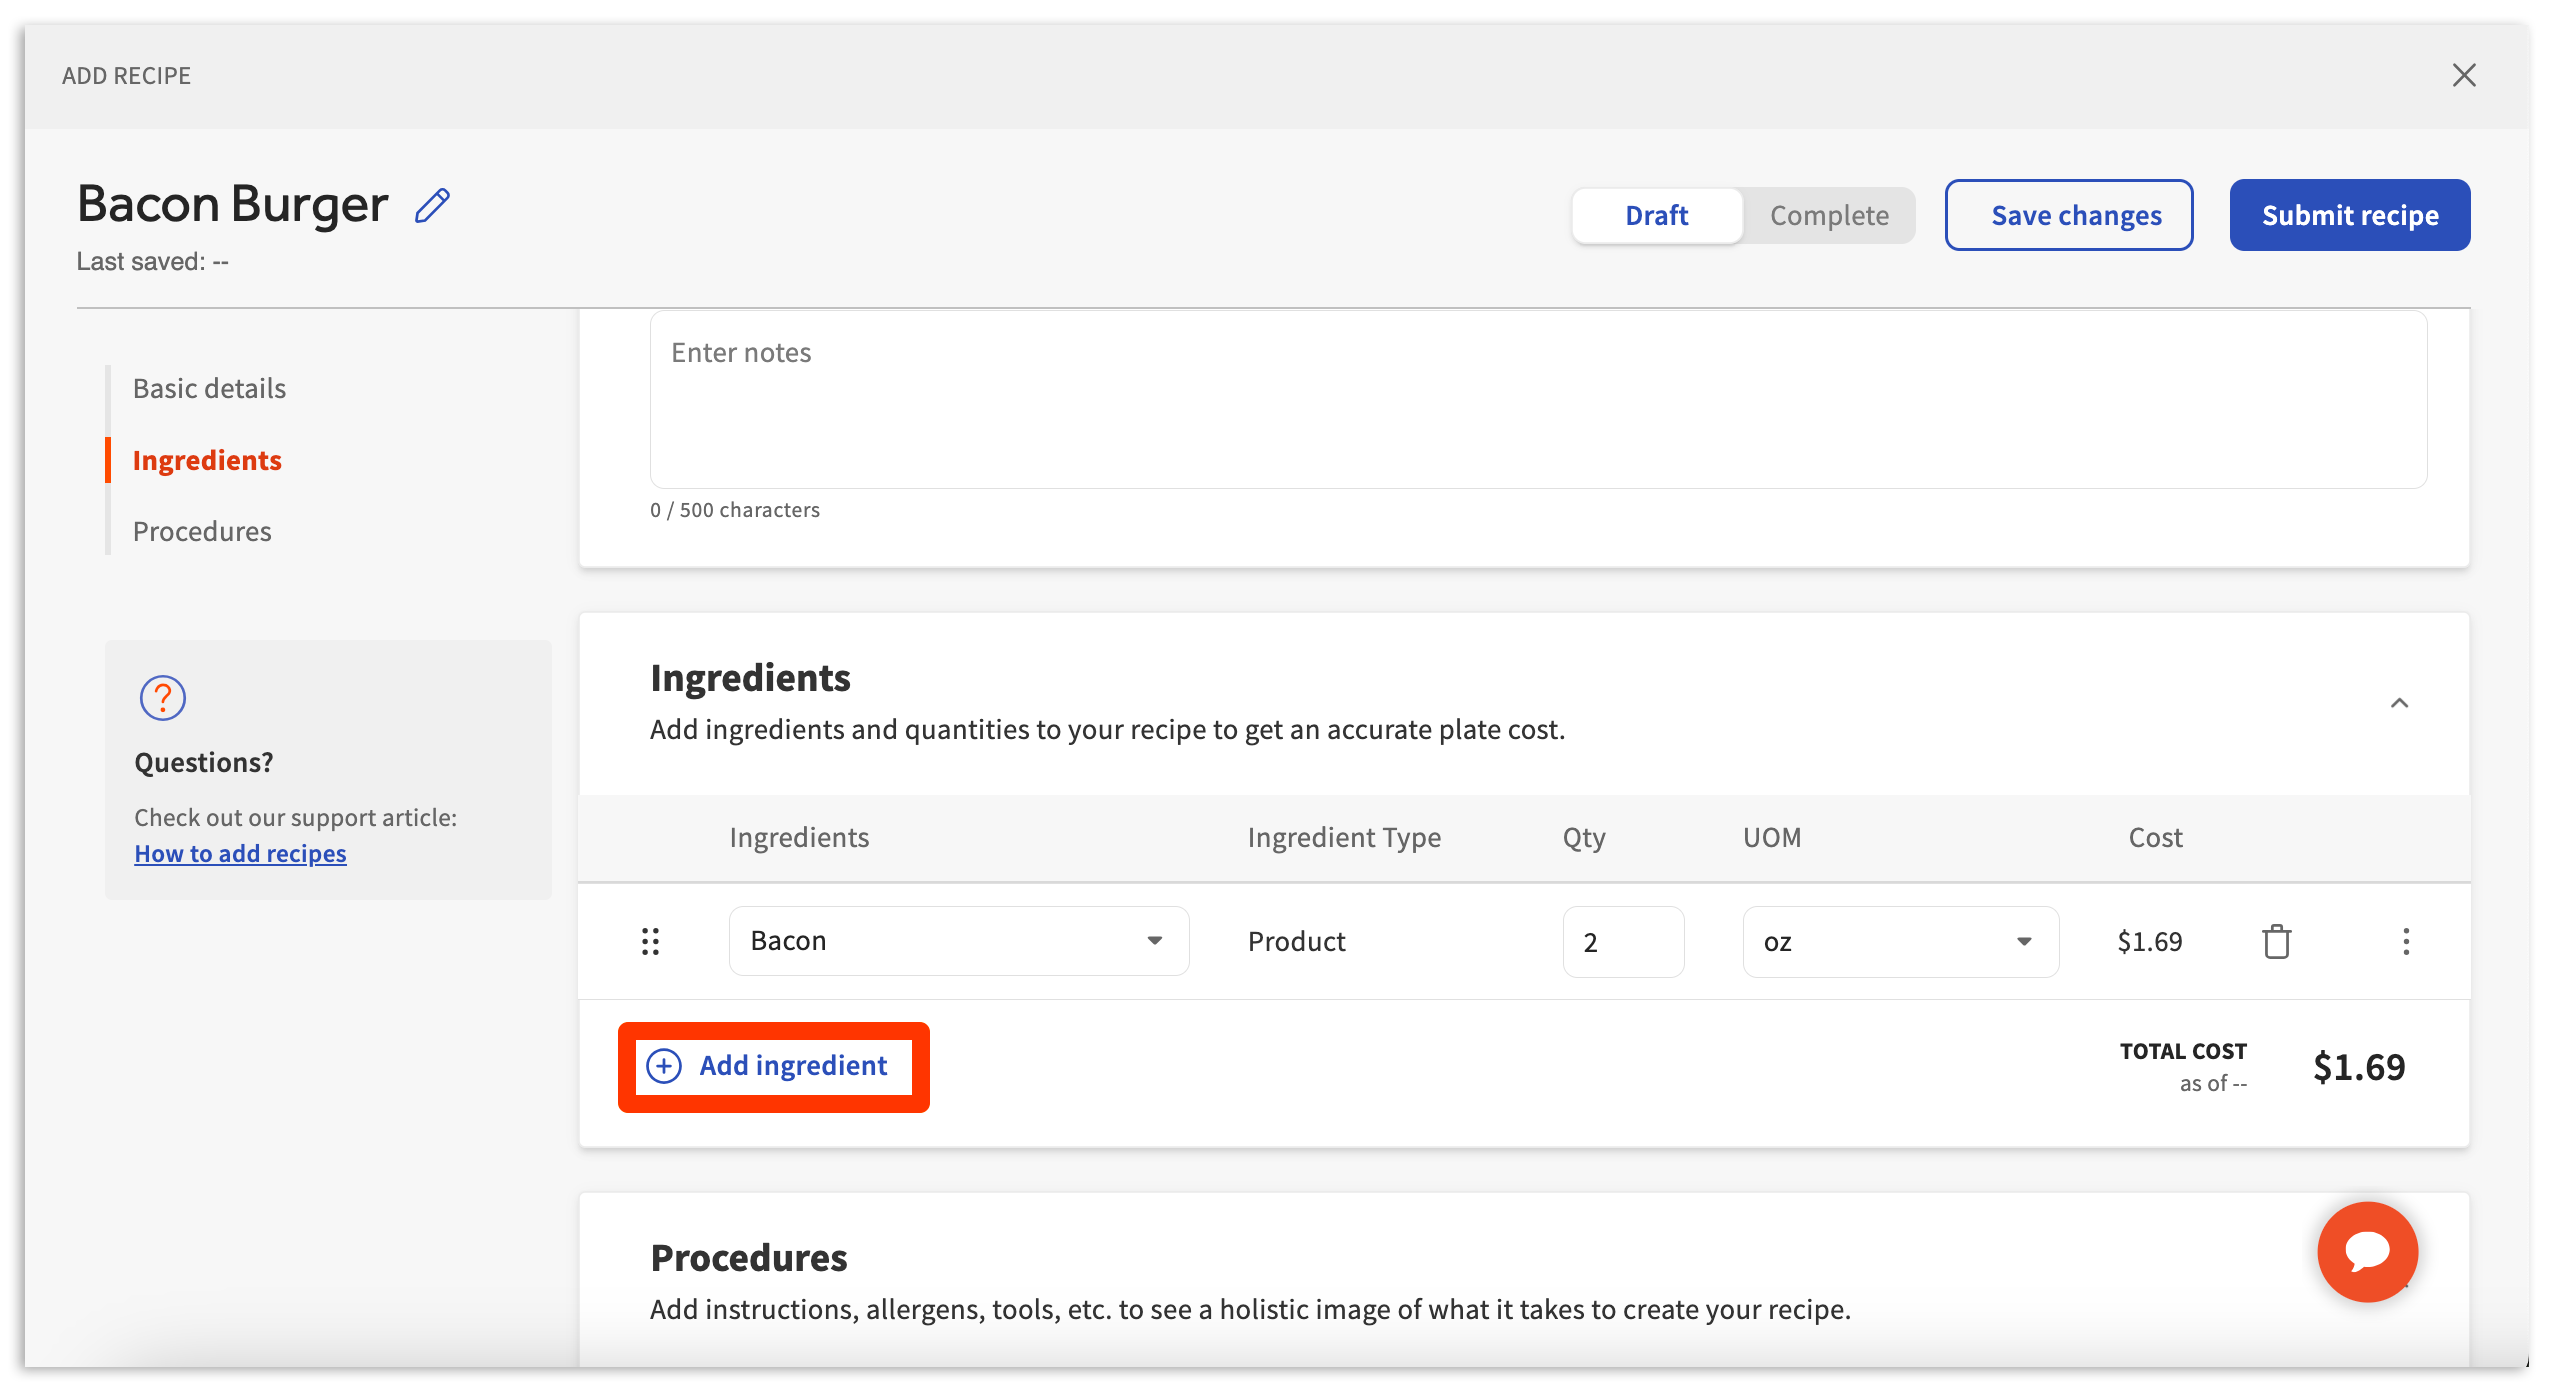
步骤 #2:食材
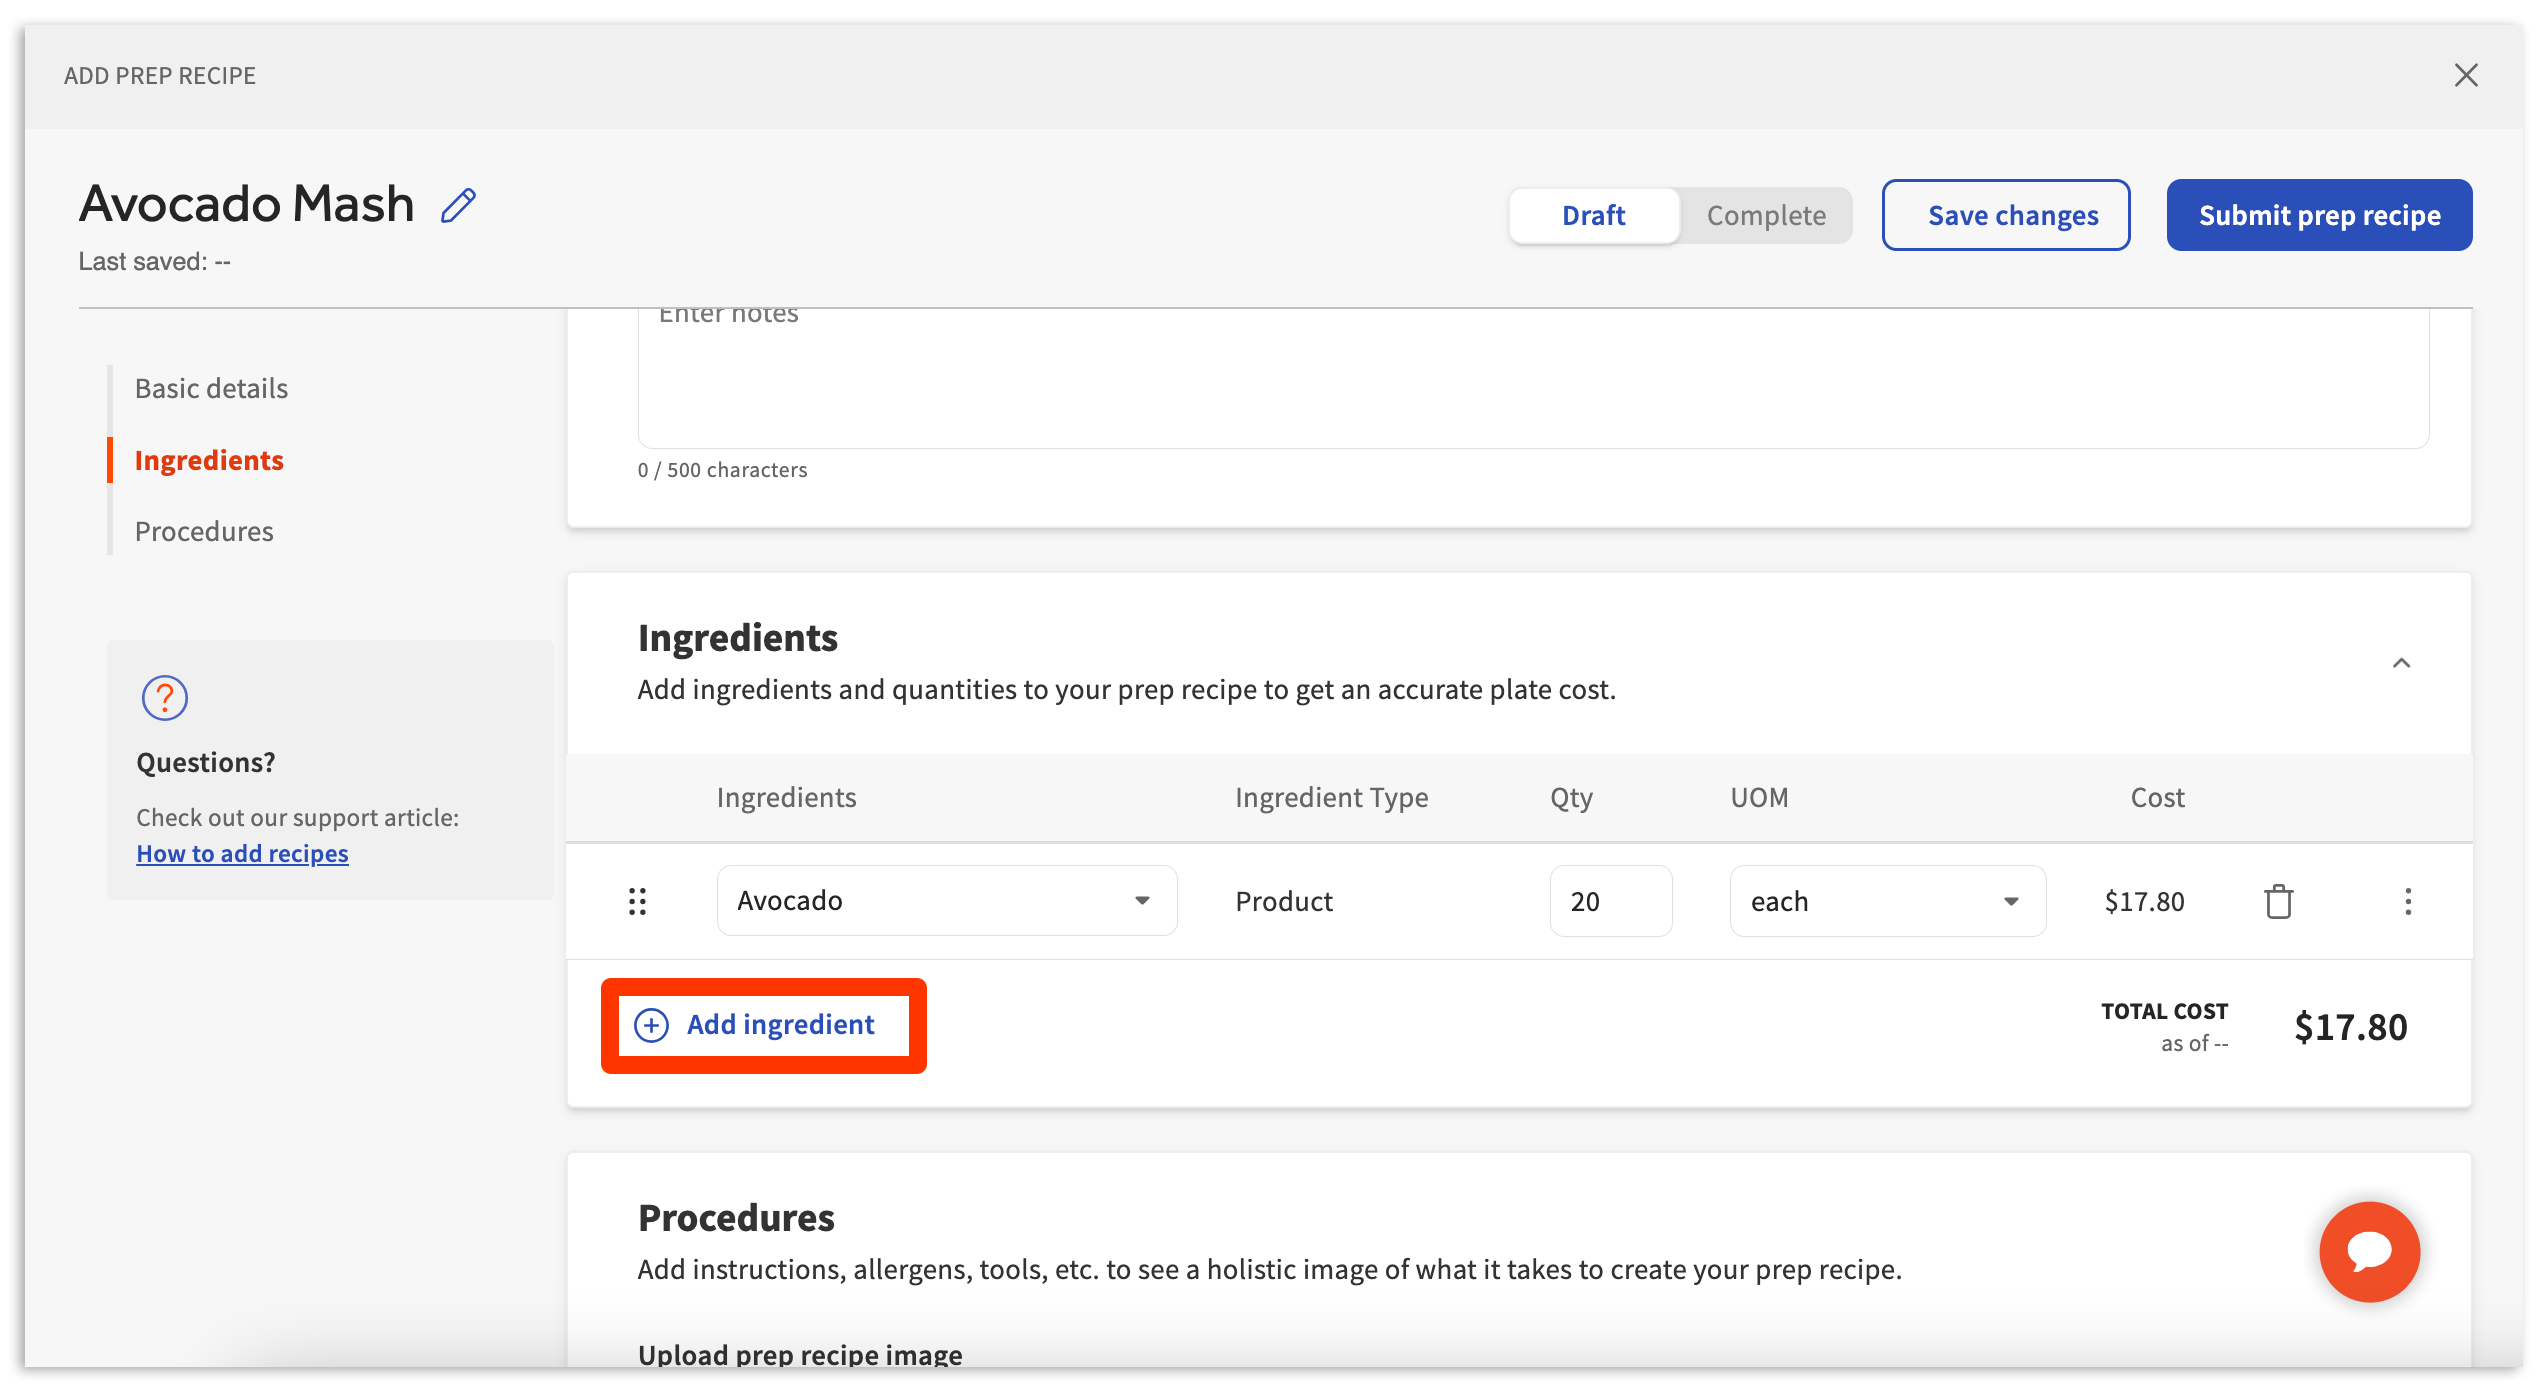
输入基本详情后,向下滚动至“食材”部分。在这里,您可以开始将食材和量度添加到您的备餐食谱中。选择“选择食材”,然后从下拉菜单中选择食材。

注意:如果您缺少一种食材,这可能是因为产品尚未创建并关联到发票单品。有关创建产品的更多信息,请访问 xtraCHEF:创建产品。
接下来,指明添加到备餐食谱中的食材的数量(数量)和UOM(计量单位)。
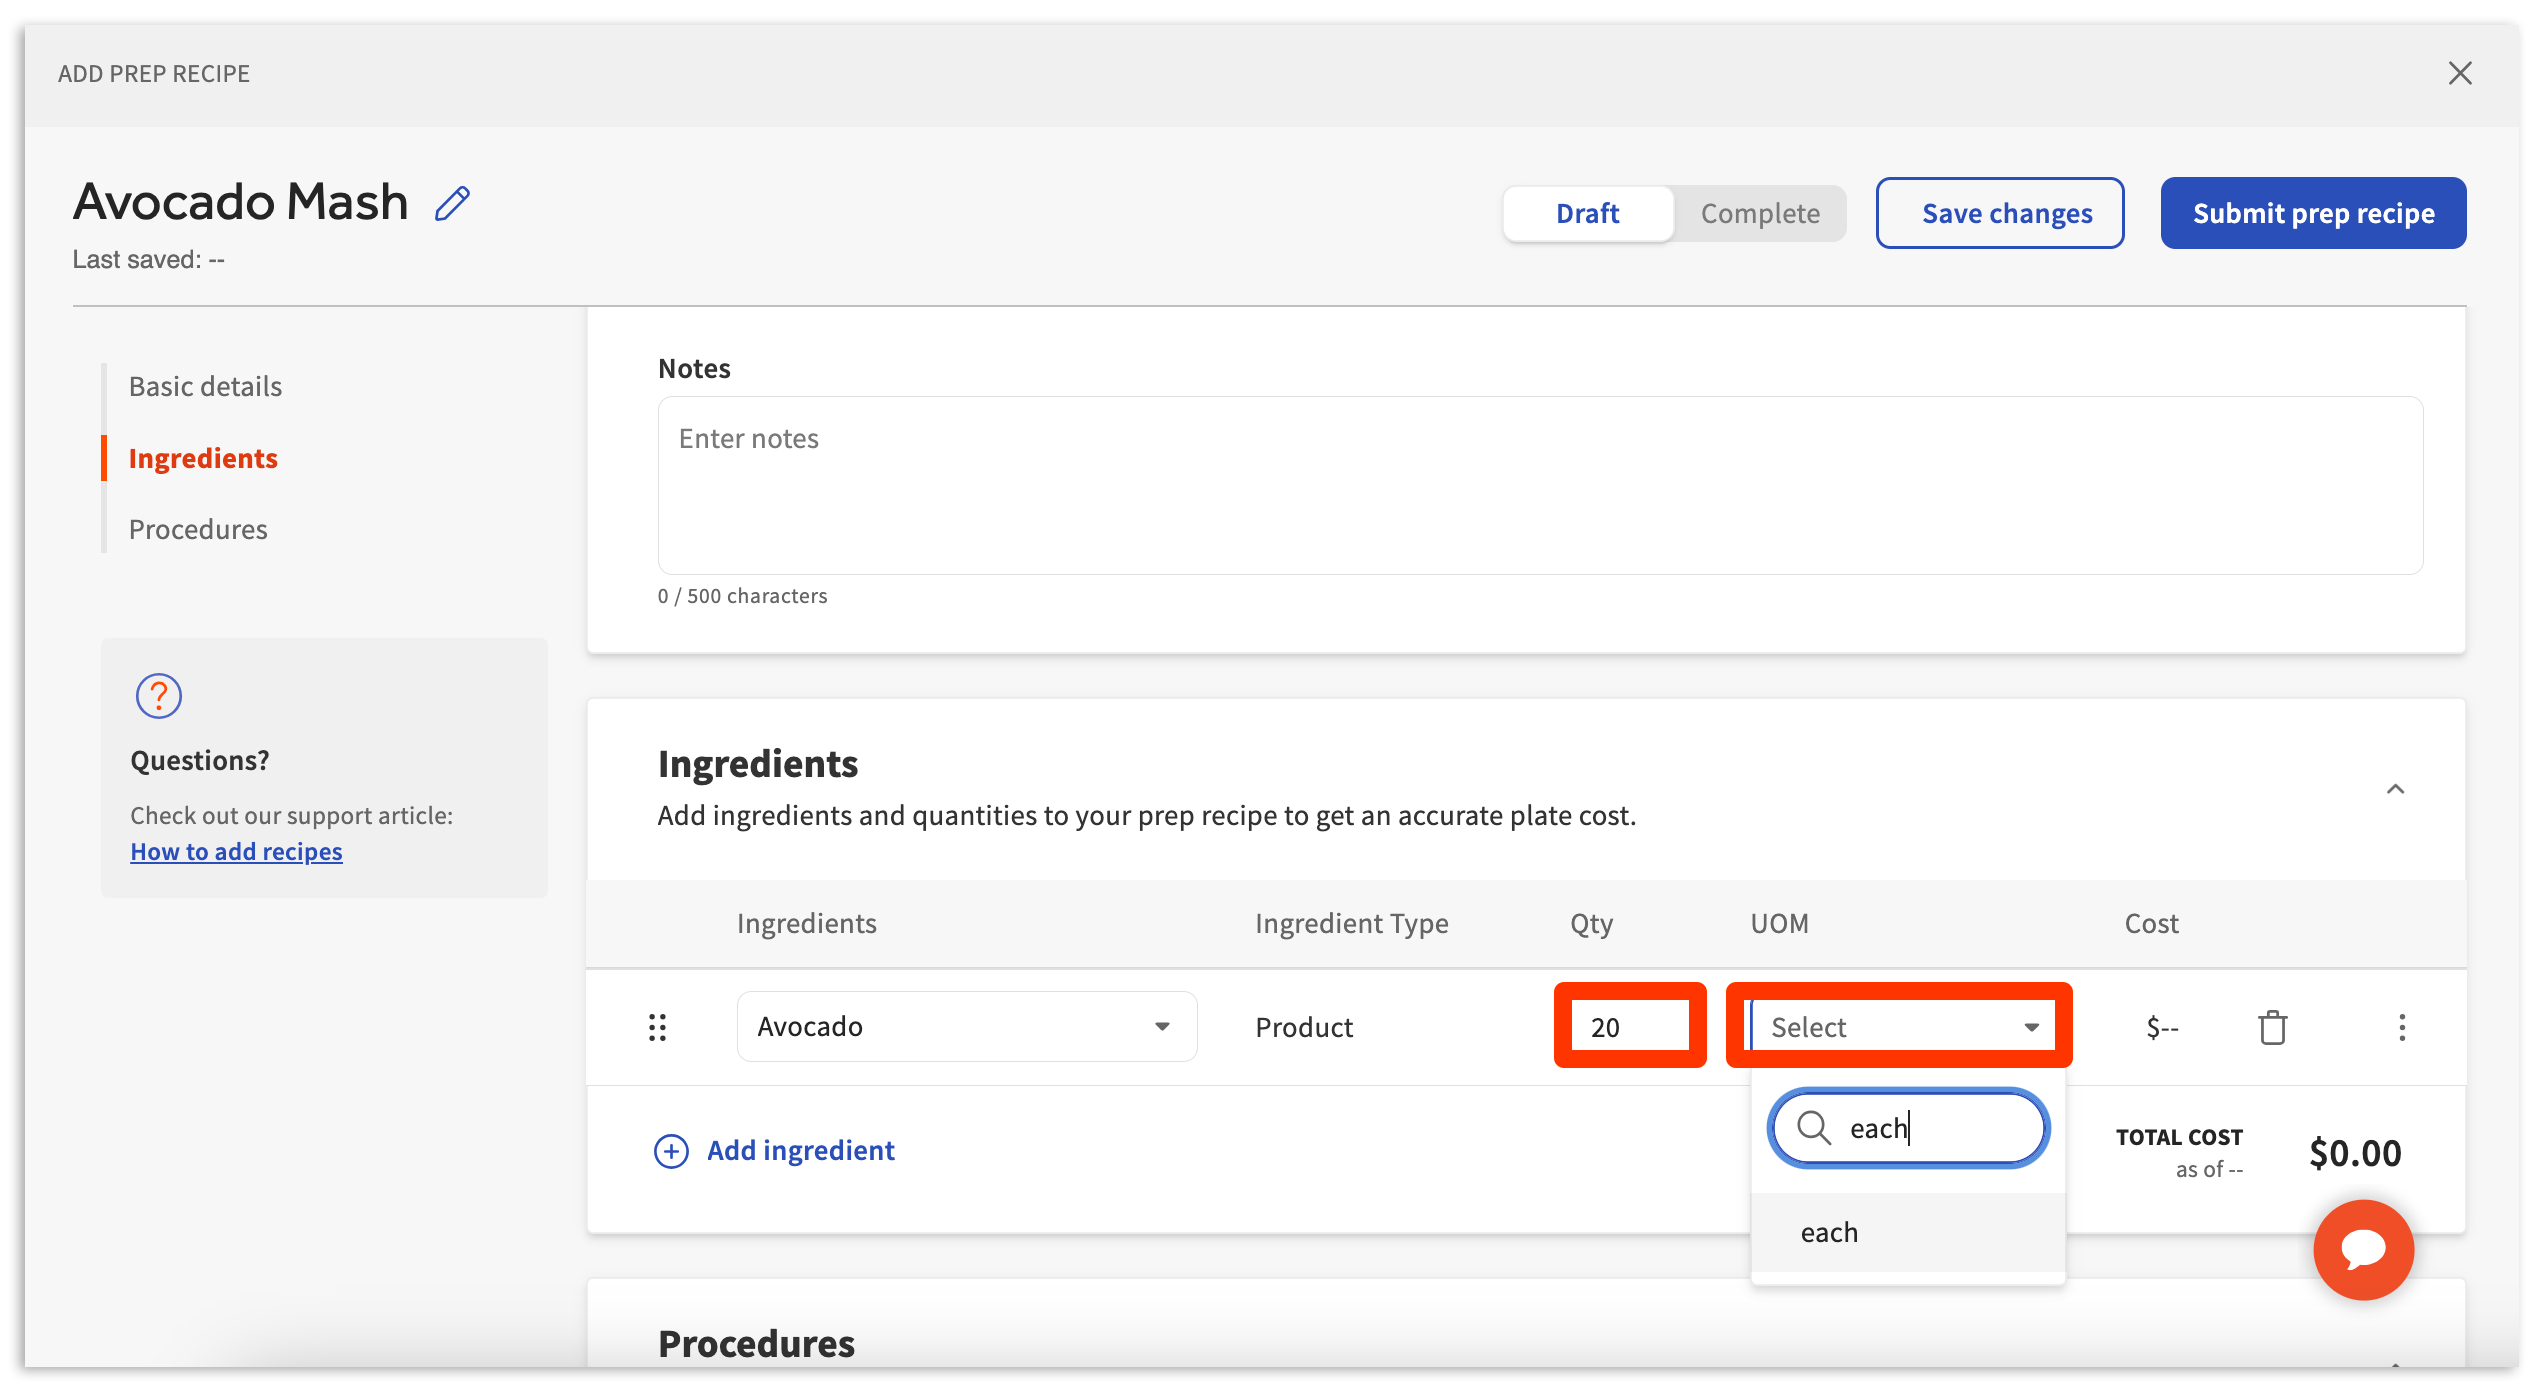
添加食材和量度后不久,价格将显示在“总成本”旁边。您可以通过选择“添加食材”并重复上述步骤来继续添加其他食材。
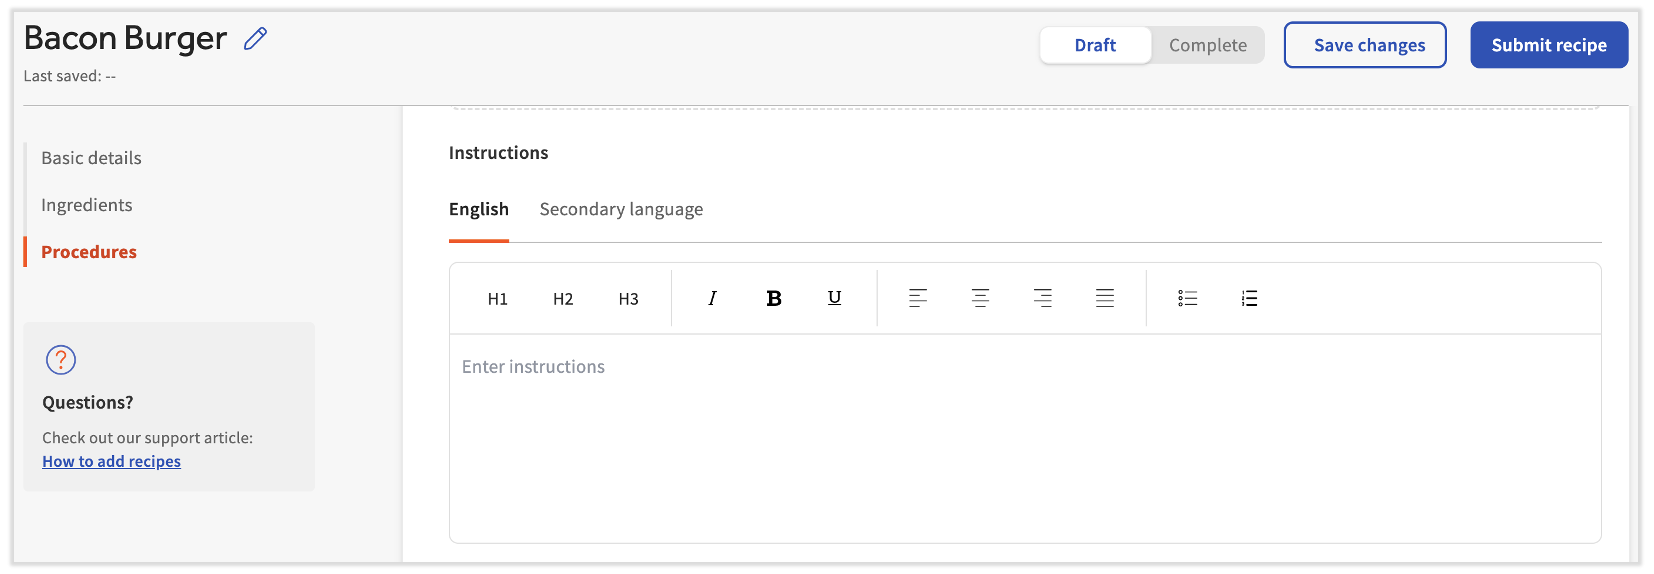
步骤 #3:程序
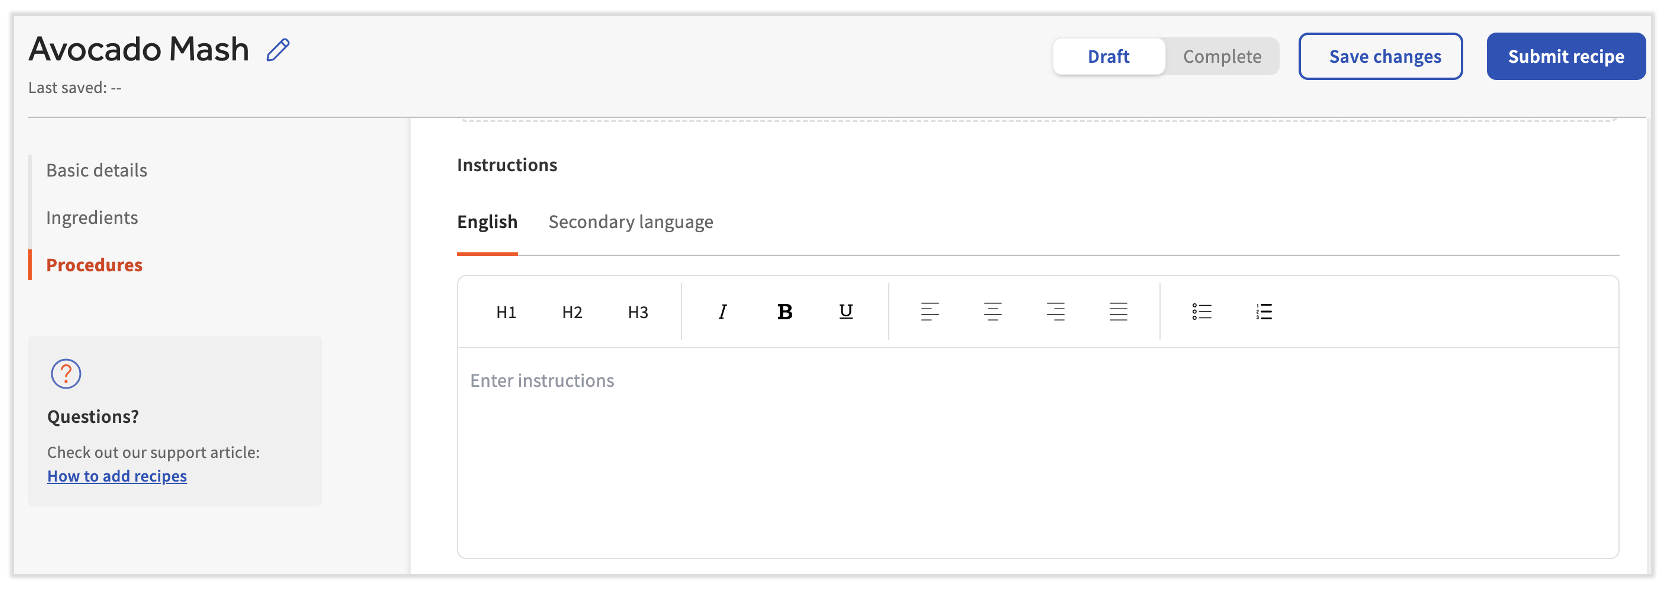
接下来,继续前往“程序”部分。在这里,您可以继续添加额外的备餐食谱详情。程序无助于信息或数据的成本计算。相反,它们存在的目的是帮助教育或告知员工以下细节:
| 详情名称 | 描述 |
| 准备食谱图片 | 用于可打印/下载食谱卡片的备餐食谱图片。 |
| 说明 | 关于如何准备备餐食谱的书面说明。这些内容可以用英语或辅助语言撰写。如果您打印或下载备餐食谱的食谱卡,这些功能将包含在内。 |
| 备餐时间 | 准备菜肴的大致时间。 |
| 烹饪时间 | 烹饪菜肴的大致时间 |
| 此预制食谱含有(过敏原) | 表示此备餐食谱可能包含哪些过敏原。 |
| 此预制食谱可能含有微量(过敏原) | 表示此备餐食谱中可能含有哪些过敏原。 |
| 工具 | 表示此备餐食谱所需的任何特定工具。 |
员工在 xtraCHEF 中查看备餐食谱或查看下载的食谱卡时,可以使用“说明”文本框中列出的步骤。
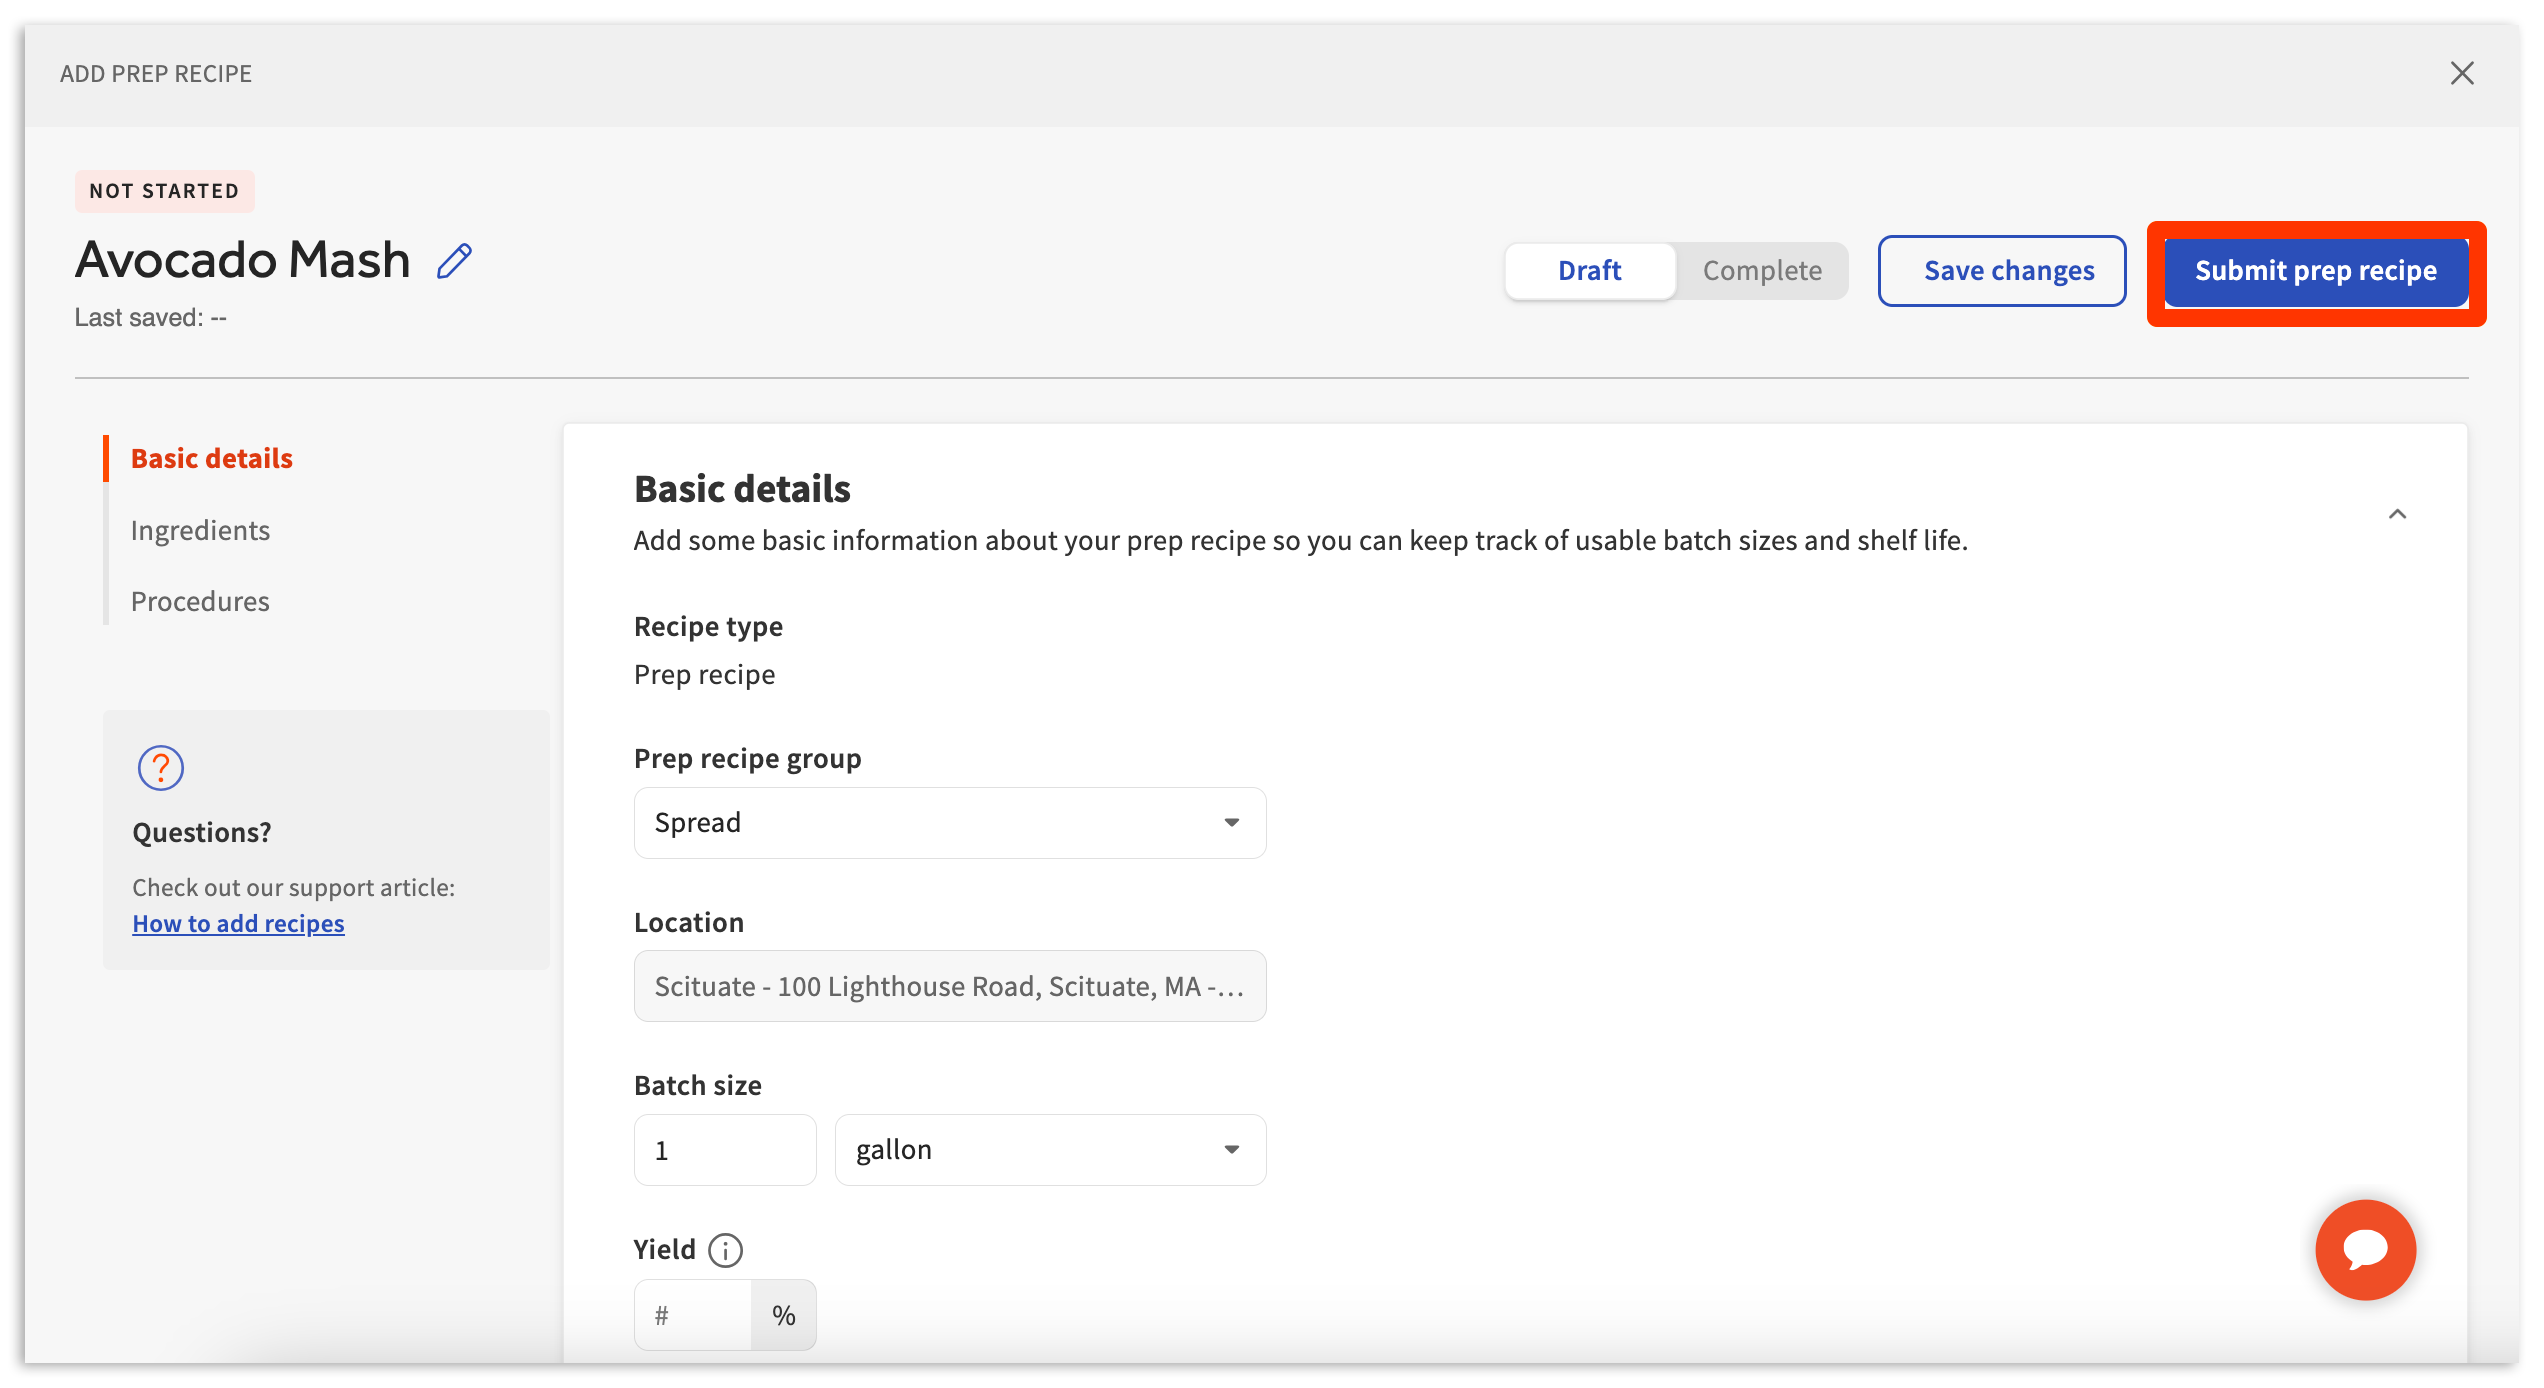
步骤 4:保存更改或提交食谱
完成备餐食谱后,选择生成器右上角的“提交备餐食谱”进行发布。 此操作将启用您的 xtraCHEF 账户,并允许您在其他备餐食谱、食谱以及修改项的产品组合映射中使用。如果您的备餐食谱尚未完成,并希望简单保存您的工作,您还可以选择“保存更改”并稍后返回。
食谱
选择“食谱 ”“ 下一步”以提 交食 谱生成器。
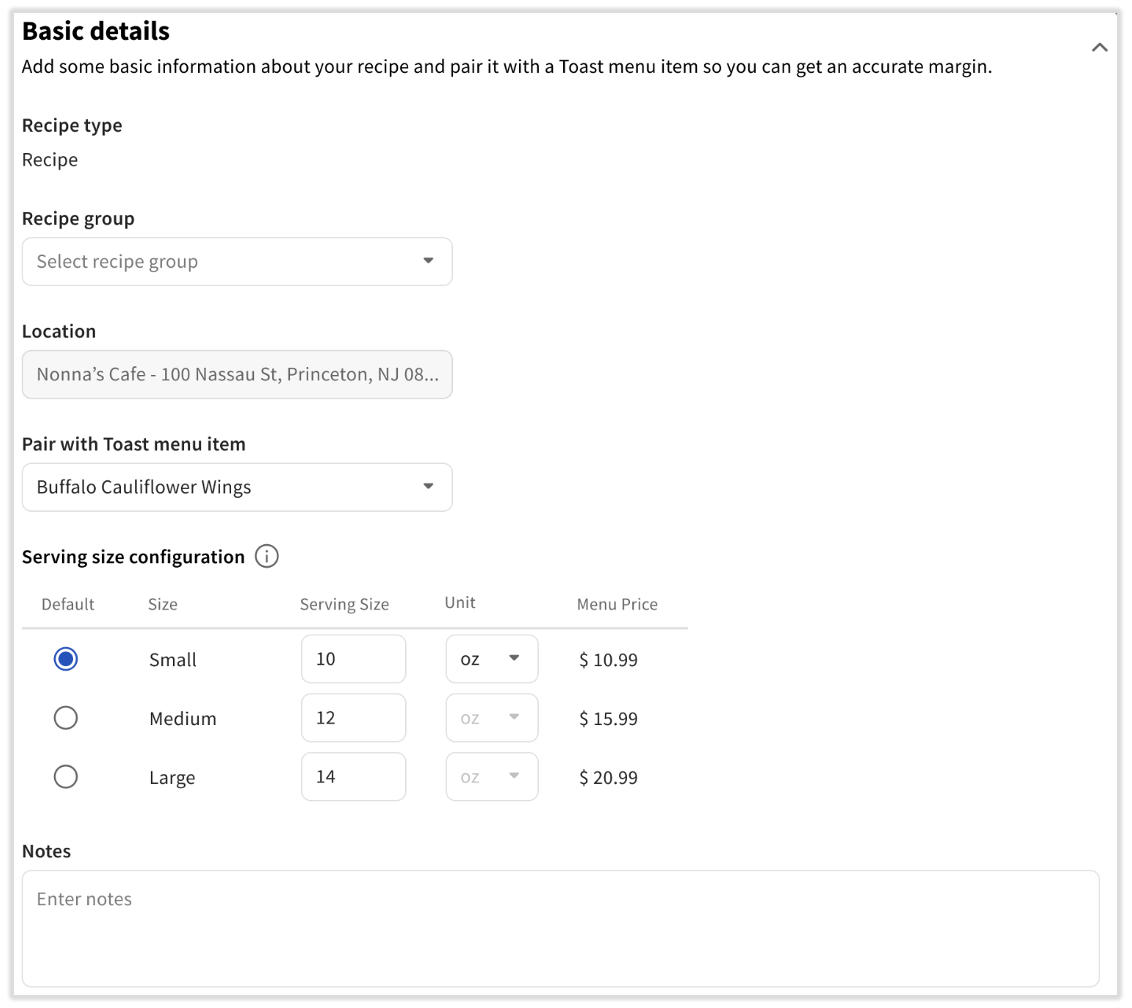
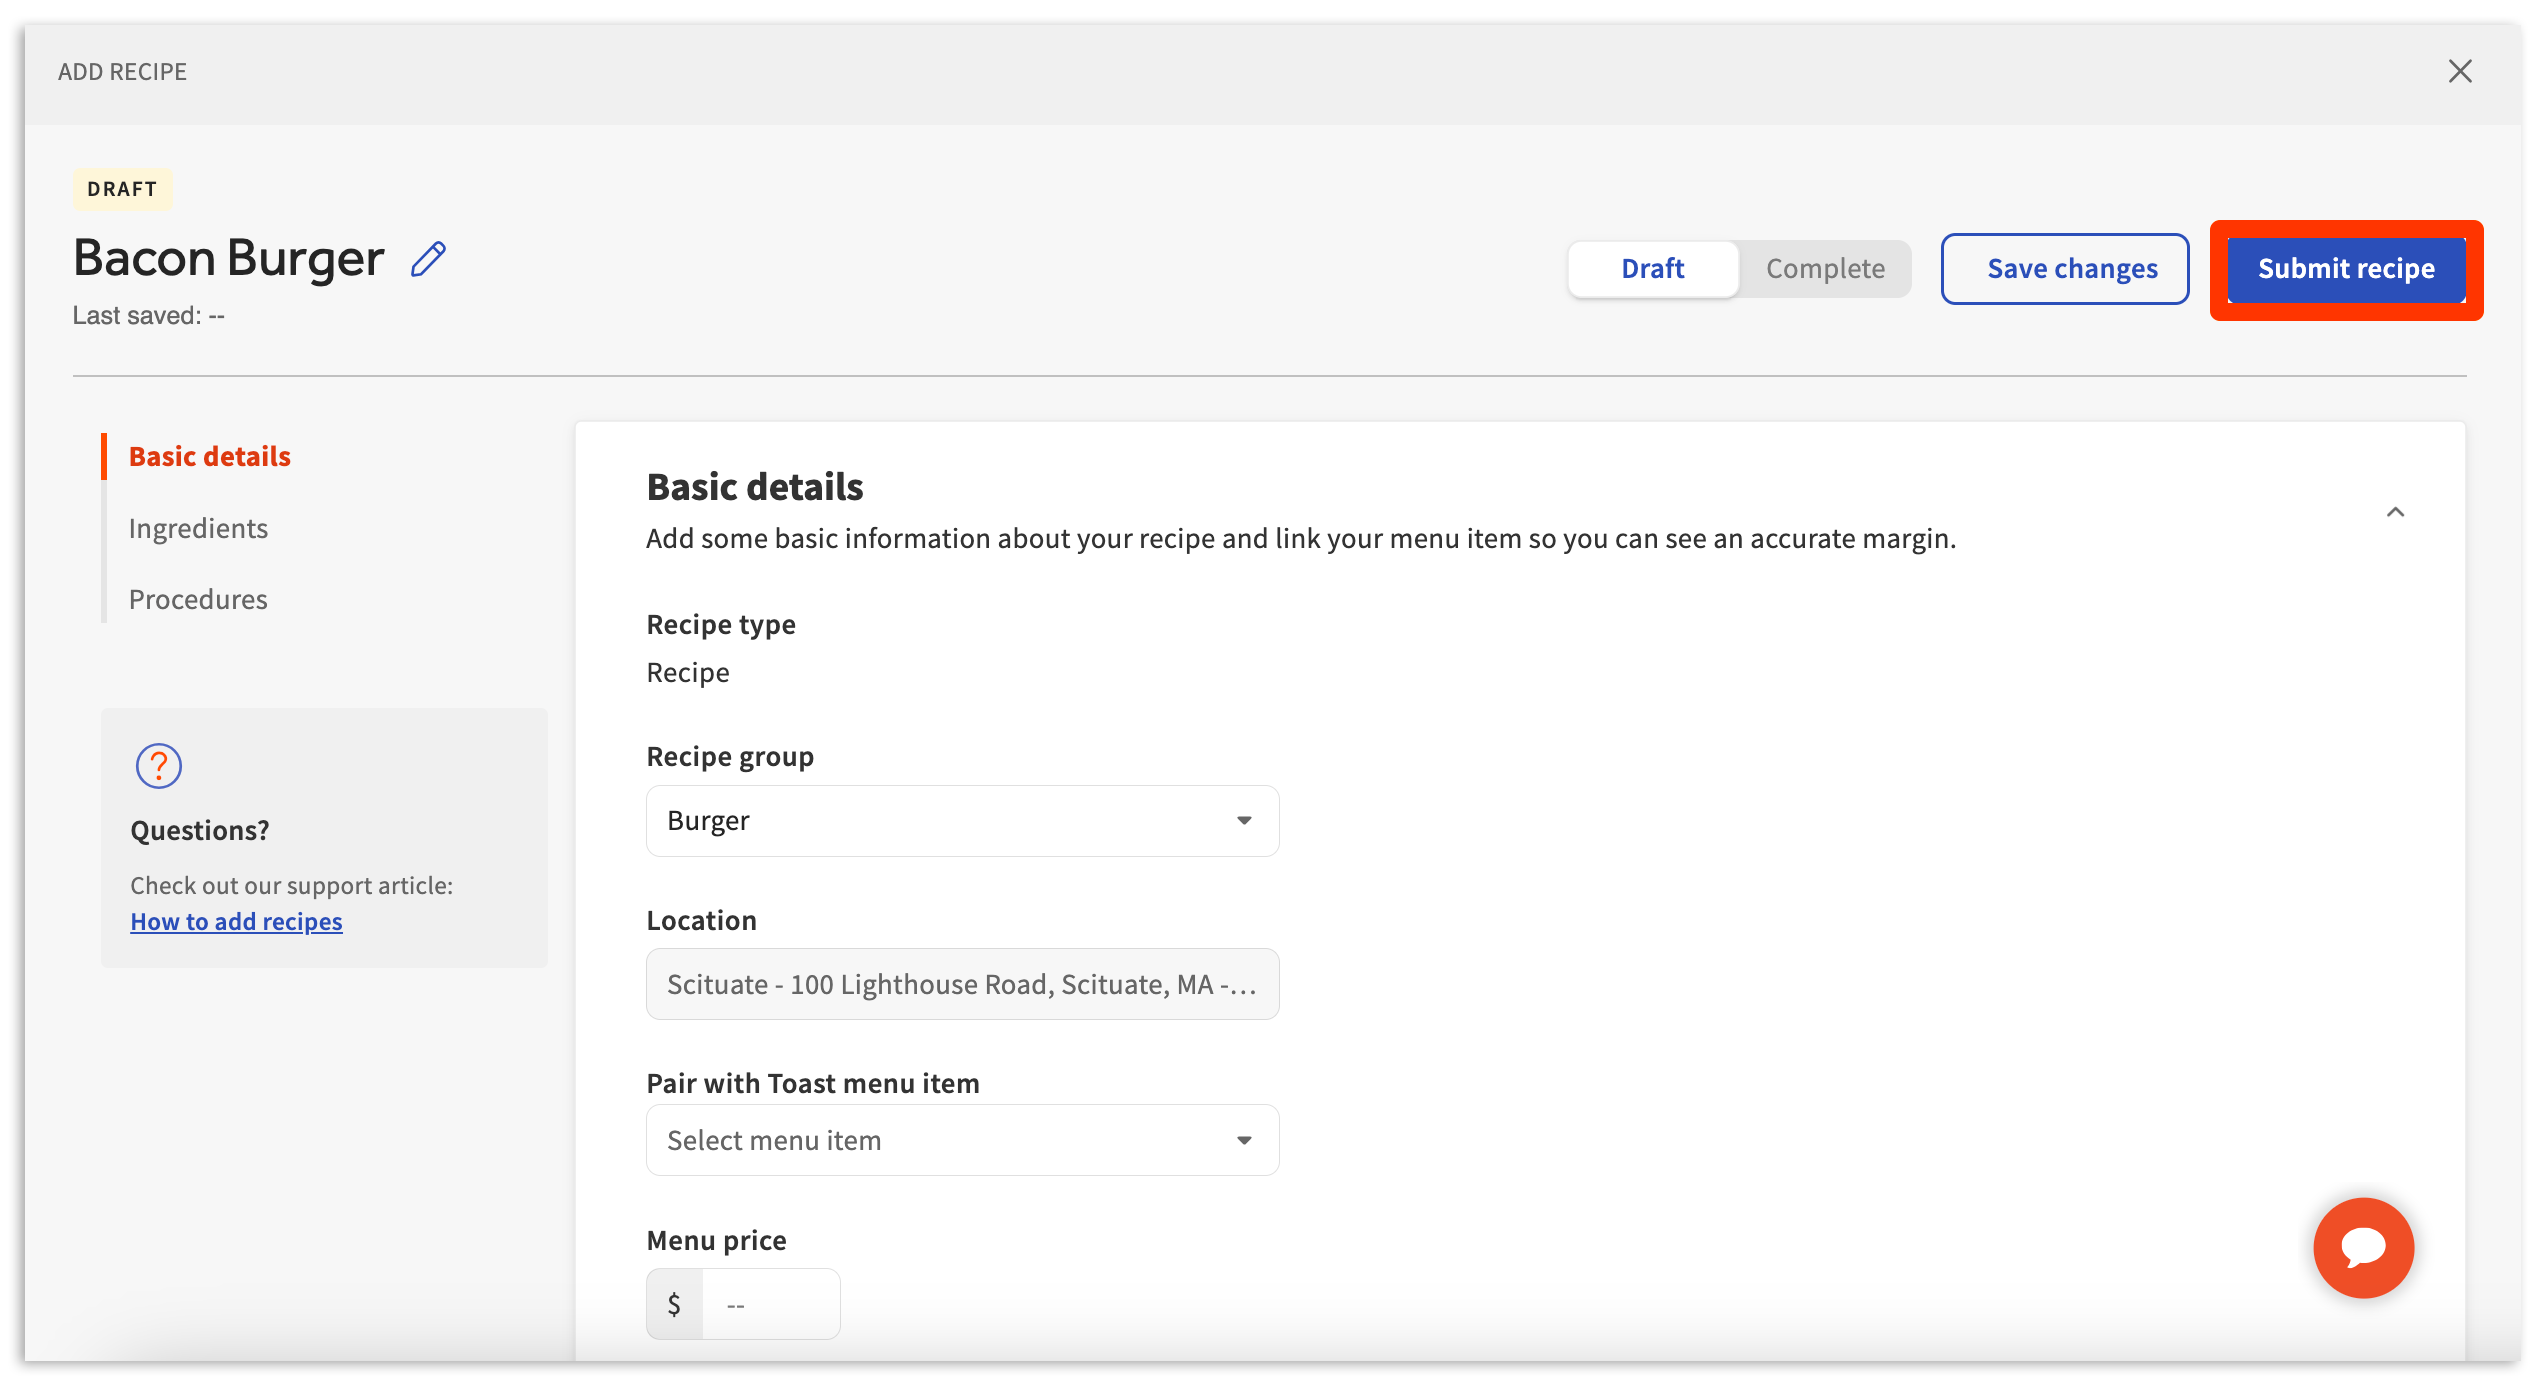
步骤 #1:基本详情
默认情况下,您将从“基本详情”开始。并非所有基本详情都是必需的。要开始,请选择空字段,然后键入或选择适用的选项。基本详情字段包括:
| 详情名称 | 描述 |
| 食谱名称 | 命名/重命名食谱。 |
| 食谱组 | 将食谱与类似的食谱类型(例如汉堡、披萨、主菜等)分组。 |
| 门店 | 定义创建食谱的门店。食谱稍后可以复制到其他门店。 |
| 与 Toast 菜单单品配对 | 将食谱与 Toast 菜单中的相应菜单单品相匹配。这也可以在以后通过产品组合映射来完成。 |
| 上菜量配置 | 通过数值和默认单位选项集表示出上菜量(这取代了使用产品组合映射来修改量的需求)。 |
| 菜单价格 | 表示基本报告的菜单价格。映射到 Toast 菜单单品后,此字段将自动填写。 |
| 备注 | 食谱描述(如有需要)。 |
并非所有基本详情均为必填项。但是,我们建议始终将“食谱”名称(左上角带有蓝色铅笔图标)、“食谱组”归为“食谱”,并填写“与 Toast 菜单单品配对”(如适用)。
在“与 Toast 菜单单品配对”下拉菜单中,您可以选择“从 POS 重新同步”。当您在 Toast Web 中更改菜单单品或其修改项时,此功能非常有用。此更改通常需要最多一天才能同步到 xtraCHEF,但如果您正在处理库存或需要提前提交准确报告,请选择此选项。请记住两件会妨碍准确同步的事情:不在 Toast Web 中发布菜单更改,或者存储单品的菜单未激活。此功能仅适用于食谱,不适用于备餐食谱。
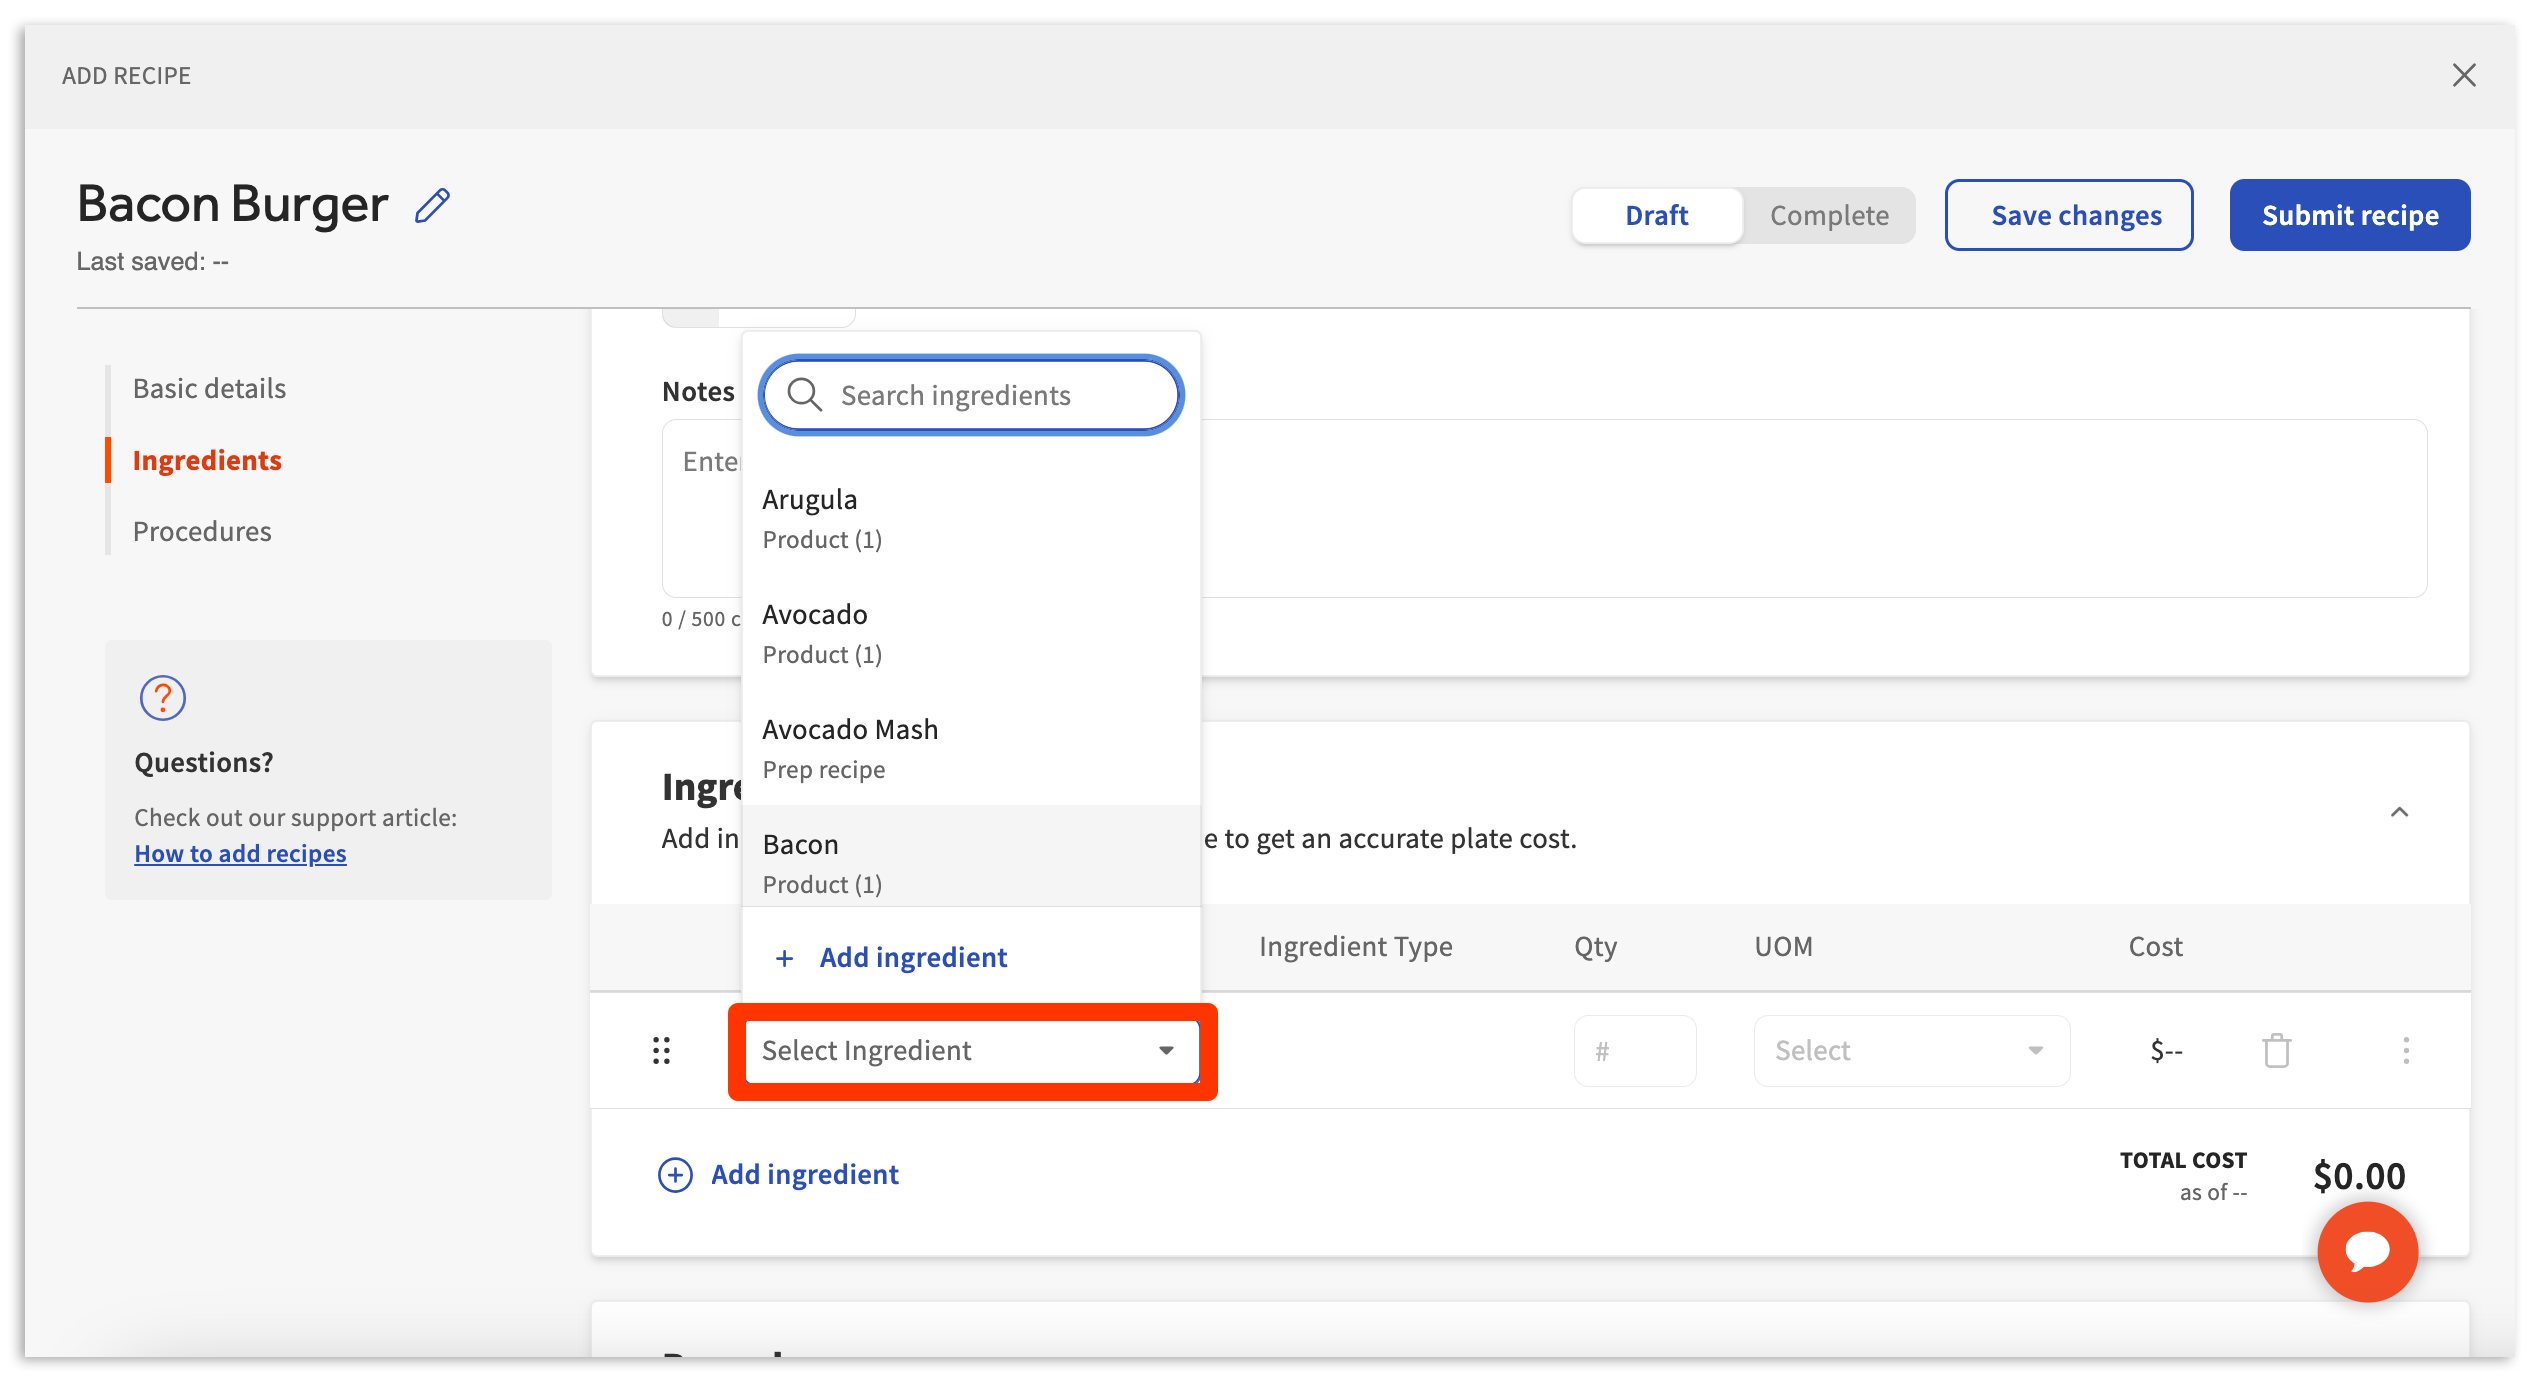
步骤 #2:食材
输入基本详情后,向下滚动至“食材”部分。在这里,您可以开始为食谱添加食材和量度。选择“选择食材”,然后从下拉菜单中选择食材。
接下来,指明添加到备餐食谱中的食材的数量(数量)和UOM(计量单位)。

添加食材和量度后不久,价格将显示在“总成本”旁边。您可以通过选择“添加食材”并重复上述步骤来继续添加其他食材。
步骤 #3:程序
接下来,继续前往“程序”部分。在这里,您可以继续添加其他食谱详情。程序无助于信息或数据的成本计算。相反,它们存在的目的是帮助教育或告知员工以下细节:
| 详情名称 | 描述 |
| 食谱图片 | 用于可打印/下载食谱卡片的食谱图片。 |
| 说明 | 关于如何准备食谱的书面说明。这些内容可以用英语或辅助语言撰写。如果您打印或下载食谱卡片,这些内容将包含在内。 |
| 备餐时间 | 准备菜肴的大致时间。 |
| 烹饪时间 | 烹饪菜肴的大致时间 |
| 此食谱包含(过敏原) | 表示此食谱可能包含哪些过敏原。 |
| 此食谱可能含有微量(过敏原) | 表示此食谱可能含有 的过敏原。 |
| 工具 | 表示此食谱制作所需的任何特定工具。 |
员工在 xtraCHEF 中查看食谱或查看下载的食谱卡时,可以使用相关流程。
步骤 4:保存更改或提交食谱
完成食谱后,选择生成器右上角的“提交食谱”进行发布。这将在您的 xtraCHEF 账户中将其设置为活跃状态,用于产品组合映射和报告。 如果您的食谱尚未完成,并希望保存您的工作,您还可以选择“保存更改”。
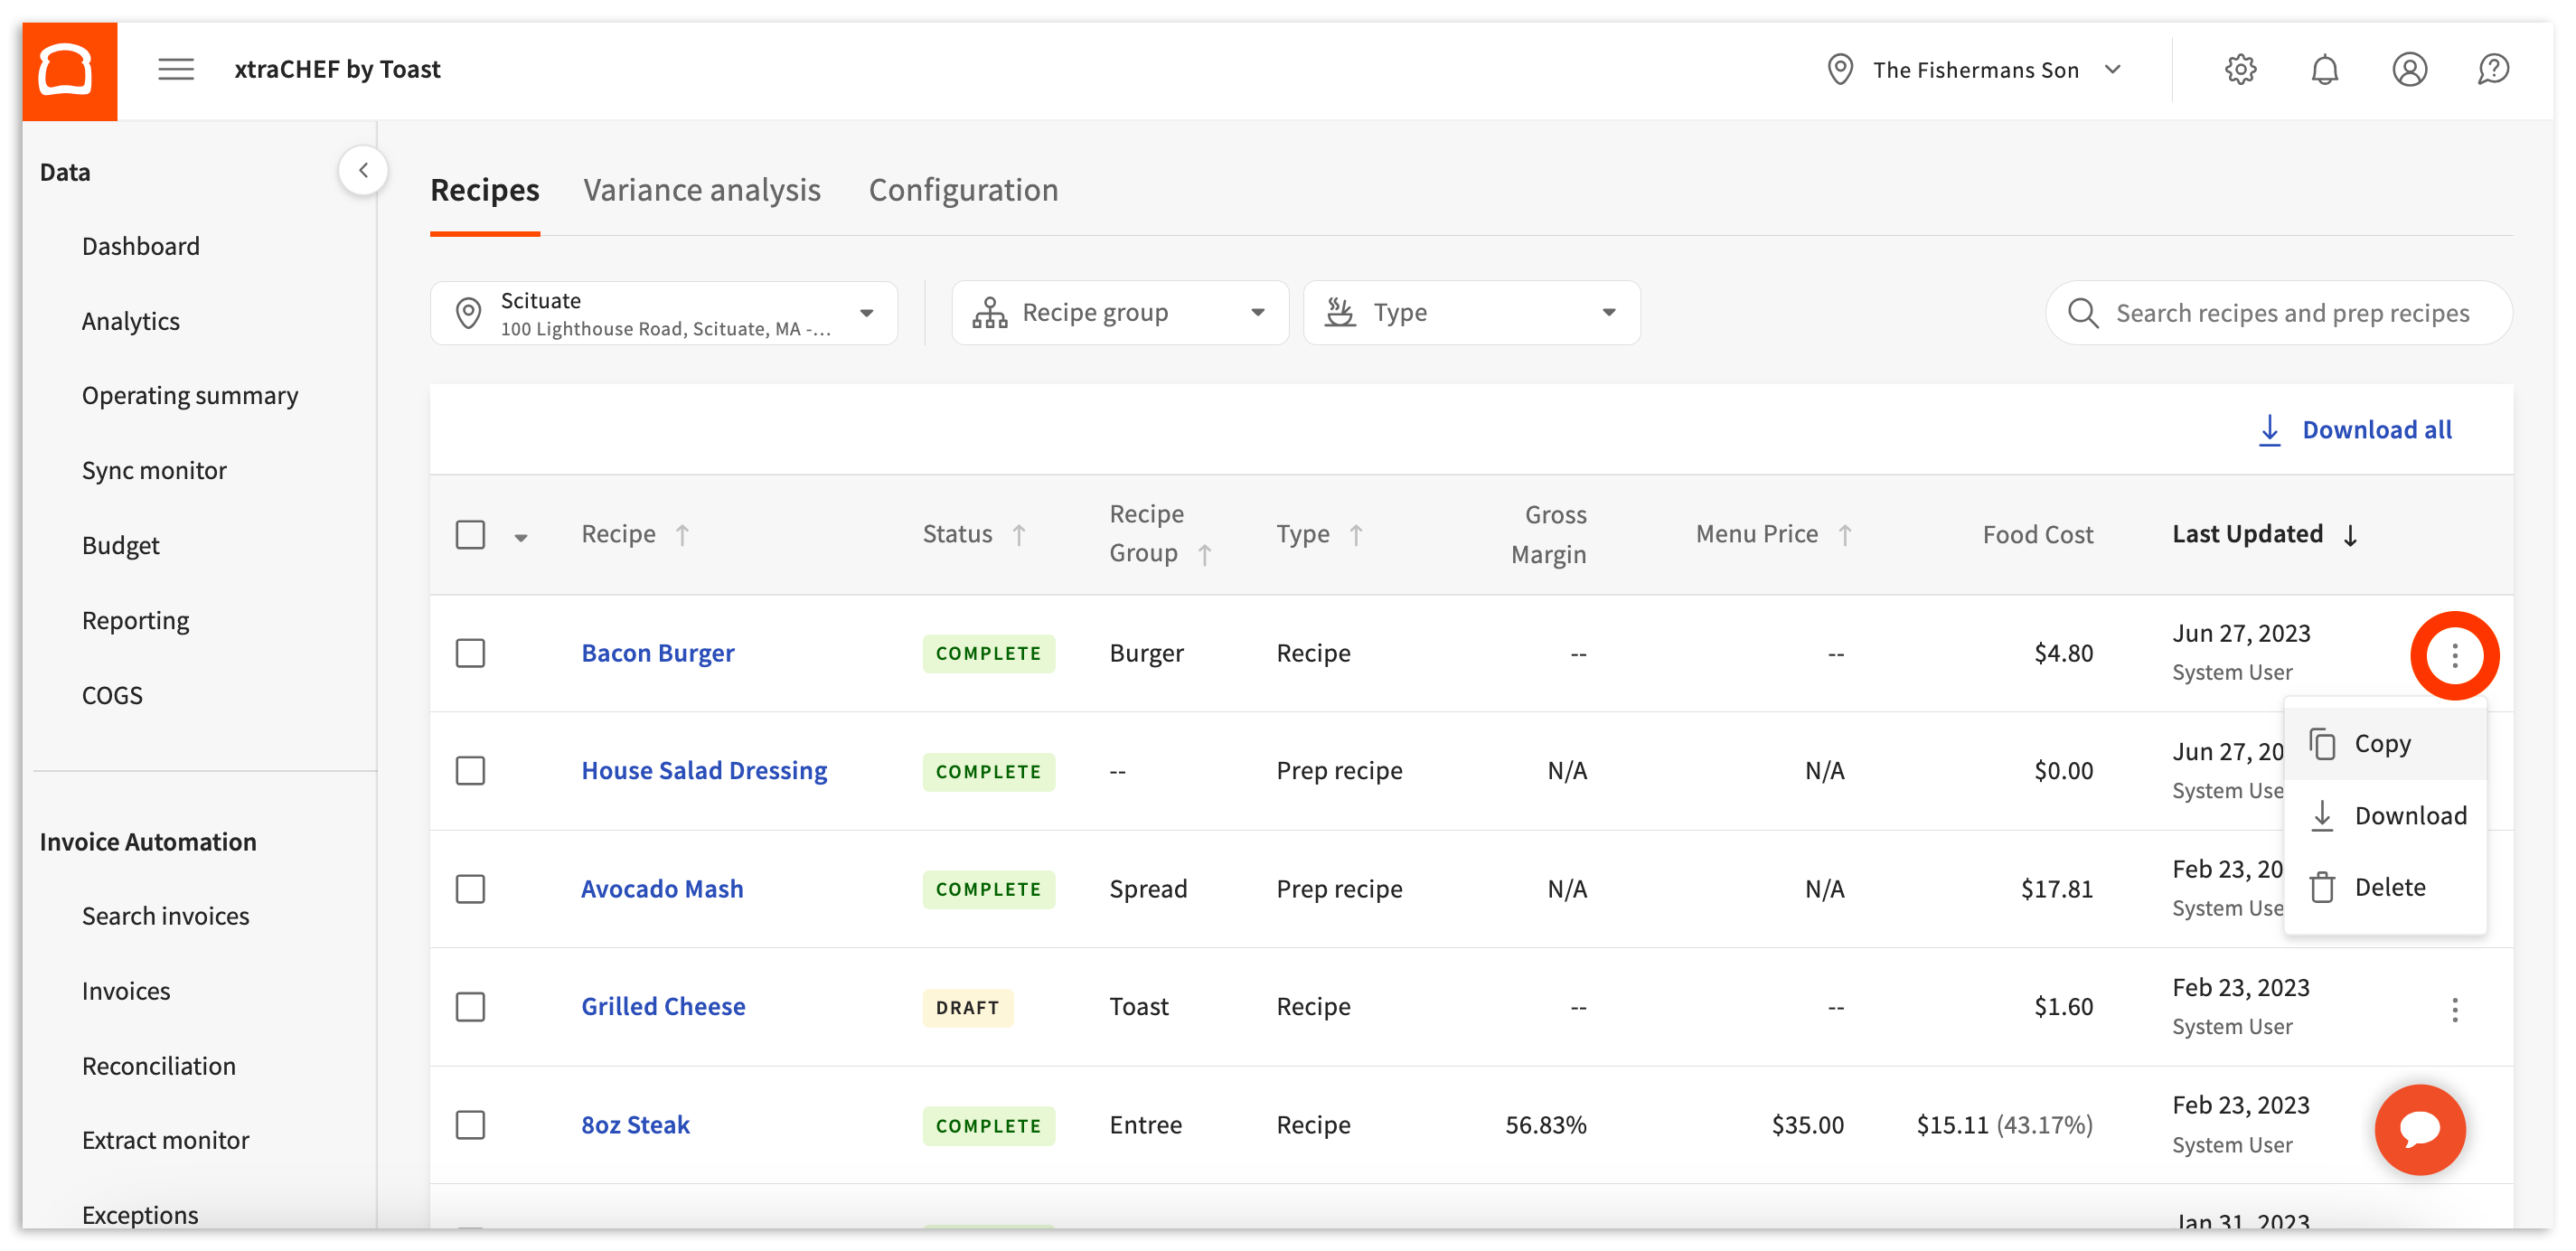
复制食谱和食谱
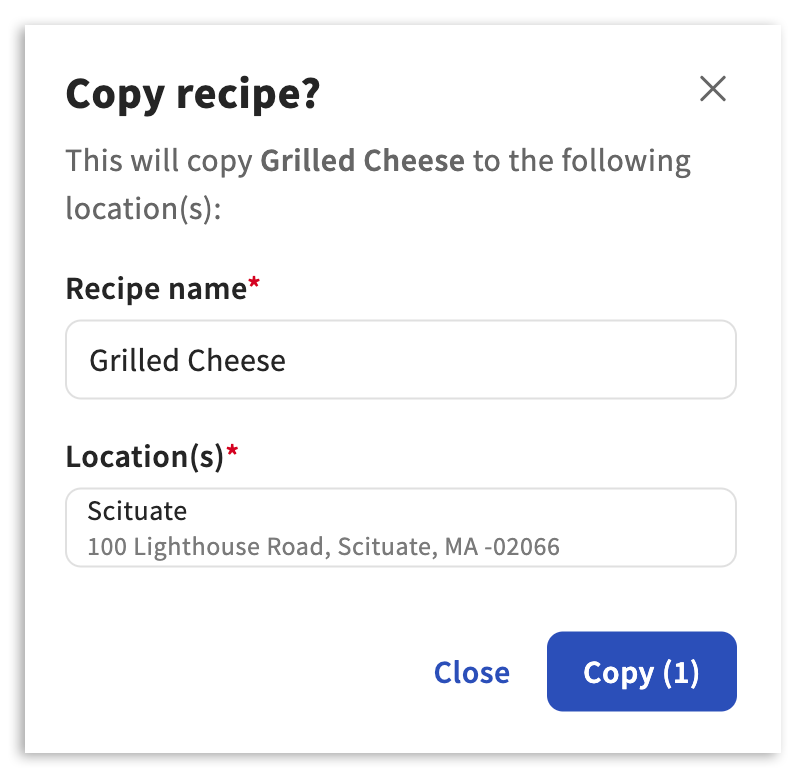
创建完成后,您可以在原始所选门店下找到您的备餐食谱和食谱。但是,如果您在另一门店提供同一道菜,这些菜品可以快速复制到您的 xtraCHEF 租户(账户)中的所有门店。找到您希望复制的备餐食谱或食谱,然后选择溢出菜单(三点)“复制”和“复制”。
在此,您可以自定义复制的备餐食谱或食谱名称,并选择您希望将其添加到的门店。选择其他门店后,选择“复制”。
下载食谱
在 xtraCHEF 中创建所有备餐食谱和食谱后,您可以选择下载所选门店的所有备餐食谱和食谱的 CSV(电子表格)或 PDF。您甚至可以下载包含所有门店所有备餐食谱和食谱的 CSV 文件。
要下载单个食谱 ,请导航至“食谱”,从下拉菜单中选择一个门店,点击食谱右侧的三个点,然后选择“下载”。
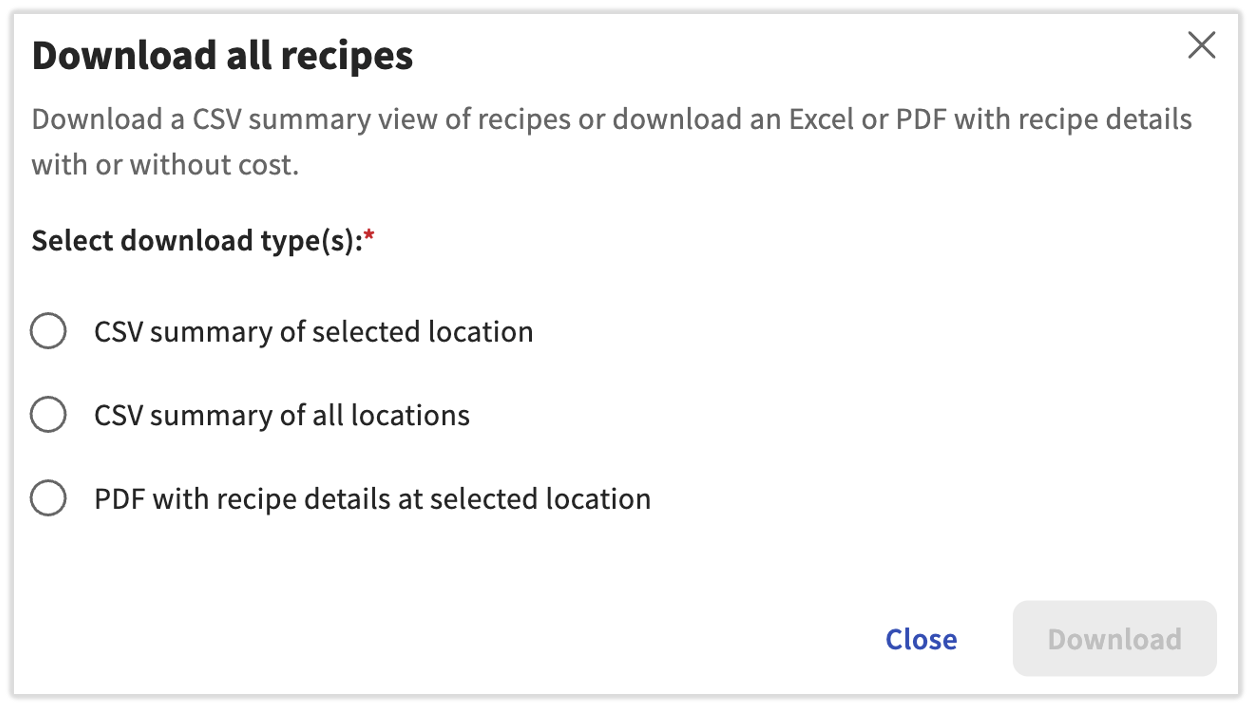
要下载所有食谱,请导航至“食谱”,从下拉菜单中选择一个门店,然后选择“下载所有”。
- 在此弹出窗口中,您可以选择您想要的文件类型,如果您需要 CSV,则可以选择包括一家或所有门店。
- 如果选择下载 PDF,您可以选择“显示成本”,以包含菜单价格、人工成本、食品成本、食材成本等字段。
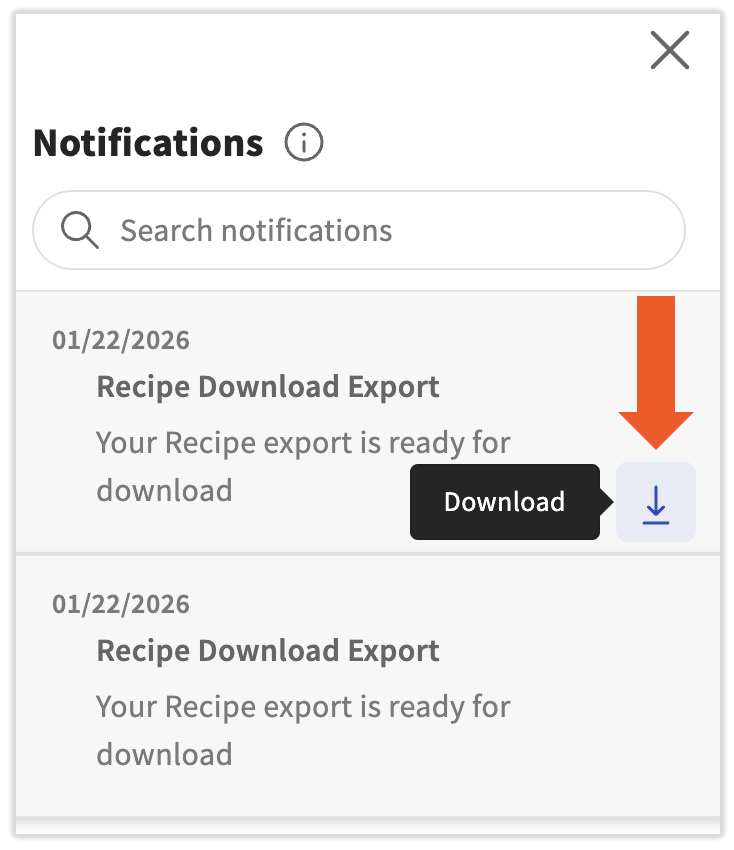
如果您选择了 PDF,您将收到一封小通知,表示此请求正在处理中。完成后即可下载,您将在任何 xtraCHEF 页面的右上角收到通知。在铃声图标旁看到一个红点后,选择“铃声图标”。现在,选择“食谱下载导出”的下载箭头。
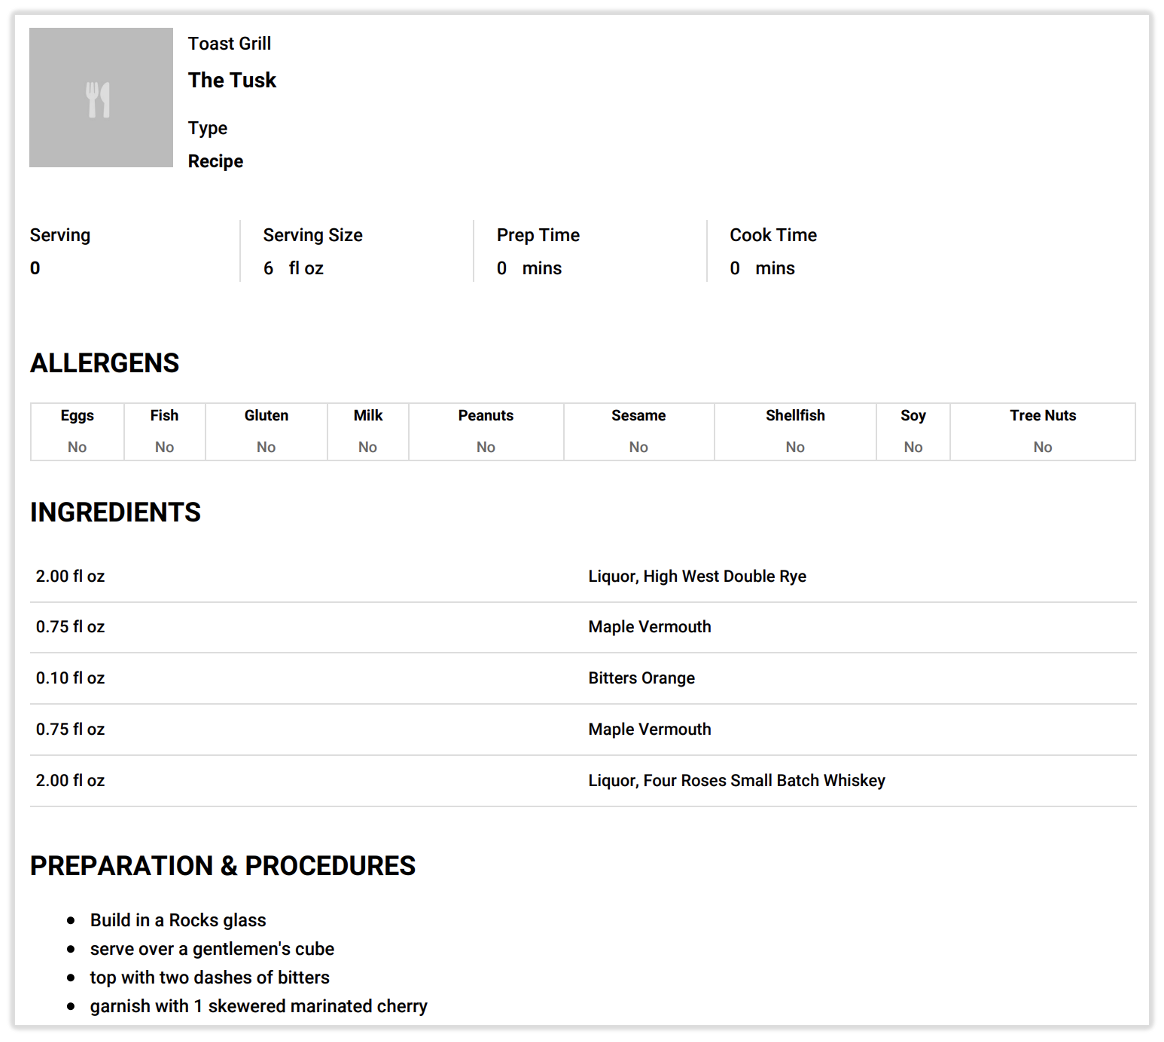
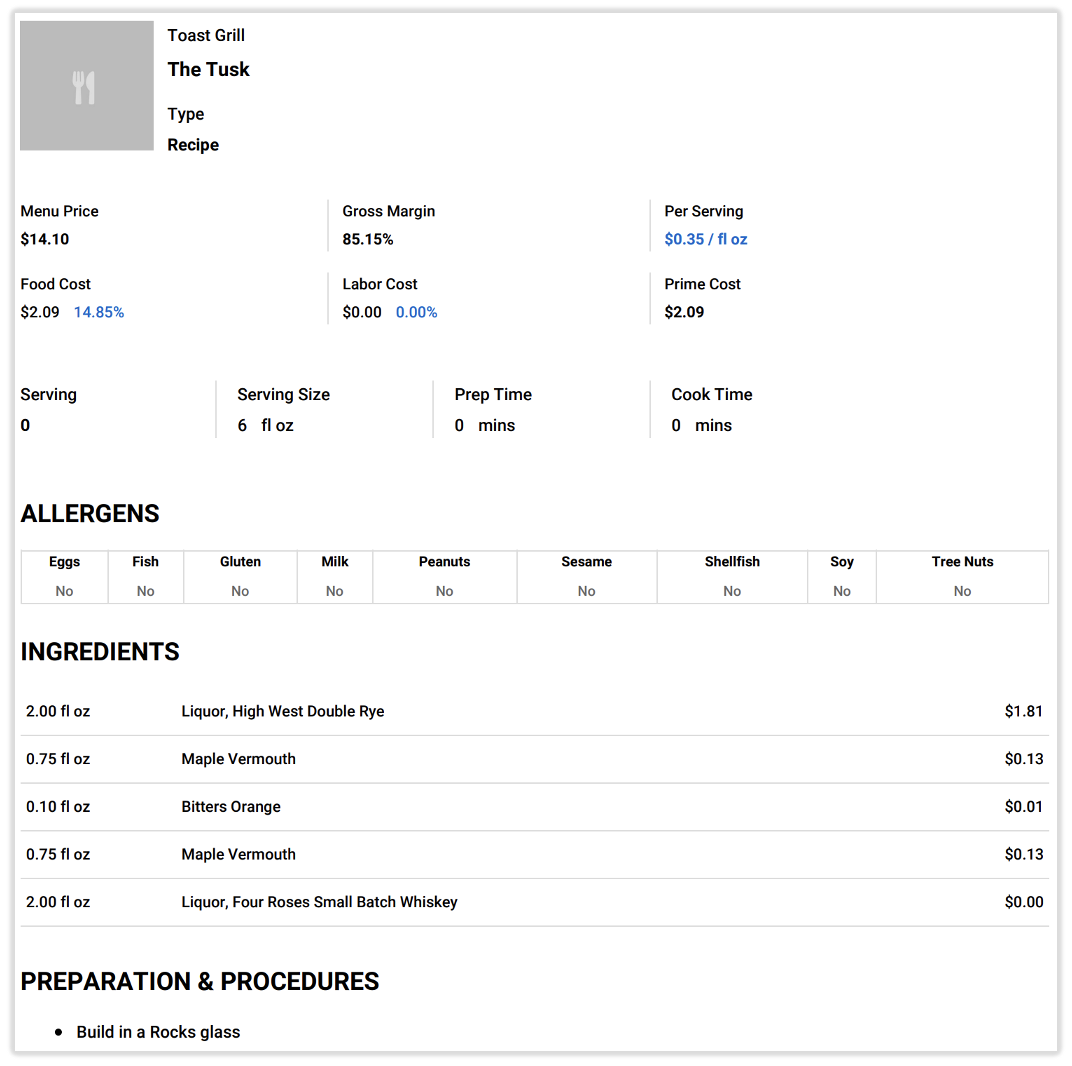
这是一个 PDF 食谱导出示例,其中没有“显示成本”复选框:
这是一个 PDF 食谱导出示例,其中已选中“显示成本”复选框:
产品详情和单位换算
您是否希望将单品从体积转换为重量?重量转换为体积?每个重量还是体积?有时,产品的采购单位会让您的食材在后期很难计算成本。单位换算有助于简化这项工作。
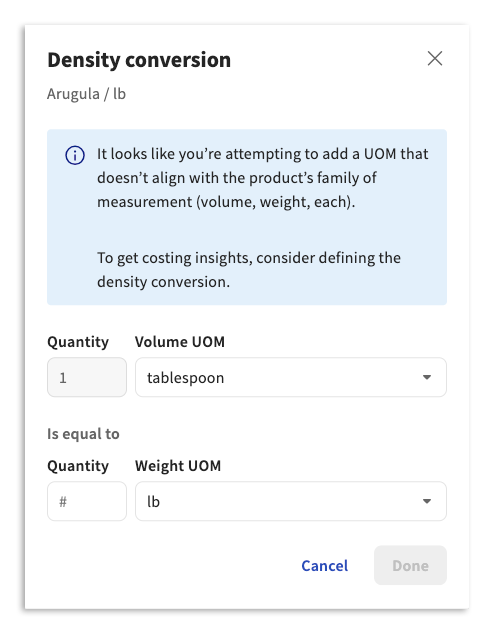
密度计算器
如果您尝试按替代计量单位 (UOM) 使用产品,密度计算器将自动填充。要创建转换,请指明一个加权/体积度量单位是体积/重量。然后选择“保存”。
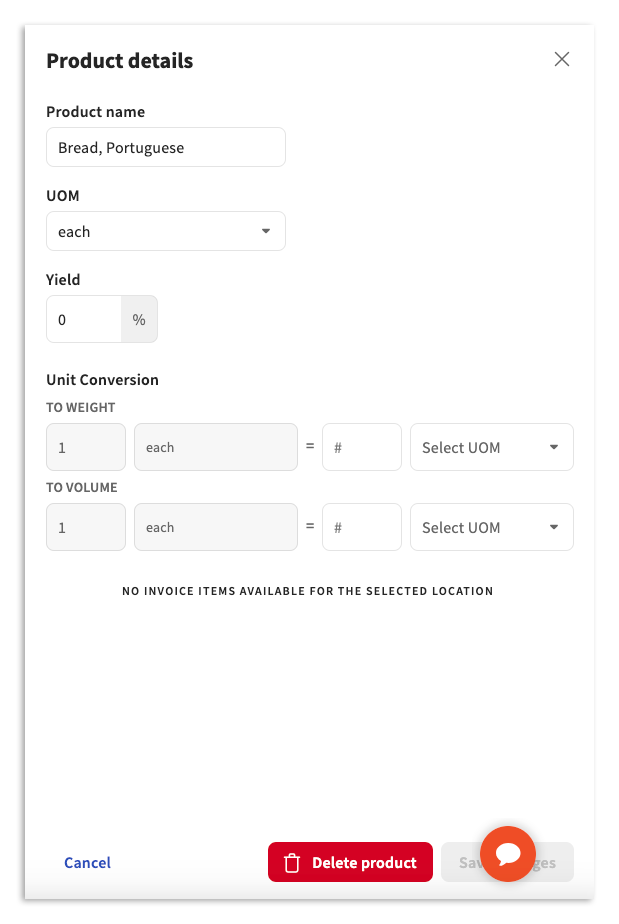
自定义转换
自定义换算用于创建产品的基本单位(每个单位)与其重量或体积之间的关系。为此,请选择位于食谱或备餐食谱中某一食材旁边的溢出菜单(三点)“”,然后选择“产品详情”。在那里,您可以注明或编辑转换(例如,每人 1 = 8 液体盎司)。完成后,选择“保存更改”。
注意:产量也可以在此处编辑。有关产量的更多信息,请访问我们题为《xtraCHEF:食谱产量和密度计算器。
成本配置
默认情况下,xtraCHEF 会根据食材的最新购买价格计算您的食谱和配方成本。
后续步骤

其他食谱配置
您还可以通过其他几种方式自定义食谱。访问 xtraCHEF:食谱配置,了解 xtraCHEF 中的单位换算、用餐选项和配送费选项。如果您需要更多食谱方面的帮助和资源,请观看本文顶部的视频,或注册 Toast 专家的办公时间。
产品组合映射
在产品组合映射中,您可以开始将 xtraCHEF 中的食谱与从 Toast Web 同步的菜单单品联系起来。产品组合映射也可以应用于您的修改项,包括嵌套修改项,以便 xtraCHEF 在顾客为您的菜单菜品或饮品添加或减去额外食材时计算最准确的成本。此步骤对于解锁高级 xtraCHEF 食谱和库存相关分析和报告至关重要。
食谱报告
配置好备餐食谱和食谱,并完成产品组合映射后,您就可以开始查看食谱相关报告了,例如差异分析和产品组合报告。有关这些报告的更多信息,请访问 xtraCHEF:食谱报告。
库存分析
想知道浪费、缩水、盗窃等变数如何影响利润率吗?开始在 xtraCHEF 中盘点实物库存。执行此操作后,您可以查看库存分析,跟踪理论和实际库存消耗,监控库存消耗,识别浪费,并控制餐厅成本,从而实现最大盈利能力。
了解如何开始使用 xtraCHEF 中的库存:库存区域设置和盘点列表入门指南